When you have multiple UniFi Protect cameras you might want to view them all on one big TV or monitor. You could open the live view of UniFi Protect in your browser, but that requires a computer to keep running 24/7 and to maintain. With UniFi Viewport you don’t have that problem.
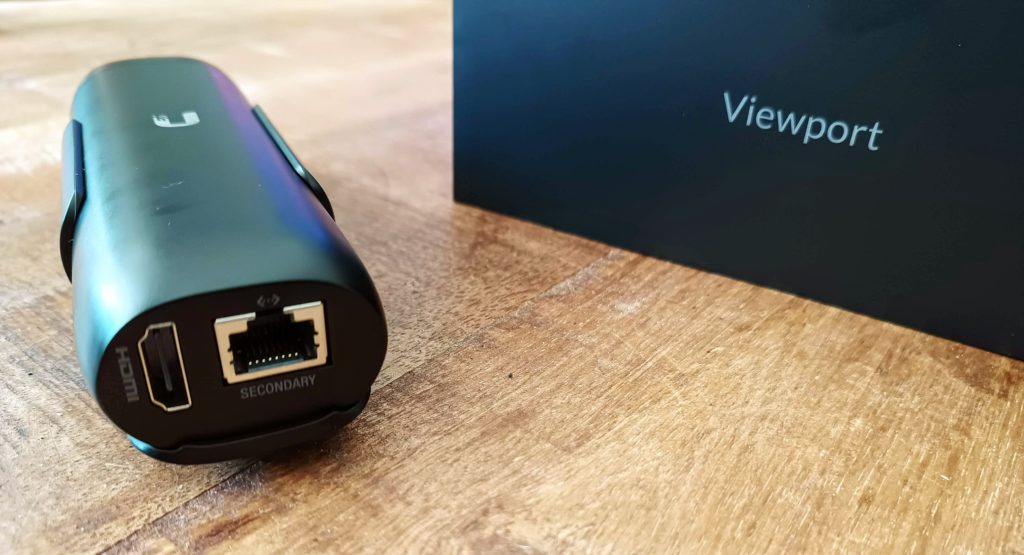
The Viewport is a small device that you can mount behind or near your TV screen. It only requires a PoE connection and comes with an HDMI cable to connect to your TV.
In this review, we are going to take a look at the UniFi viewport and how to configure it.
UniFi Viewport Review
The UniFi ViewPort is a small and easy-to-mount display adapter that allows you to stream up to 16 cameras simultaneously. It’s only 5 cm (2″) thick, allowing you to easily mount it behind a TV or monitor with the supplied mounting bracket.
The ViewPort comes with one versatile mounting bracket and a high-quality HDMI cable. The bracket is really great design. You can not only mount it on the wall but also on the back of a monitor/TV using one of the VESA mounting points. And if that is not possible, you can also glue it on the back of the monitor with the included double-sided tape strip.
The ViewPort is a really simple and straightforward device. The only thing that you can and need to configure is the grid layout of the camera streams, using one of the live views in the UniFi Protect console.
Specifications
| CPU | ARM® octa-cores Kryo™ |
| Memory | 4GB low-power DDR4X |
| Dimensions | 157 x 52 x 37 mm (6.18 x 2.05 x 1.46″) |
| Max. power consumption | 9.5W |
| Power method | 802.3af PoE |
| Simultaneously camera streams | 16 |
| HDMI output | 4K @ 30 fps |
UniFi ViewPort Setup
Just like all the UniFi devices is installing the ViewPort really simple. It requires PoE, so you will need to connect it either to a PoE-capable switch or use a PoE adapter for it. The adapter isn’t included, so make sure you buy it separately when needed.
The first step is to mount the ViewPort, and there are a couple of options for that. The multi-purpose mounting bracket can either be mounted to a wall, on the back of a monitor/tv using one of the VESA mounting points or you can clue the bracket on the back of the monitor using the supplied double-sided tape.
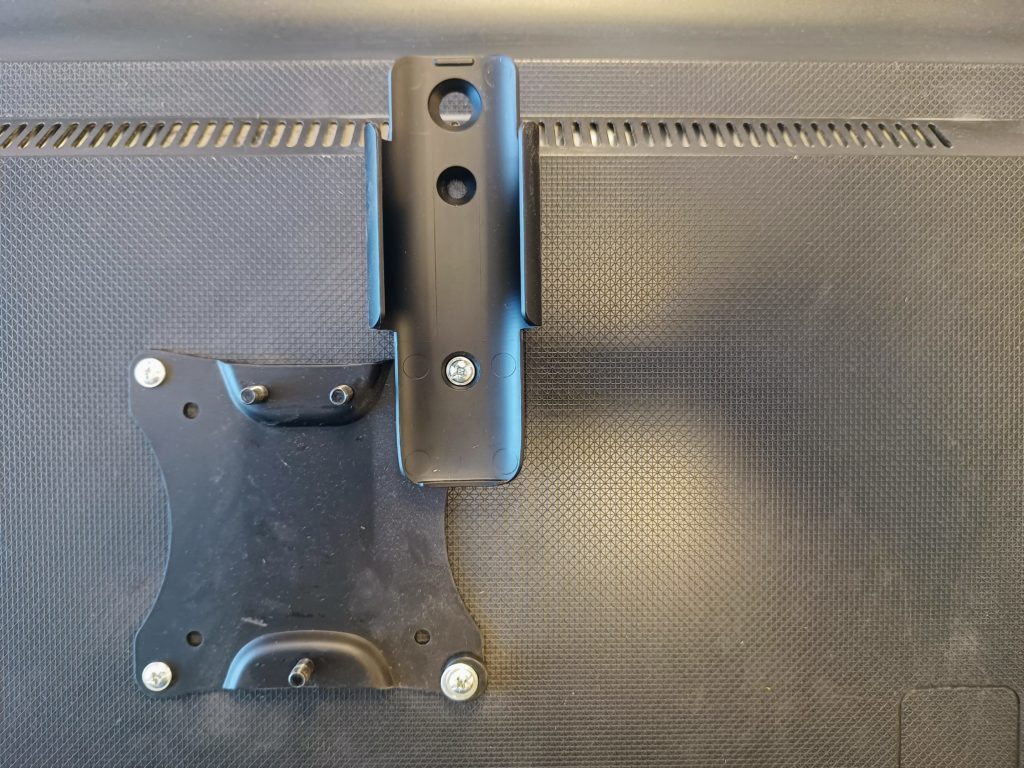
Depending on the design of your monitor arm, it’s possible to use the VESA mounting points for both the monitor arm and bracket.
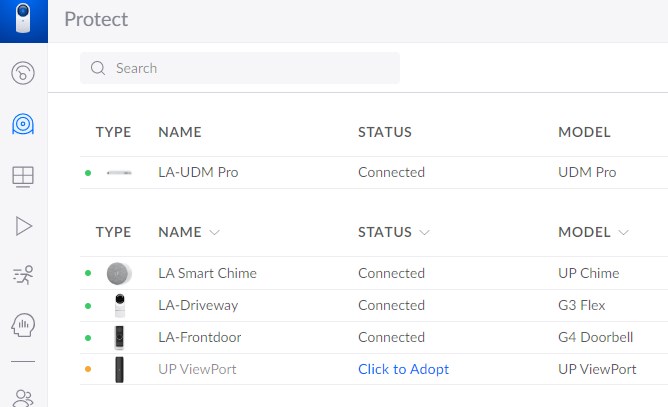
After you have connected the ViewPort we can adopt it in the UniFi Protect console, just like any other Protect device.
Creating the Live View layout
The ViewPort displays one of the live views that you can create in the UniFi Protect console. You can create different layouts in the console, and assign the layout to a viewport. To add a new layout:
- Open the Live View
- Click on Select Live View (toolbar appears when you move the mouse into the live view)
- Choose Add Live View

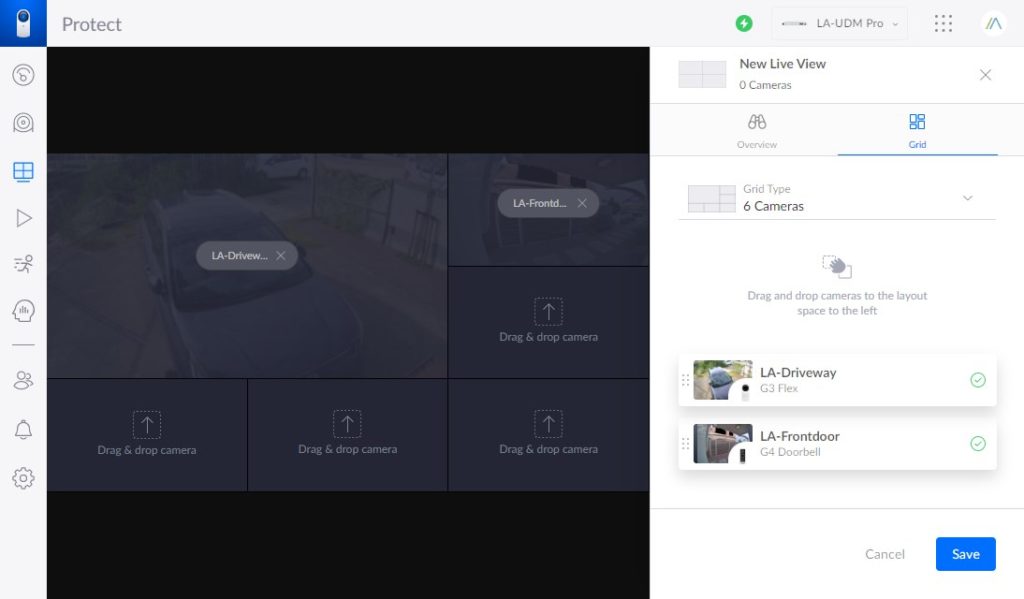
You can now give your new Live View a name, and choose the Grid layout that you want to use. It’s possible to select a grid with up to 26 cameras, but keep in mind that the UniFi ViewPort only supports 16 camera streams.
So the maximum grid layout that you can select is 16. After you have chosen your layout, simply drag and drop the camera streams into the grid. Click Save when done.
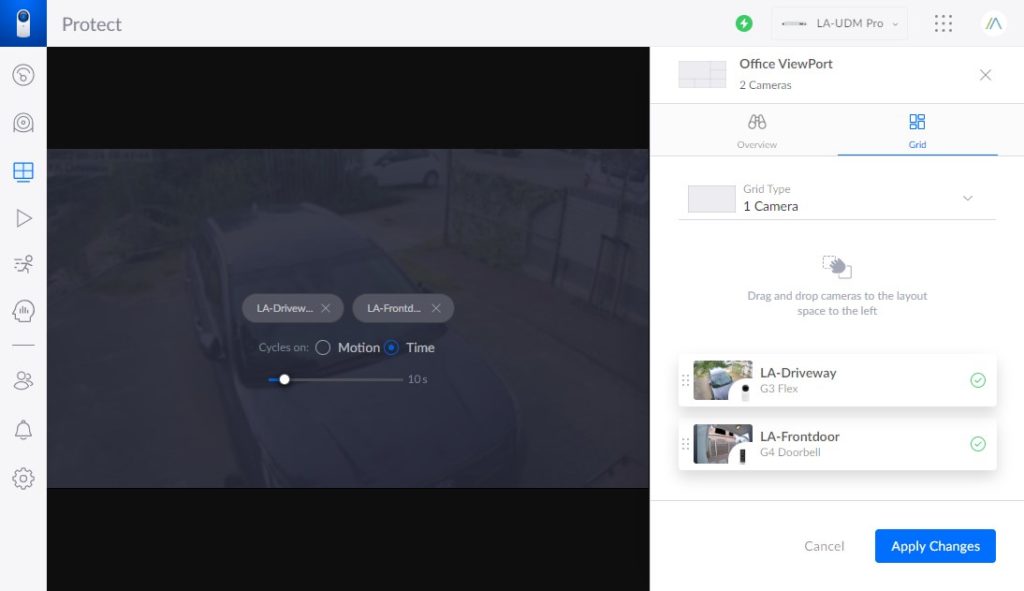
Creating an alternating/rotating Live View
In UniFi Protect it’s also possible to create an alternating / rotating live view. This allows you to rotate the live view every x second between different cameras or even rotate the live view based on motion.
To create a rotating live view, you will need to drop a camera over an already occupied grid view. You can then set the delay between the views or select motion as the cycle option:
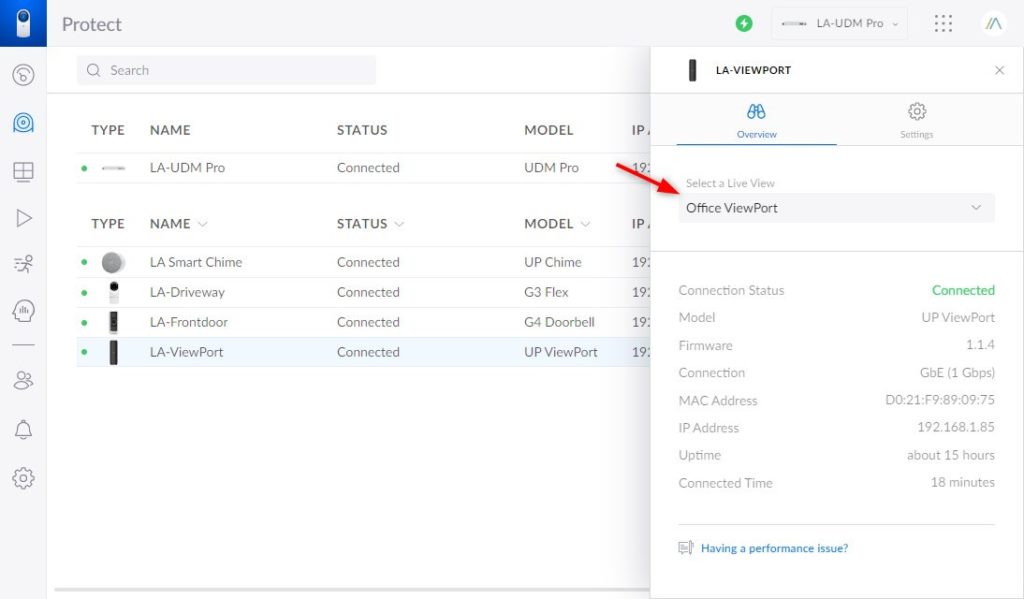
Applying the Grid View
To apply the new grid layout to the ViewPort, head back to devices and select the ViewPort. On the right side, you can select the Live View that we have just created.
Wrapping Up
The UniFi ViewPort is a great display adapter that allows you to easily view the live views of your cameras. At the moment it costs around $200, which may seem a bit high, but keep in mind that running and maintaining a computer 24/7 also cost a lot of money. Another option is to use a Raspberry Pi, but again, you will need to configure and maintain it.
I hope you liked this review, if you have any questions, just drop a comment below.


I installed my new Viewport today on our kitchen TV. I plan to have four cameras, but for now I have only one set up. The video is smooth when I view it on the UniFi portal, but on the TV it is horrible: about one frame every 5-10 seconds. If I use a four-camera layout it improves significantly, perhaps 5-10 FPS. It didn’t take much research to find tons of complaints about this online, some of them three years old. All of those threads eventually peter out with no definitive solution. Have you heard of this? Are there just a lot of defective Viewports being sold, or is there something that I’m missing? As you mention in your review, there really isn’t much to set up. Thanks
Yes, I have had this as well with one of the viewports that I managed for a client. Contacted Ubiquiti and they sended a new firmware release for it. Don’t have access to it anymore.
Double check if you are running the latest firmware and otherwise contact Ubiquiti support.