A shared calendar can really help your project team when it comes to keeping track of appointments and upcoming tasks. The advantage of a shared calendar in Outlook is that, with the right permissions, every member can create and edit appointments or only view upcoming meetings.
A shared calendar can be created under your own account or you can use a shared mailbox account to create the calendar. We can create the calendar in both Outlook and Outlook Online.
In this article, I will explain how you can create a shared calendar in Outlook, set the correct permissions, and how members can open the calendar.
Create a Shared Calendar in Outlook
Every mailbox comes with one calendar by default. Now you can share your own calendar with your colleagues, but that is not always the best option. What a lot of people don’t know is that you can create additional calendars in Outlook.
We are going to create a new calendar in Outlook, which we then share. This way we can keep our own appointments separate from the project. And with the calendar overlay function in Outlook, we still keep track of all appointments in one overview.
The steps below describe how you can create and share a calendar in Outlook, scroll down for the steps in Outlook 365.
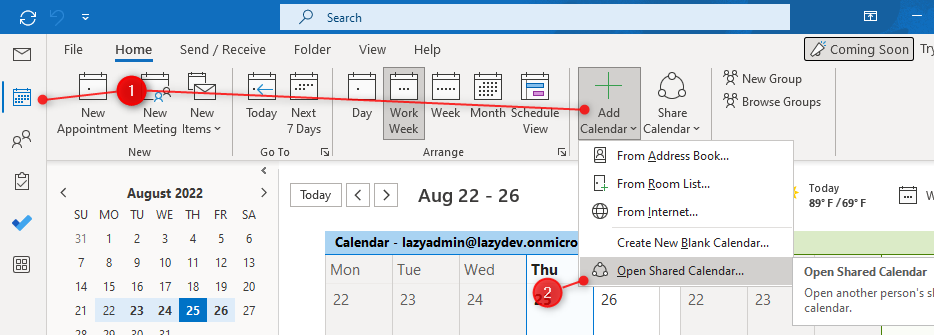
- Open the calendar view in Outlook
In Outlook, click on the calendar icon.
- Add a New Blank Calendar
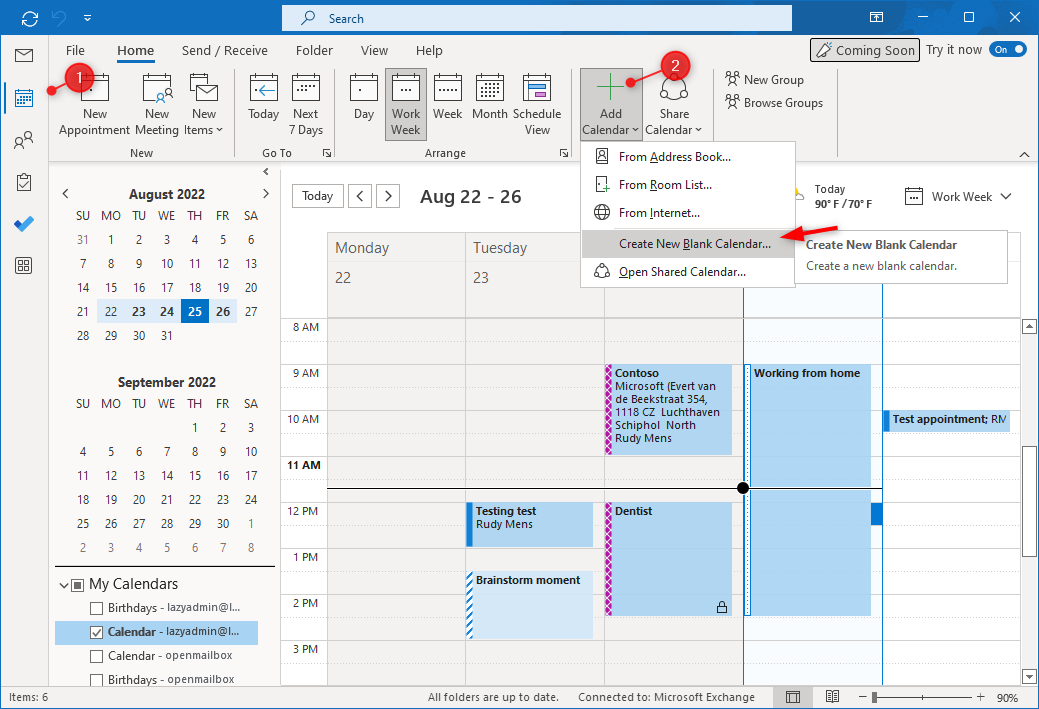
– Make sure you have the Home tab selected
– Click on Add Calendar in the ribbon
– Select Create New Blank Calendar…
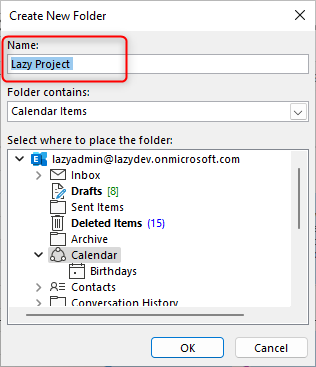
- Create the new Calendar
Give the new calendar a name, select a location for the calendar and click Ok. The default location, under your own mailbox account, is fine for most situations. Further in the article, I will explain how you can create the calendar in a shared mailbox account.
Keep in mind that if your account is closed, the calendar won’t be accessible anymore.
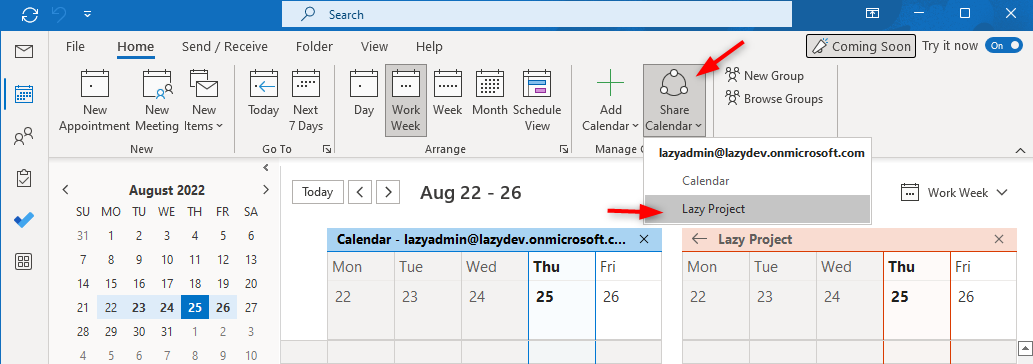
- Shared the Calendar with members
The calendar is now created under My Calendars. We will now need to share the calendar with our project members.
In the ribbon, under the home tab, click on Share Calendar and select our newly created calendar.
If the calendar isn’t displayed yet, click on Send / Receive and Send / Receive all folders. It can take a minute until the calendar will be visible.
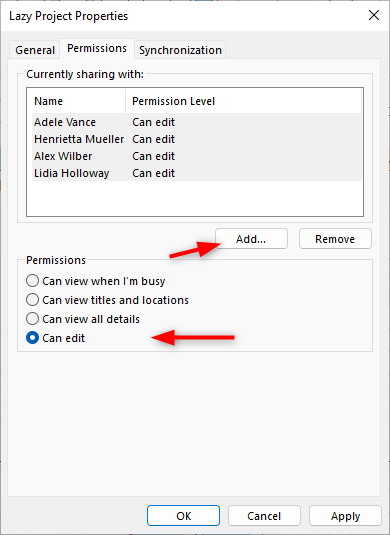
- Add permissions to the calendar
In the dialog, click Add to select the members that you want to give access to the calendar. Next set the correct permission that you want to give, for example, can edit or only view all details. When done, click Apply
Read more about calendar permissions level in this article, where I explain all the differences.
Create a Shared Calendar in Outlook 365
We can also create a new calendar in Outlook 365 and share it with our project members. The steps are pretty similar, only the layout is different.
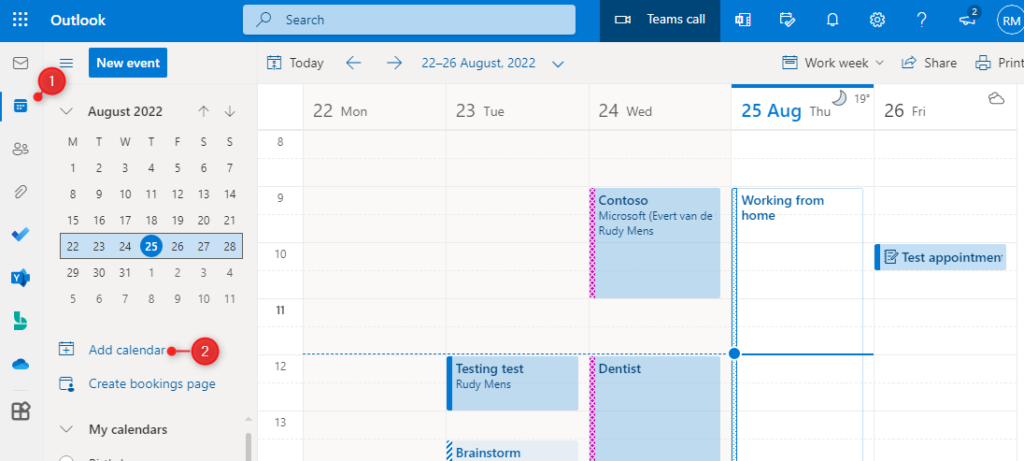
- Open Outlook Online and open your calendar view
- Click on Add calendar
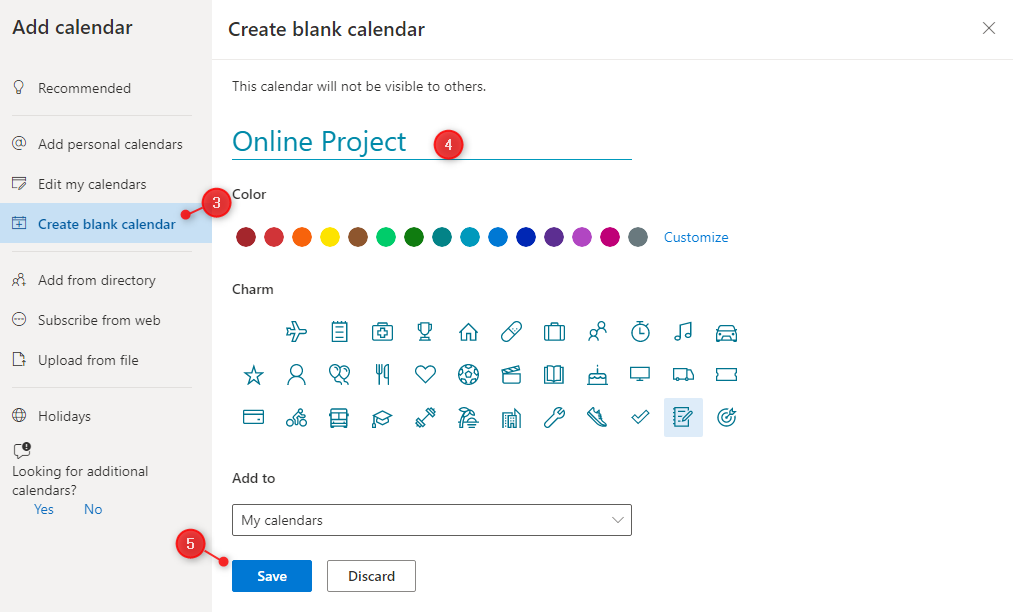
- Click Create Blank Calendar
- Give the calendar a name, color, and optional an icon
- Click Save to create the new calendar
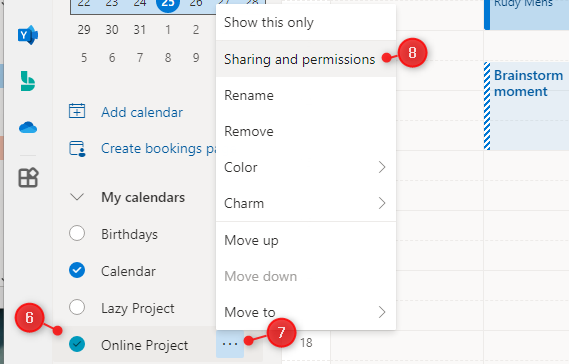
The newly created calendar should now be listed on the left side under My Calendars. All we need to do now is share the calendar with other users:
- Hover with your mouse over your newly created calendar
- Click on the 3 dots
- Click on Sharing and Permissions
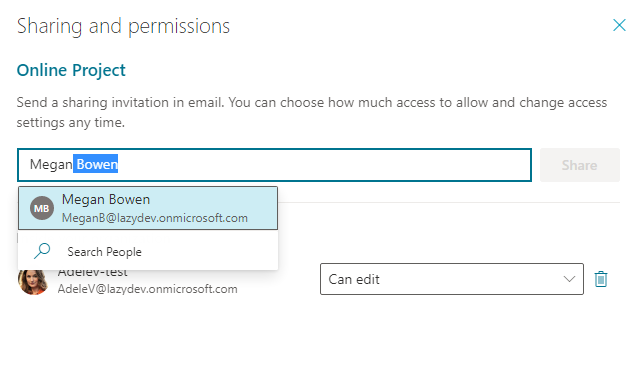
- You will need to add one person at a time, search on name or email address and select the user.
- Choose the permissions level and click on Share. Repeat the steps for all users.
How to open a Shared Calendar in Outlook
A shared calendar will need to be added in Outlook by the users themself. There are two ways to do that. When you share a calendar with your colleagues, they will receive an invitation email automatically. The user can simply click on accept to add the shared calendar to their Outlook.

Another option is to manually add the calendar in Outlook, for this you will need to know the calendar name.
- Open the calendar view in Outlook and click on Add Calendar
- Select Open Shared Calendar…
Enter the name of the shared calendar and click on Open. It can take some time before the calendar becomes visible in Outlook. If you search on the calendar name and you get the response “No suggestions” just give it an hour and try again.
In my experience clicking on accept in the invitation email works the fastest.
Create a Shared Calendar in a Shared Mailbox
When you have full access permissions to a shared mailbox, it’s also possible to create a new shared calendar in the shared mailbox. The advantage of this method is that the calendar isn’t bound to an employee’s Outlook account. So when the employee leaves the organization, the calendar can still be used by others.
To create the calendar, follow the steps described earlier, only in Step 3, we are going to select a different location for the calendar:
- Scroll down in the list under “Where to place the folder”
- Expand the shared mailbox (in this case named “openmailbox”
- Select the calendar folder
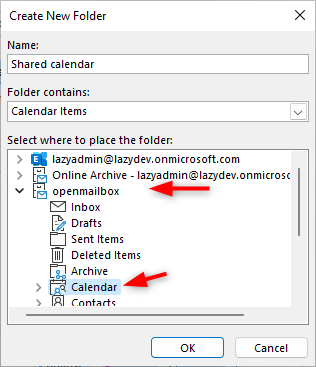
The shared calendar is now created in the shared mailbox account “openmailbox”.
Close or Remove a Shared Mailbox
When you leave the project, you probably want to remove the shared calendar from your Outlook. Closing or removing a shared mailbox is pretty simple:
- Right-click on the calendar in Outlook
- Choose Delete calendar
Or in Outlook Online
- Hover over the calendar and click on the 3 dots for more options
- Click on Remove to close the calendar
Wrapping Up
Shared calendars in Outlook are really useful when working on a project or when you are planning an event. You can share it easily with multiple persons, give different permissions and keep your own calendar to yourself.
I hope this article helped you with creating a shared calendar, if you have any questions, just drop a comment below.


Great article, thanks
This worked beautifully! Thank you!