To synchronize your local Active Directory users to Azure AD you will need to install the Azure AD Connect tool. This tool is installed on a domain-joined server in your network and will synchronize your on-premise Active Directory with Azure Active Directory.
Using the Azure AD Connect tool, we can create a hybrid environment. One of the advantages of this is that our users can use Single Sign-On or for example password reset in Microsoft 365.
In this article, we are going to install and setup Azure AD Connect.
Requirements for Azure AD Connect
Before installing Azure AD Connect it’s good to take a look at the requirements for the tool. If you have a large tenant, then make sure that you check the required server specifications. Other important requirements are:
- Azure AD Connect must be installed on Windows Server 2016 or later.
- Windows Server Core isn’t supported
- Make sure that .Net Framework 4.6.2 or newer is installed
- Run IdFix to identity errors and duplicates before synchronizing
During the installation, we will need to log in with our Azure AD Global Administrator account. If you have MFA enabled for that account (which you should have), then you will need to add the following URLs to the trusted sites:
- https://login.microsoftonline.com
- https://aadcdn.msauth.net
- https://aadcdn.msftauth.net
If you don’t add the URLs upfront to the trusted site list, then you will be prompted to add them during the installation.
You can download the latest version of the tool here directly from the Microsoft Download Center or through your Azure Active Directory under Azure AD Connect:
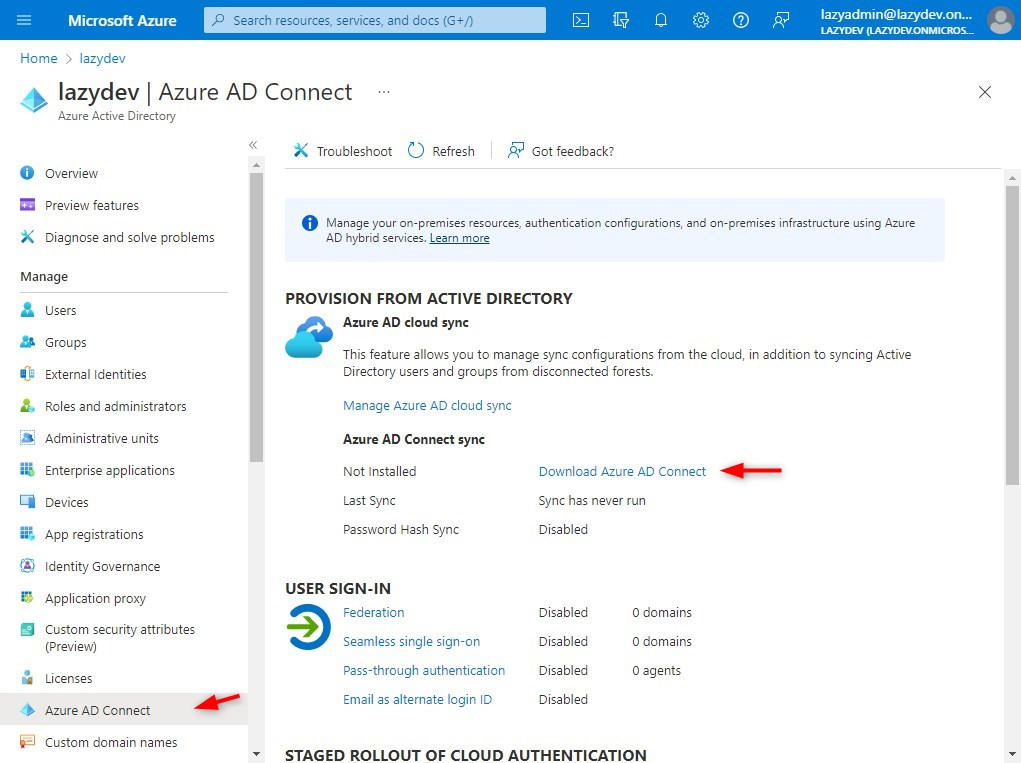
Install Azure AD Connect
Time needed: 10 minutes
We are going to install and configure the Azure AD Connect tool. During the installation, we will need our Azure AD Global Administrator account (account name ends with <your-domain>.onmicrsoft.com).
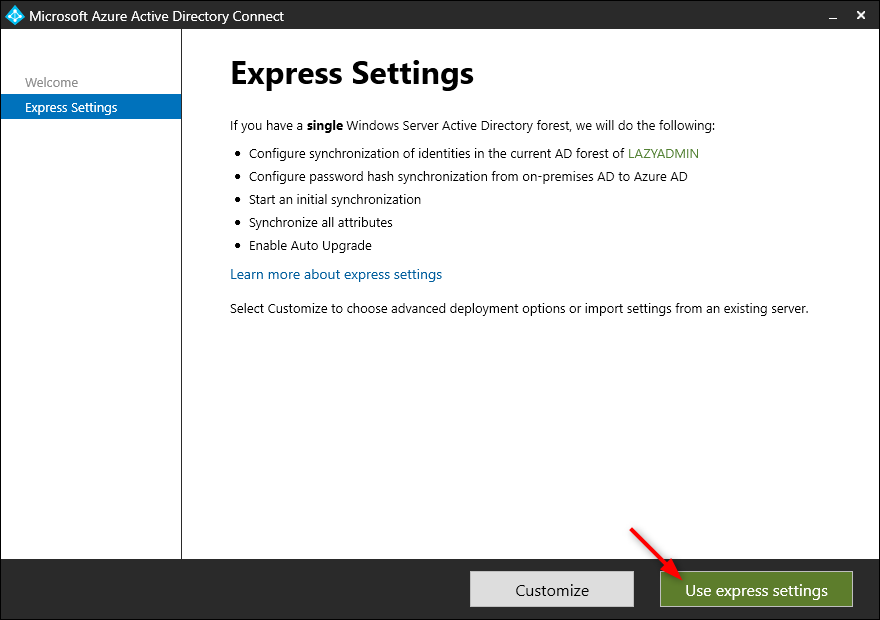
At the beginning of the installation, you can choose between customized and express settings. For 90% of the deployments is express perfect. It can be used if you have a single AD forest and less than 100.000 objects in your AD.
The express settings enable Password Hash Synchronization of single sign-on, synchronizing all users, groups, contacts, and devices, (you can change that in the last step), and enables auto-update of Azure AD Connect.
- Start the Azure AD Connect installation
Open the .msi file that we have downloaded and accept the agreement to continue - Choose Express Settings
Select express settings to quickly install the Azure Active Directory Connect tool
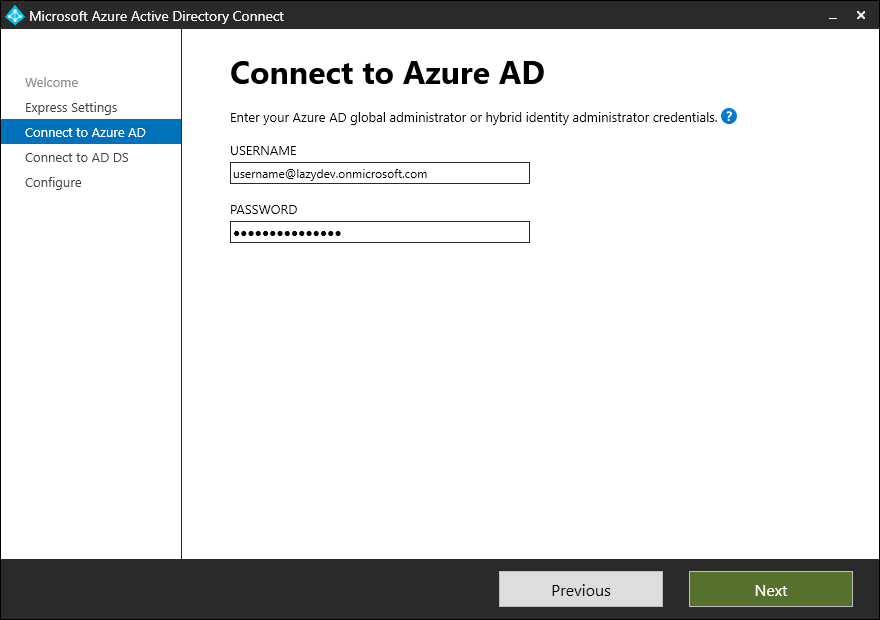
- Connect to Azure AD
You will now need to enter our Azure AD Global Administrator account. The username of this account ends with .onmicrosoft.com and is thus not your local domain administrator account!
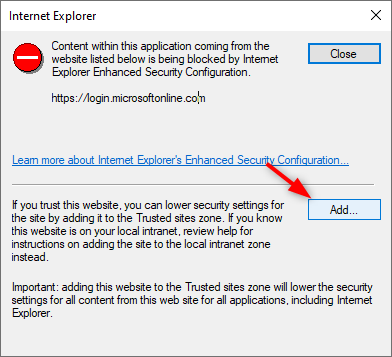
- (optional) Accept trusted site error
If you are using MFA on the Global Administrator account you might get an error that the content is blocked. Click on Add… and add the suggested URL to the trusted sites list. You might get this error up to 3 times.
- Login at Microsoft 365
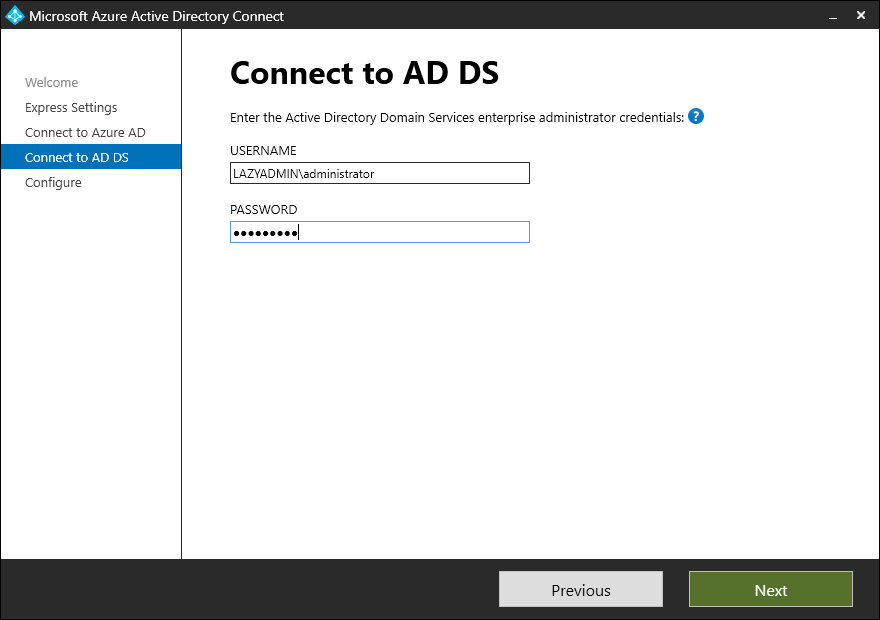
You are now prompted to log in to Microsoft 365. Login with the credentials of the Azure AD Global Administrator. - Enter local Domain Administrator Account
The next step is to log in with your local domain administrator account. This account is used to create a local AD account that will be used for the synchronization.
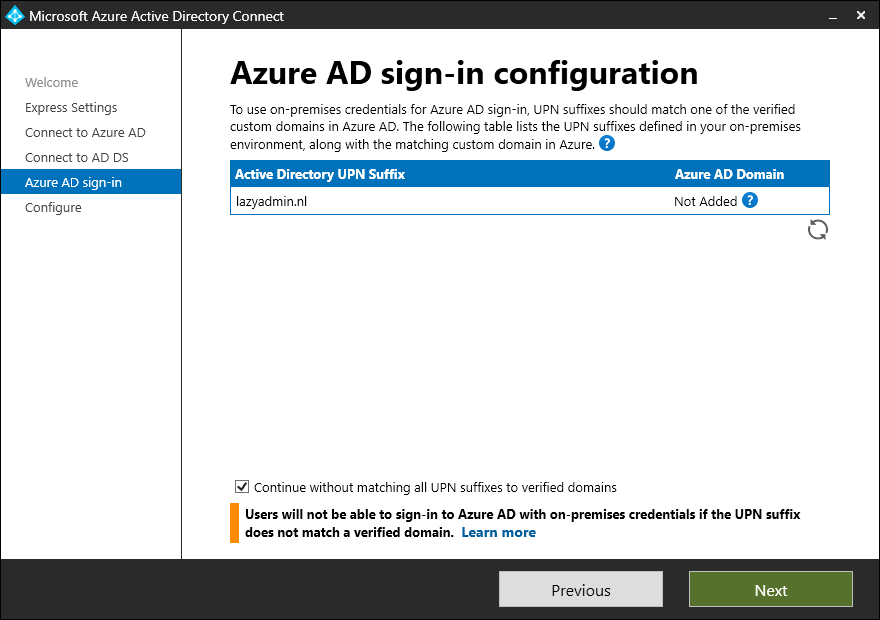
- Verify the domains
Make sure that your domain is verified in Microsoft 365. Otherwise, users will need to log in with username@domain.onmicrosoft.com username.
If you have multiple domains listed, and the primary domain is verified then you can select “Continue without matching all UPN suffixes to verified domains”
- Finish the installation
The last step is to actually install the Azure AD Connect tool. If you have used the Express option and don’t want to synchronize all OUs, then uncheck “Start synchronization” and click install.
I will explain later on how you can change the OUs and start the synchronization.
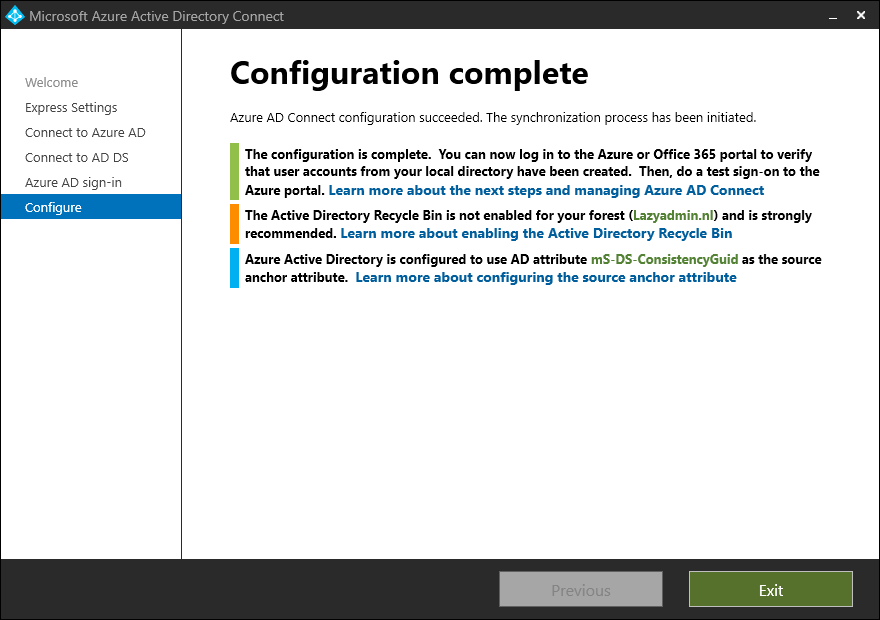
- Wait for the installation to complete
The installation and configuration can take a couple of minutes.
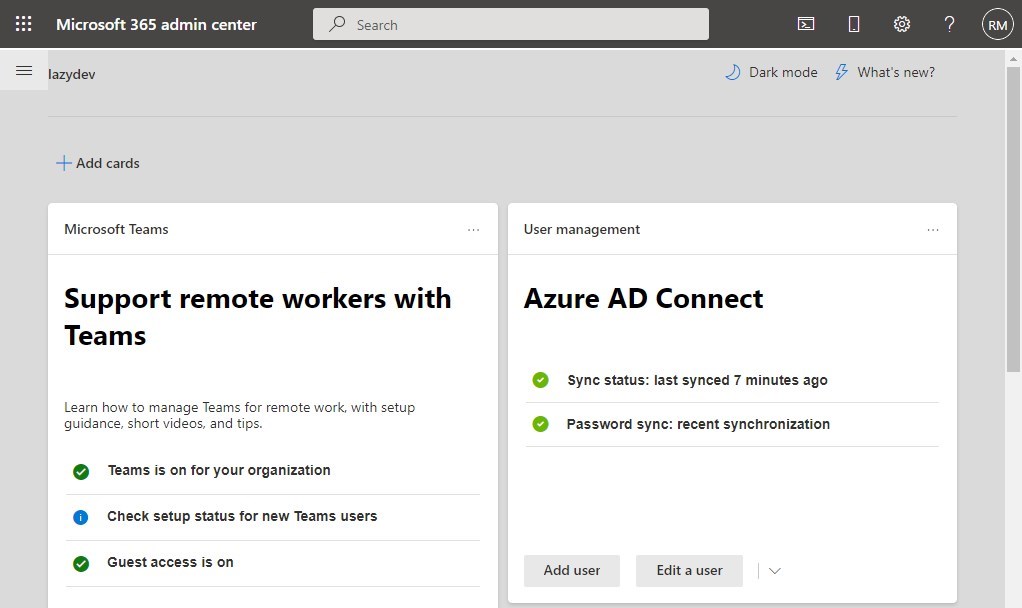
- Verify the synchronized Users and Groups
There are two ways to verify if the synchronization is successful. We can log in at the Microsoft Admin Center, there you will see on the dashboard the Azure AD Connect status. And if you navigate to the users you will see your local Active Directory users listed.
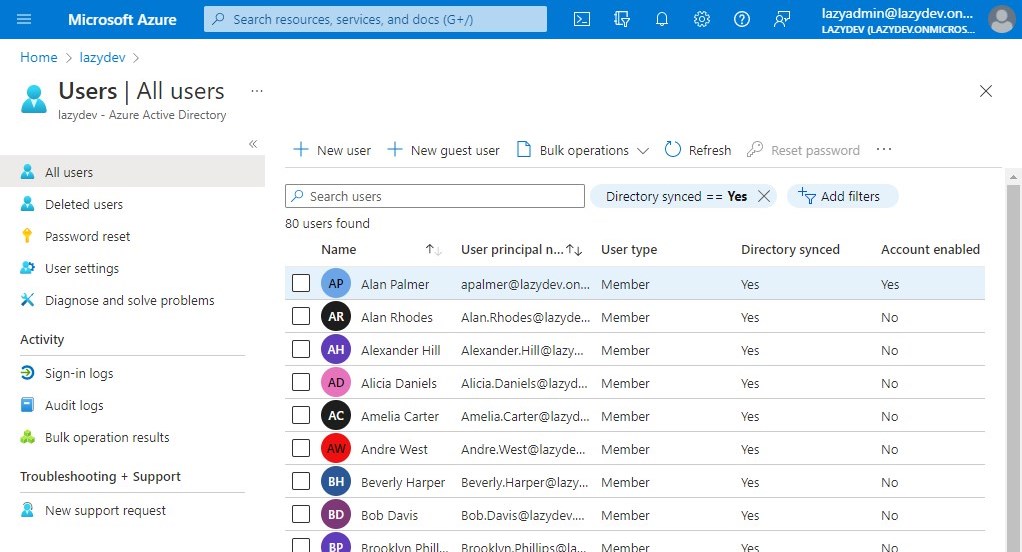
- Verify users in Azure AD
Also in the Azure AD, we can verify the synchronization. Open portal.azure.com and open the Azure Active Directory. If you click on users you will see all Directory Synced users listed.

Filter OU for Synchronization
If you don’t want to synchronize all users and groups to Azure AD then you will need to customize the synchronization options. To do this we will need to reopen the Azure AD Connect tool.
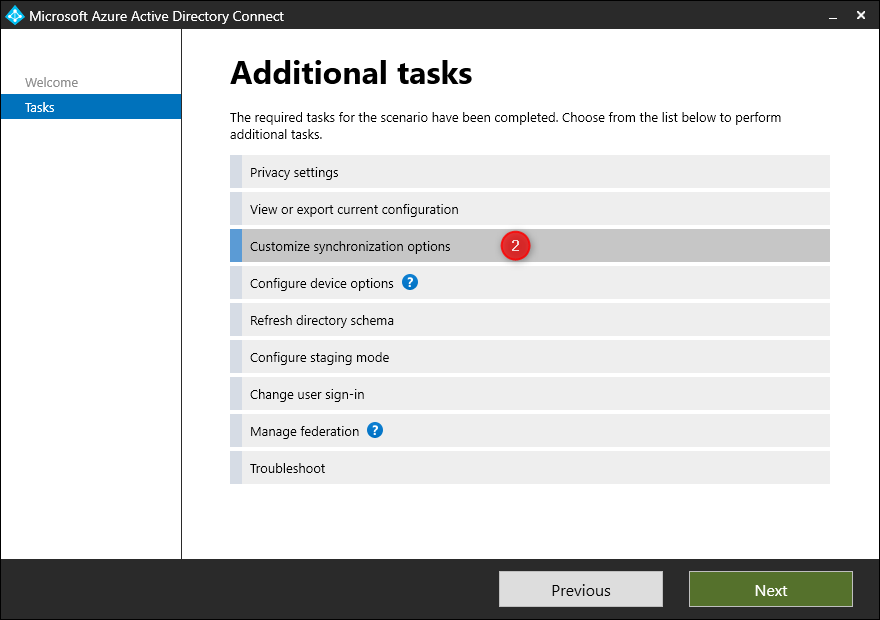
- Open Azure AD Connect and click Configure
- Select Customize synchronization options
- Enter the password of the Azure AD Global Administrator account to continue
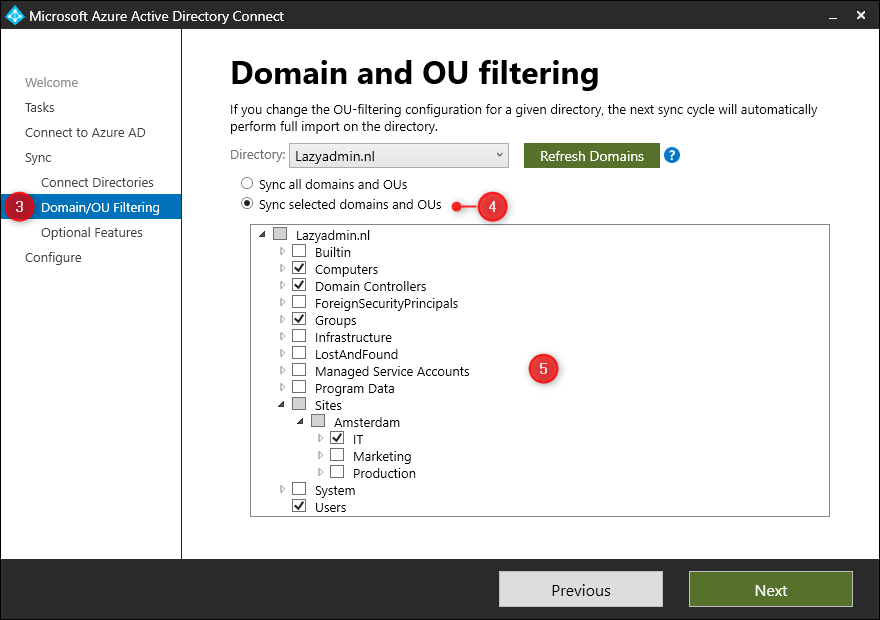
- Click Next to go to Domain/OU Filtering
- Select Sync selected domains and OUs
- Expand your domain tree and select the OUs you want to sync
- Click Next and leave all Optional Features as is.
- Click Configure to apply the changes
Finding Synchronization Errors
If the synchronization isn’t working or you are missing users or groups in the Azure AD, then we can use the Azure AD Connect Health tool to find any errors. The Connect Health tool can be found in Azure AD or you can directly access it through this link.
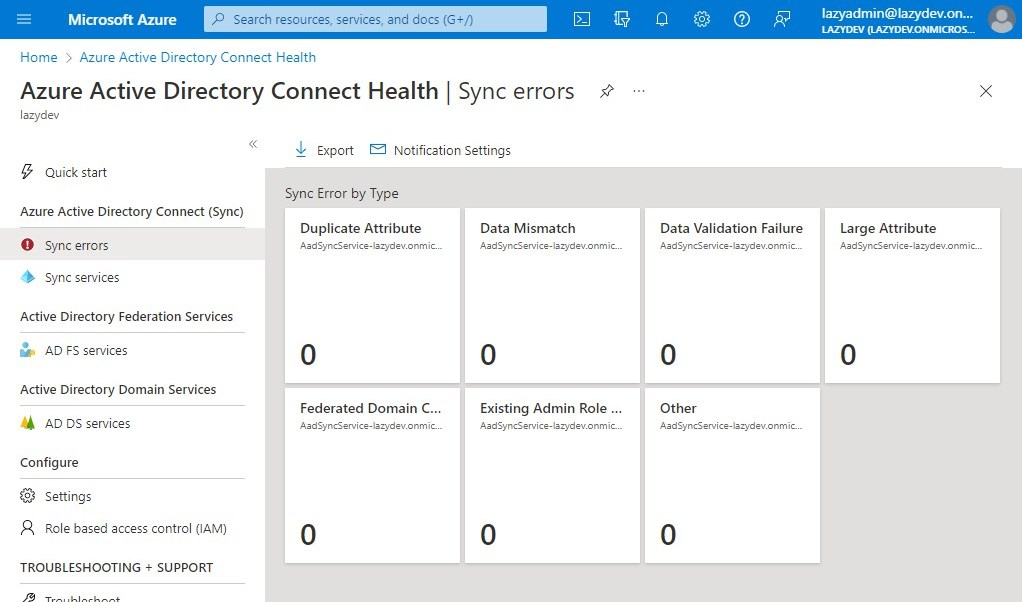
If there are any errors, then use the IdFix tool to solve the issue.
Wrapping Up
Installing Azure AD Connect has become pretty easy with the express settings. Make sure that you use the IdFix tool before your start your synchronization to find any errors.
It’s possible to install Azure AD Connect on your domain controller, but only if you have a small tenant and your server has enough performance. Otherwise, it’s better to install the Azure AD Connect tool on a separate domain-join server.
I hope you found this article useful. If you have any questions, just drop a comment below.


Might be good to mention that this requires your local domain be routable, or that you set up an alternate UPN suffix that matches your verified domain in 365:
https://docs.microsoft.com/en-us/microsoft-365/enterprise/prepare-a-non-routable-domain-for-directory-synchronization?view=o365-worldwide