Are you getting a blue error screen with the error Kernel Security Check Failure? This error is most of the time related to a driver issue or faulty hardware. The error can appear out of nowhere when you are working or gaming on your Windows 10 or 11 computer, and can also prevent you from booting at all.
If the error is a driver-related issue, then the problem most of the time appears after installing a Windows update, or after updating the drivers manually. Luckily this is easy to fix.
In this article, we are going to fix the bsod Kernel Security Check Failure error once and for all. Most people are still able to start Windows normally, if you can’t even start Windows, then skip to this part first.
Fix Kernel Security Check Failure Windows 10
Even though Windows Updates can cause the issue, they can also be part of the solution. So the first thing we are going to do is update Windows 10. Make sure you have the latest Windows 10 build and that it’s fully updated.
- Click Start > Settings
- Select Update & Security
- Click Check for Updates and make sure all the updates are installed.
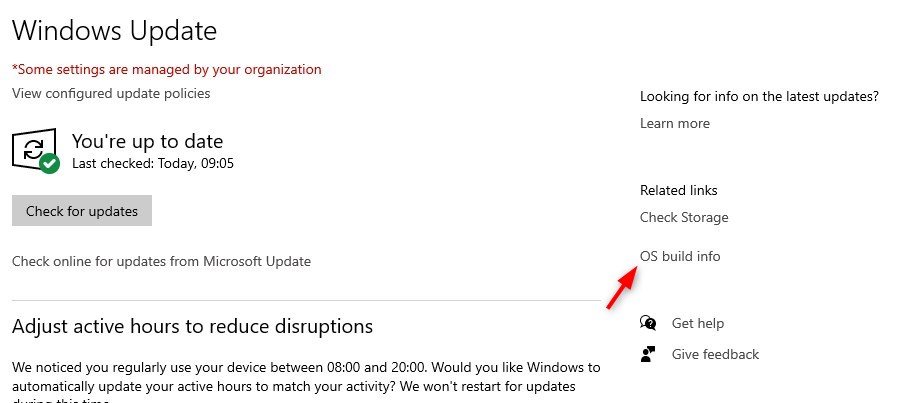
- If you are unsure that you have the latest Windows 10 release, then click on OS Build info
- You will find the version under Windows Specifications. The latest version at the moment is 21H2. You can find an overview of all the versions here at Microsoft.
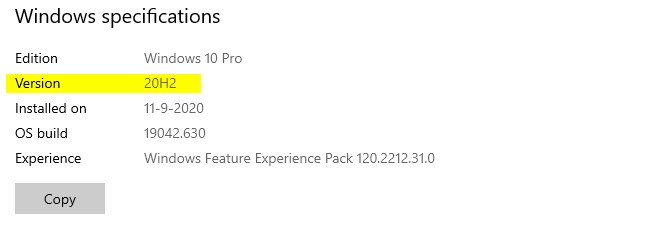
- If you have an older version, then download the latest Windows 10 build here and update it manually.
Windows should now be fully updated. If you have installed new updates, make sure you restart your computer before we continue.
Updating Drivers to fix Kernel Check Failure
With Windows up-to-date, we can now take a look at the drivers. First, we need to find any drivers that are incompatible with your Windows installation. Most of the time these are drivers that are left behind from old hardware or after upgrading your Windows from Windows 7 to 10 for example.
We are going to use a built-in tool to verify the drivers, Driver Verifier. Use this tool with caution. It’s designed for developers to test new drivers. When selected the wrong option, it will stress test the driver and cause (another) Blue Screen of Death, intended to find bugs in new drivers.
Tip
If you get in a boot loop (Windows keeps crashing) then start Windows in safe mode, open the Driver Verifier again, and delete the settings.
- Press Windows key + R
- In the run box, type verifier and hit enter.
- Select Create Standard settings in the Driver Verifier Manager and click Next
- Choose Automatically select unsigned drivers and click Next
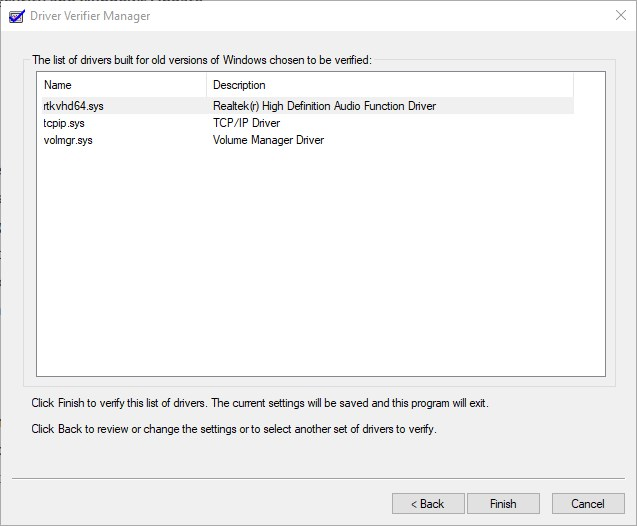
If there are any drivers that are incompatible with your Windows version, then they will be displayed here in the list. Otherwise, you will get the notification “No unsigned drivers have been found”.
To update the driver you can first try to use the Device Manager.
- Press Windows key + R
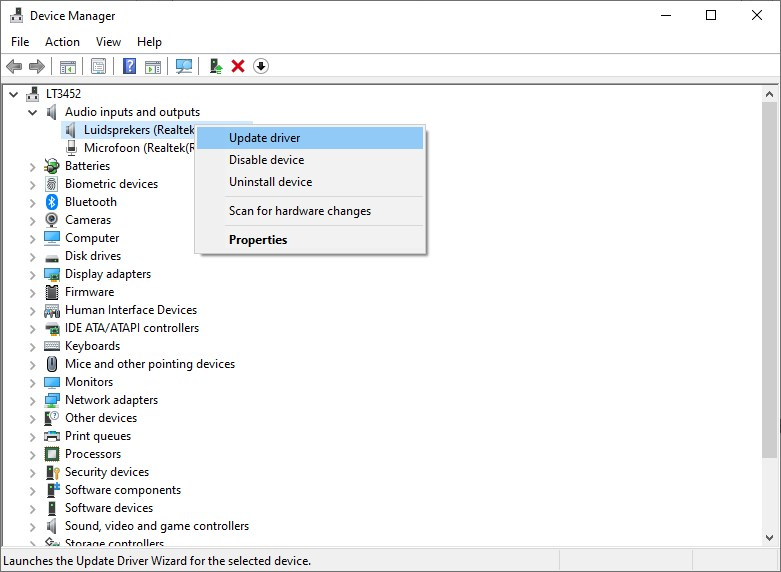
- Type devmgmt.msc and hit enter
- Try to find the device with the outdated driver.
Use the description from the driver verifier as a hint, use Google to find the hardware related to the driver name, or open the properties of each device and check the driver name. - Right-click and select Update Driver
If you get the message that the best driver is already installed, then you can try to find a newer driver on the site of the manufacturer. Google the driver or device name and search for a newer version.
Scan and repair system files
The next step is to scan and repair the Windows file systems in an attempt to fix the kernel security check failure error in Windows 10.
- Press Windows key + R
- Type cmd and press Ctrl + Shift + Enter to open the command prompt as admin
- Type sfc /scannow
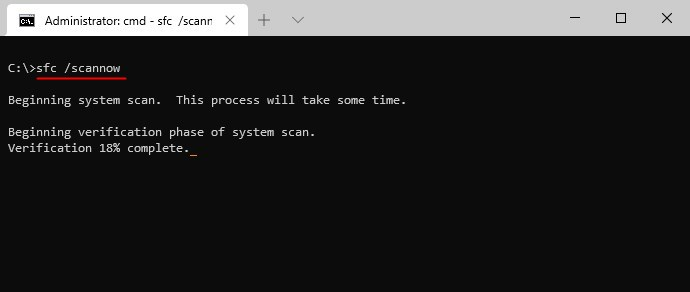
It can take a couple of minutes to verify, and maybe repair, all the files. Just give it some time to finish.
When finished, reboot your computer and test if the blue screens are gone.
Hardware related issue
If all the steps above didn’t help, then the problem could be hardware-related. Faulty memory modules, the problem with your video card, or an underpowered power supply can all be causing the kernel_security_check_failure error.
Finding hardware problems is always a process of elimination. We are going to start with the parts that are easy to test or take out.
Finding memory problems
Faulty memory can be the root cause of random bsod in Windows 10. Luckily corrupt memory modules are easy to find (and replace). We have a couple of options to find out if a memory module is corrupt:
- Run memory diagnostics in Windows
- If you have multiple memory modules, take them out one-by-one.
- Run memory diagnostics in your Bios
Run memory diagnostics in Windows
We start with the easiest option, running memory diagnostics in Windows. This tool is available in Windows since Windows 7 and can identify memory problems.
- Click start and open Settings
- Search for Memory and select Diagnose your computers memory problems
- Click Restart Now (save your work first) to scan your memory
Windows will restart and scan your memory. If there is any problem with a module, then replace the module with a new one (they are not really expensive and easy to replace yourself).
Removing memory modules
If you have multiple memory modules, you can also eliminate any problems by removing the modules one by one. Turn off your computer and remove one module. Start your computer again, acknowledge the bios warning that you get because the memory is changed, and test if the kernel security check failure error is gone. If not, place the module back and take out the other one.
When you have more than 2 modules, repeat the process until you have tested each module.
Run memory diagnostics in your Bios
You can also run the memory diagnostics during startup. Most bios have a memory and hard drive test tool that you can use for diagnostics.
Open your bios by pressing ESC after you have started your computer. Look for an option memory test, system health, or something similar.
Bad Power Supply
A bad or underpowered power supply can also be the cause of the blue screen with stop code kernel security check failure error. When a power supply is a problem, then most likely the bsod only occurs when you stress your computer enough, like playing games or using editing software.
Replacing a power supply is a bit of work and a new one costs a reasonable amount of money. So nothing else works in this article, then you can try replacing the power supply.
Digging deeper, find the real cause of Kernel Security Check Failure
If all the steps above didn’t work for you then we really need to examine the log files to find the real cause of the blue screen with the stop code kernel_security_check_failure. Now, you can try to write down (or take a picture) of all the info on the blue screen self. But an easier option is to examine the dump file.
When your computer crashes, Windows will make a minidump file with all the important information about the crash. After your computer is rebooted, we can open this minidump file to take a closer look at the root cause of the problem.
The minidump files are saved in the folder : C:\Windows\Minidump. To open the file we will need a small program, BlueScreenView from Nirsoft. Download the version “Download BlueScreenView with full install/uninstall support” from the download section and install the program.
Reading the minidump files
BlueScreenView will automatically find the minidump files after you have opened the program. Minidump files are kept for 30 days by Windows, so it’s possible that you have multiple dump files.
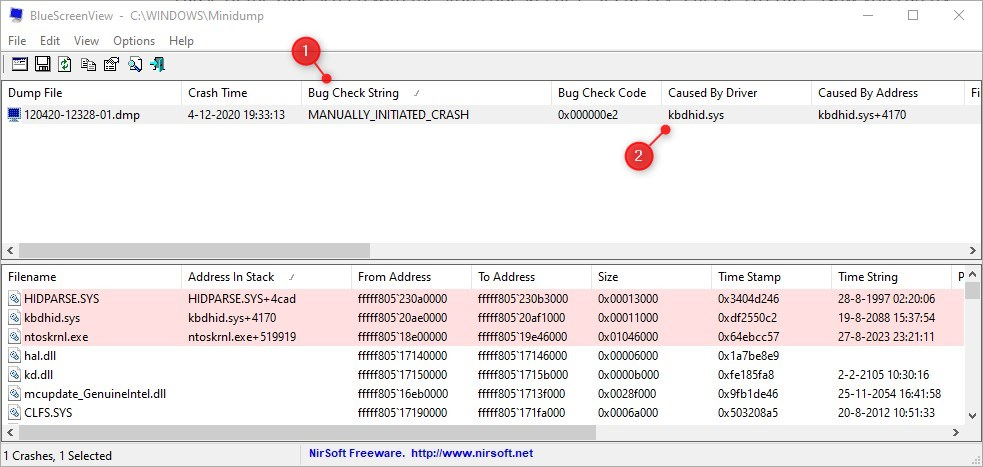
There are two things important here to start with:
- Bug Check String: this will contain in your case probably kernel_security_check_failure.
- Caused By Driver: the driver that is responsible for the crash.
The driver name, in this case, kbdhid.sys, doesn’t say that much (in this case it’s the keyboard because I manually initiated the crash). You can scroll to the right to see if the Product Name is listed, otherwise, you will have to Google the driver name to find out to which product it belongs.
Try to find a newer version of the driver, if you already have the latest driver installed, then try to replace it with one version older. Maybe the new driver contains a bug that causes the bsod.
You can also try to replace the hardware in question, in this example case, another keyboard probably would solve the issue.
When you are unable to start Windows
If you can’t even start Windows at all, then you will need to start Windows 10 in safe mode to be able to repair it. I have written a short article with different methods on how you can boot into safe mode, which you can find here.
Once you have started Windows in safe mode, you can follow the steps described above to fix the Kernel Security Check Failure error.
Wrapping up
Kernel Security Check Failure errors can sometimes be difficult to solve. The steps above might look difficult, but just follow them step by step and the issue will most likely be solved.
I hope you were able to fix the error kernel_security_check_failure with this article. If you have any questions, just drop a comment below.


