Keeping your passwords safe is important, but sometimes you need to share a password securely with a co-worker or family member. And securely is not by using mail or Whatsapp, so what are your options than to share a password?
You have a couple of options, you could for example use a password manager like 1Password. In 1Password you can share a password easily with a guest. But what if you are using KeePass or another local password manager?
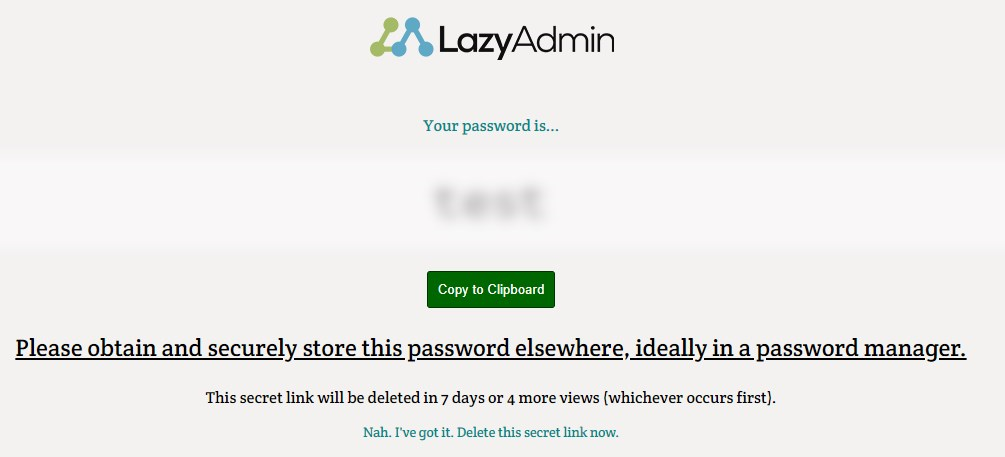
To share a (locally stored) password you can use a web service like Password Pusher. Password Pusher creates a link that can only be viewed x times or is only valid for x days. After that, the link will be deleted.
Password Pusher is completely open-source and you can trust it. But if you want to share your password even more securely, you can run your own instance of Password Pusher with a Heroku app.
By default, Password Pusher doesn’t come with much customization options. It only has a dark theme. If you are using it in a corporate environment, it can be useful to add your company logo to it for some recognition by your users. I have created a light theme for Password Pusher which you can find later in the article.
Using Password Pusher
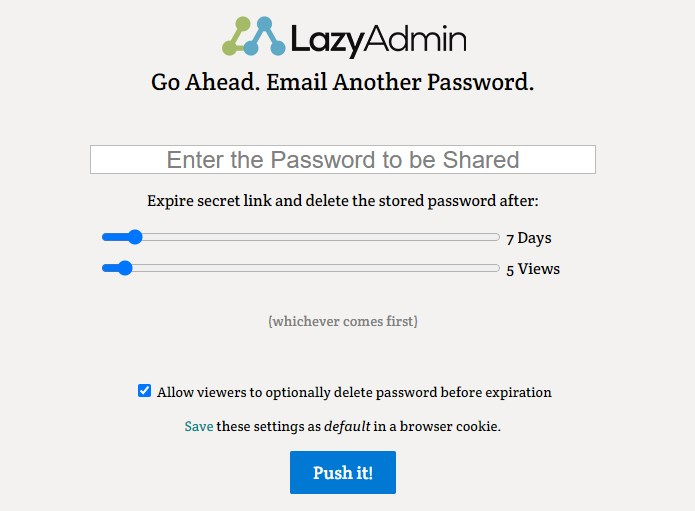
So the easiest option is just to use the Password Pusher service. Simply open the website pwpush.com
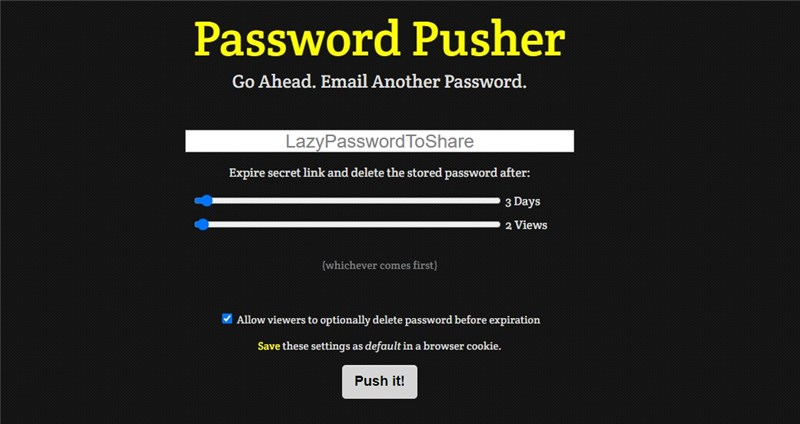
There is almost no need to explain this, but here we go:
- Enter the password that you want to share
- Select the amount of days you want to link to be valid
- Select how many times the link can be opened
- Click Push It
- Share the link that is generated
One tip for this, if you are sharing the link through Microsoft Teams or any other chat app, then set the views on 2 at minimum. Teams will do a request of the page to create a preview in the chat, which will count towards the number of views.
Why you should deploy your own Password Pusher
Deploying your own instance of Password Pusher is even more secure. You are in control of the server and data as well. So you are the only one who has access to the temporary urls.
But there are more advantages, you can fine tune your own Password Pusher. For example the maximum views to only 3 and maximum days to 1 instead of 90.
Deploying your own Password Pusher in Heroku
You probably have never heard of Heroku, but it’s a cloud provider where you can host your application. They take care of the server-side, you only need to take care of the app. Heroku offers a free plan that allows you to run a small application. Perfect for our own instance of Password Pusher.
Deploying our own Password Pusher instance takes only a couple of minutes and doesn’t require any programming skills.
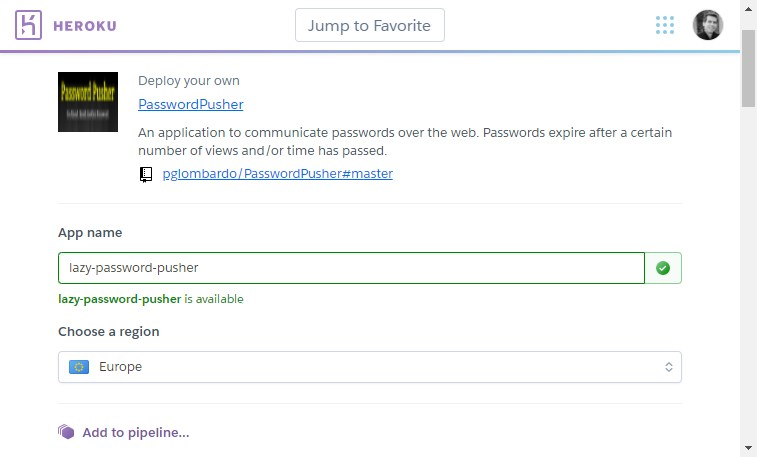
1. Deploy Heroku Template
We start with this one-click deployment template for Heroku that is made by the creator of Password Pusher. If you want to use the light theme, then use this one-click deployment link.
You will need to register for an account, just simply fill out the form and select that you are a hobbyist.
2. Create a New App
After you have verified your email address and set a secure password, you can start with deploying your app:
- Give you app a name, all lower case
- Select a region, United States or Europe
Next we can set some default values. The most important to look at are:
- EXPIRE_AFTER_DAYS_DEFAULT – Default value is 7. I recommend to set it on 1
- EXPIRE_AFTER_DAYS_MAX – 90 days by default, 7 is more then enough
- EXPIRE_AFTER_VIEWS_DEFAULT – 5 views by default, 2 is in most cases enough
- PAYLOAD_INITIAL_TEXT – You can change or translate the place holder in the password field
Click on Deploy App when you are done. It will take a minute or so to build the app.
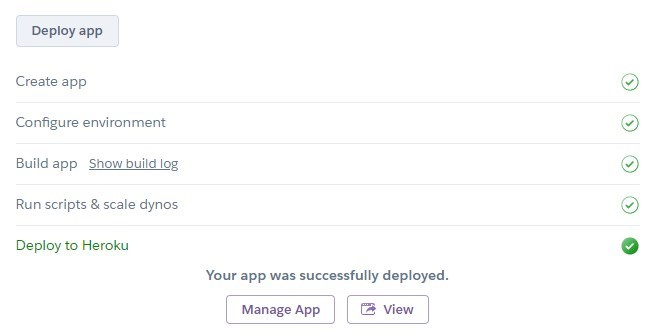
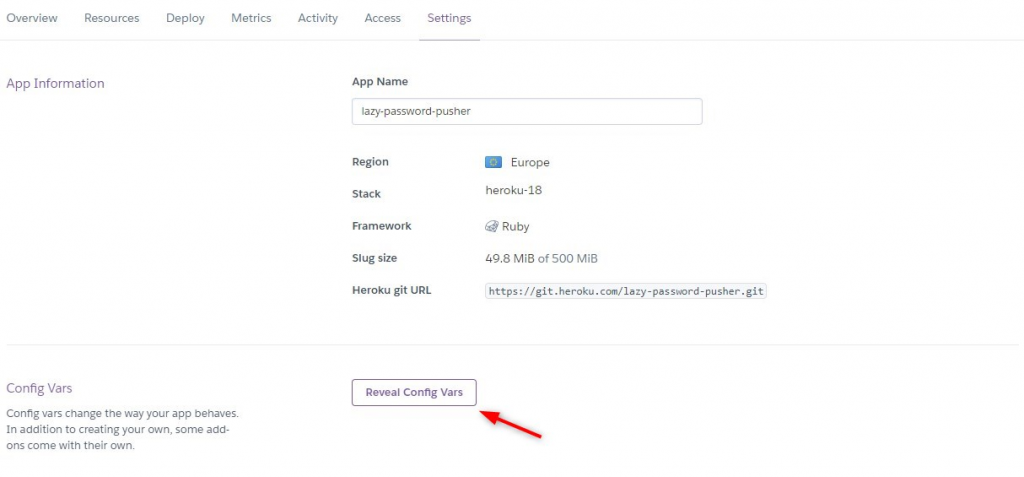
When the deployment to Heroku is done you can View or Manage your app. If you go to Manage you can change the variables that we have set earlier. Under Manage go to Settings and click Reveal Config Vars to change them.
Password Pusher with Custom Logo
As mentioned earlier, I have created a light theme for Password Pusher with the option to add a custom logo to it. The steps are pretty much the same as earlier, only you will need to use this link for the Heroku one-click deployment.
The custom logo is also added to the password link page:
During the setup there are two extra options you can configure:
Custom logo
The background color of the light theme is a light gray (#f3f2f1), so the best option is to use a transparent logo (png file). The size of the logo that I am using is 250x50px.
You will need to host the logo somewhere else and enter the full URL.
You can also use the custom logo with the dark theme.

Light Theme
Set the option Light Theme to true to use the light theme.


Sorry, I should have been more clear. I just wanted to be able to change the logo easily, but I can’t deploy your version as I get the following error.
! Failed to install gems via Bundler.
!
! Push rejected, failed to compile Ruby app.
! Push failed
Unfortunately, I would have no idea where even to start trying to change Peter Giacomo Lombardo Heroku one.
I have looked at the new version, but it’s rewritten so much. It will take some time for me to figure out how to change it once again.
Thank you for the reply, it would be great if it could be updated, but I completely understand if it’s so much of a time investment. – Thanks Again 🙂
Any chance you could update this as the package no longer works?
The original package of PwPusher can do pretty much the same right now. Just check the GitHub page of PwPusher for more information