Keeping your Office 365 account secure is really important, that’s why you need to use MFA in general. Accounts without MFA can get easily breached after phishing mails or even with password sprays.
If you haven’t set up MFA for your Office 365 accounts, then make sure you read this article first.
There are 2 new features added to Azure AD MFA to make it even more secure, location and number matching. In this article, we are going to take a look at both options and how to enable them.
Azure MFA Location
The problem in general with the current Azure AD MFA push notification is that you don’t which app did send the notification and from where. This can result in users blindly approving an MFA request on their phone, without realizing that the request didn’t come from their own device (and yes, this has happened in one of the tenants that I manage).
The MFA Location feature doesn’t only show the location from where the request was made, but also the app that made the request.
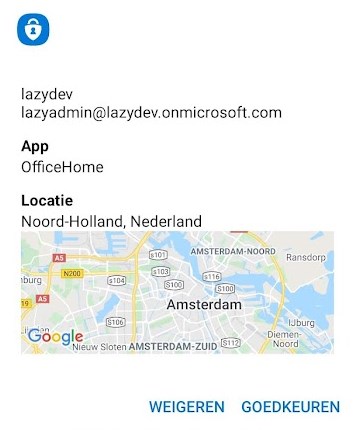
There is one downside to this feature though. If you are using a VPN connection or VDI, then the location doesn’t match the user’s location. But if you get a request from outside your country, or even outside your region, then it should be enough to warn your users that there is something wrong.
Number matching in Office 365 MFA
If you have enabled passwordless authentication, then you already have number matching basically. But if you want to use a password and push notification, then you can also add number matching to the MFA request.
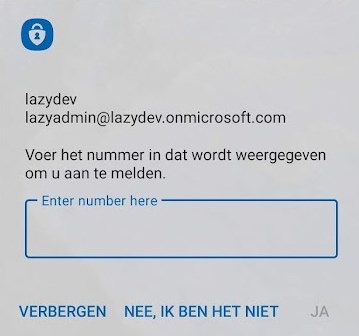
This way the user will need to enter a number, which is displayed on the login screen, in the Microsoft Authenticator app.
Enabling MFA Location and/or Number Matching
The easiest way to enable these new features is through the Azure AD Portal. It’s also possible to use PowerShell in combination with Microsoft Graph, but that requires a bit more work.
- Open Azure Active Directory
Navigate to https://portal.azure.com and click on Azure Active Directory - Open the Microsoft Authenticator Policy
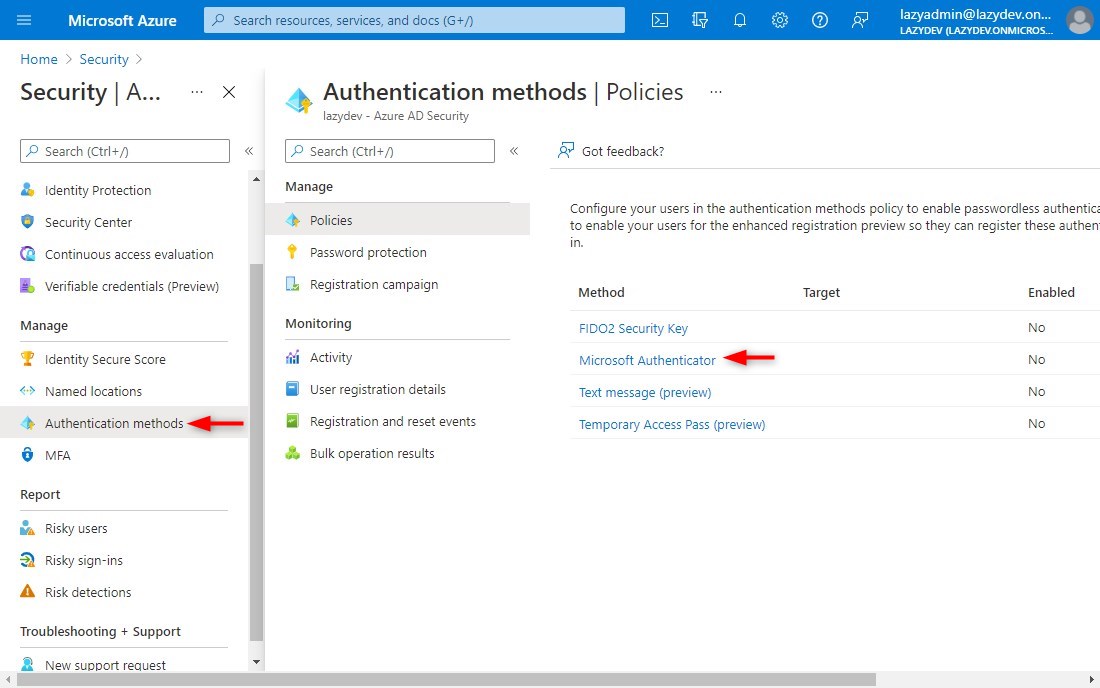
– Open Security > Authentication Methods
– Click on Microsoft Authenticator
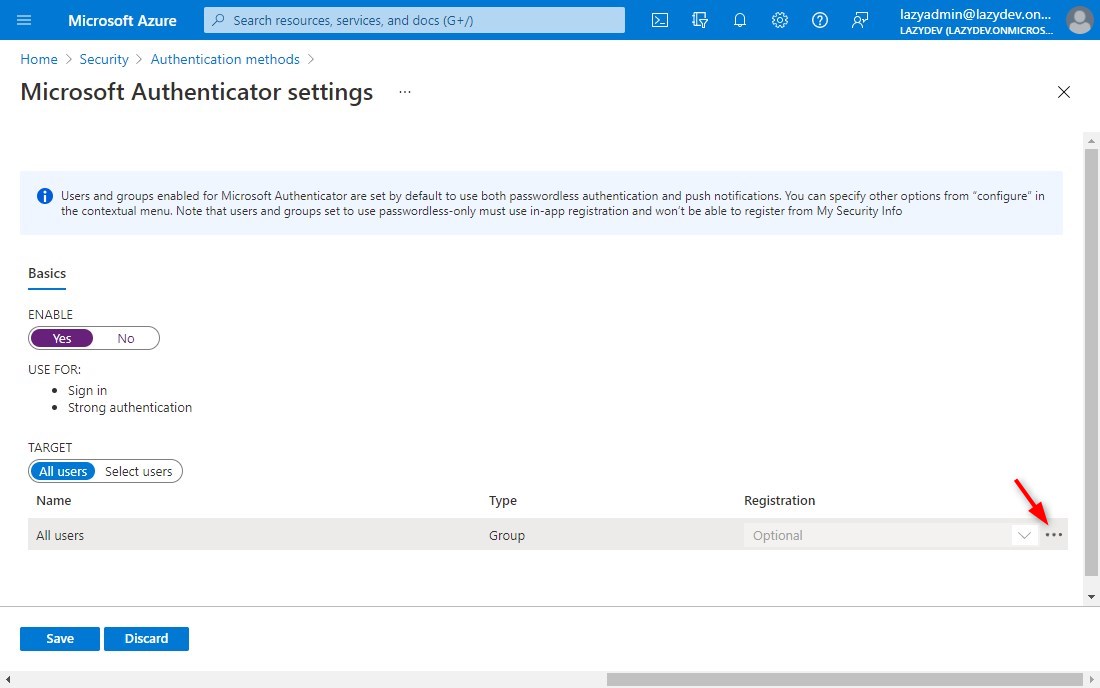
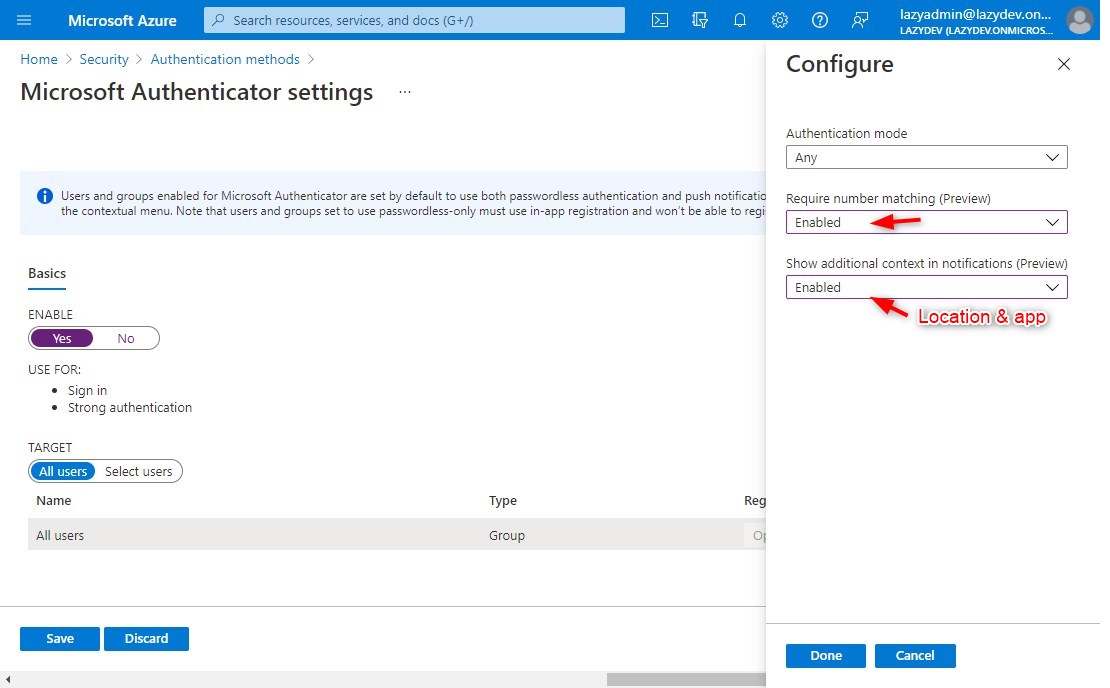
- Configure Microsoft Authenticator
– Click on the 3 dots to open the context menu and select Configure
- Enable number matching and/or additional context
You can now enable number matching and/or additional context in notification (location and app)
Wrapping Up
The most user-friendly option is to enable/force passwordless sign-in and add the location to the MFA notification. This way the user only needs to select the correct number in the app and can verify the location of the request.
If you don’t want to use passwordless authentication, then add number-matching to the MFA request. This way you can be sure that the MFA request comes from a user’s intended action.
If you have any questions, then drop a comment below.


We finally pushed Passwordless to all users now as a test – after it ran stable with the initial test Group. This has only been stable the last couple of months.
I hope the opt-in from the users soon is enforceable (enable phone login) but for now all those who want to participate can do so