Companies looking for one solution to protect all their business-critical data are in the right place with Nakivo. Nakivo is known for its powerful backup solution for VMs, servers, workstations, and Amazon EC2 instances. Last year they added support for backing up Microsoft Office 365 data.
Today we are going to take a look at Nakivo, how easy it is to configure, manage — and of course — to restore files. In this review, we focus on the Microsoft Office 365 part of Nakivo.
Nakivo reached out to ask if I wanted to test and review their Microsoft Office 365 backup solution and give my honest opinion about it.
If you are still in doubt about whether you even need to back up your Microsoft 365 tenant, then I really suggest you read this article first. It will describe in a detailed way why using a third-party backup solution is highly recommended for Microsoft 365.
Nakivo Microsoft Office 365 Backup
Keeping your Microsoft Office 365 data safe is your own responsibility. With the file version history and retention policies, you can protect your data to a certain degree, but restoring a large amount of data can be a tedious task. With Nakivo for Microsoft Office 365, you can protect your mission-critical data and easily recover it at all times.
As mentioned in the beginning, Nakivo can back up a lot more than just Microsoft 365 data. The application isn’t fully cloud-based, as compared to other backup solutions that I have reviewed, so you will need to install it in your own environment. Now, this isn’t really a problem because you can run Nakivo on pretty much any platform you want:
- Windows
- Linux
- Synology NAS
- QNAP NAS
- Western Digital NAS
- ASUSTOR NAS
- Netgear NAS
- Amazon EC2
- FreeNAS
- Raspberry Pi
For each of those, a detailed install guide is available along with a ready-to-deploy app. Besides supporting these platforms, they also have a VMWare and a Nutanix AHV virtual appliance that you can download.
When it comes to storage, you only have one option for backing up Microsoft 365 data—and that is directly attached or locally mounted storage. If you are also going to back up other data with Nakivo, then there are more options, including Amazon S3 and Wasabi.
Because you are running Nakivo in your own environment with your own repository, you have full control over the schedule and amount of restore points that you want to keep. Nakvio supports up to 4,000 recovery points for Microsoft Office 365 backups.
Director and Transporter
In Nakivo you have one Director and you can have multiple Transporters. The Director is the central management instance. It provides the user interface and manages the inventories and backup jobs.
The transporter is the component that runs the actual backup job, recovery, data compression, etc. Using multiple transporters is interesting if you have multiple sites that you want to back up. For Office 365 you can just use the on-board transporter installed by default.
What parts of Microsoft Office 365 can Nakivo backup
Microsoft adds new features and apps every year to Office 365, so it’s good to know what Nakivo can back up. The backbone of Microsoft 365 is SharePoint and Exchange (even OneDrive is just personal SharePoint sites, actually). For example, apps like List are basically a SharePoint list with another look and feel.
Nakivo can back up the most essential, business-critical data of Microsoft 365, which is SharePoint Online, OneDrive for Business, and Exchange Online. With these three items, you have covered all your critical data in Microsoft Office 365.
Getting started with Nakivo
To get started with Nakivo you first will need to choose where you want to install it. If you are planning on using a network attached storage (NAS) to run Nakivo on, then make sure you first check that the model is supported first and what the requirements are.
Setting up Nakivo is a little more work compared to the full SaaS backup solutions, but in return, you get more options when it comes to scheduling your backups and restore points.
Installing Nakivo
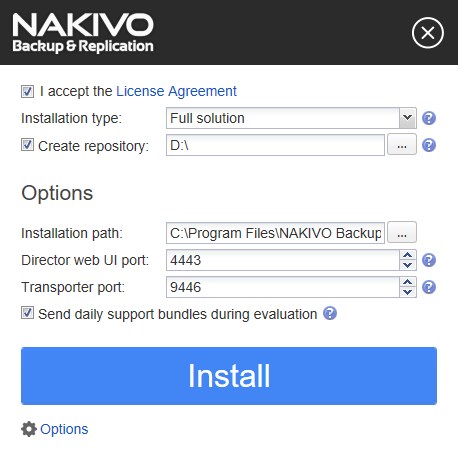
The first step is to download and install Nakivo. During the installation, you can create a local repository if you want. The application is web-based, so you can change the web UI port if that is necessary.
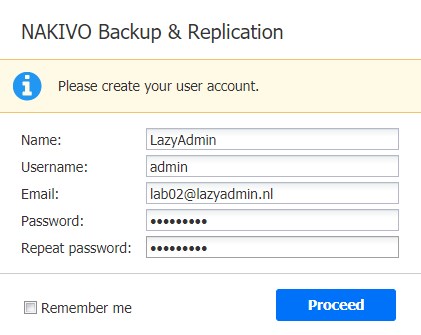
The next step is to create a local user account. Later on you can create additional accounts, custom roles and even integrate Nakivo with your local Active Directory.
Basic configuration
Before we can start with making backups of our Office 365 data, we first need to configure a couple of basic settings, like bandwidth throttling, branding, and email notifications.
Bandwidth throttling allows you to create different rules based on a schedule. This way you can assign more bandwidth after work hours to Nakivo and limit it during work hours. You can create one global rule for all jobs or assign a bandwidth rule to a specific job.
We also need to configure an SMTP server for the email notifications before we can start with setting up the backup.
All this is perfectly documented here in the user guide of Nakivo.
Creating a SaaS Repository
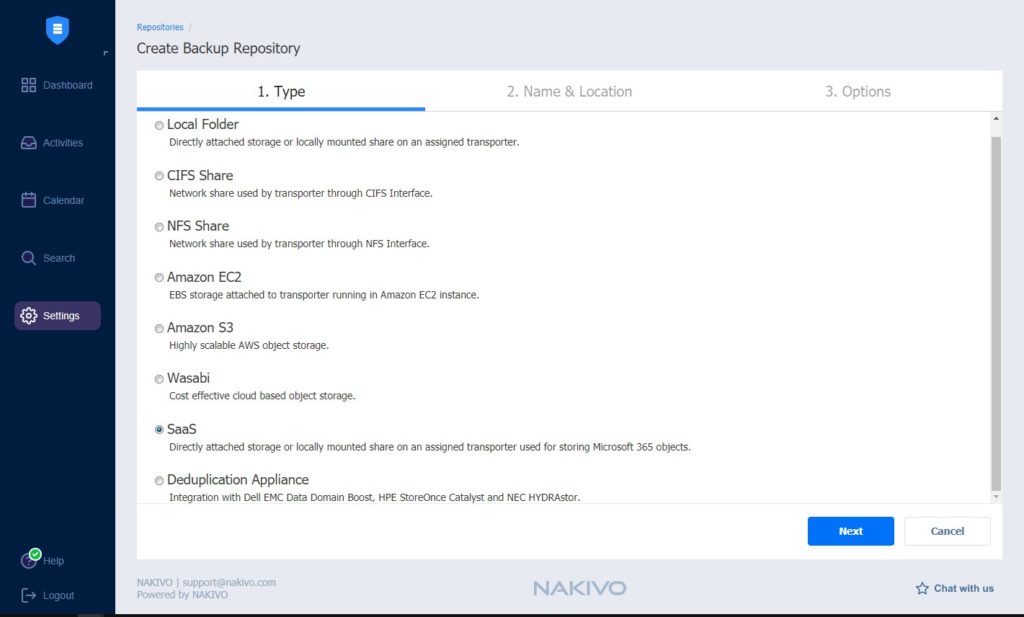
During the installation, we already had the option to create a local repository. But to back up Microsoft Office 365, we need an SaaS repository that can be used to store Microsoft 365 Objects. This repository must be a locally attached or mapped storage device.
Adding your Microsoft Office 365 Tenant
Nakivo needs to have access to your tenant to back up and restore your data. To do this we need to register a new application in the Azure Active Directory. All the steps are described here in the user manual.
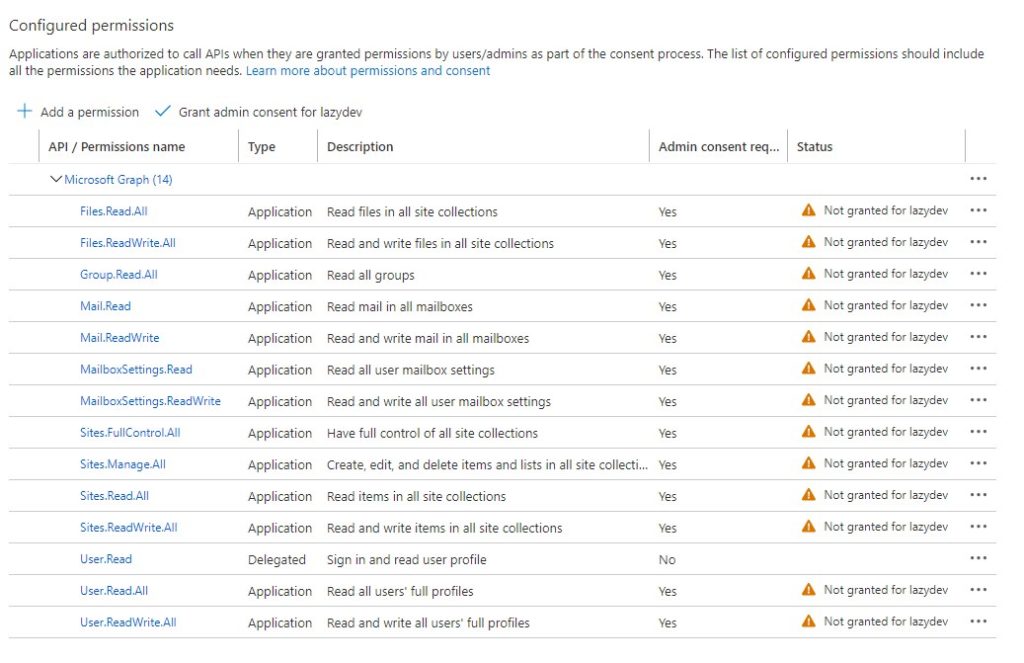
Make sure you add all the API permissions, which you can find under Microsoft Graph -> Application Permissions. Use the search function in the permission screen to quickly find the correct permissions.
After you have granted the permissions, you can add the Microsoft 365 account to the inventory in Nakivo.
- Select Settings -> Inventory
- Add new and choose Microsoft 365 account
- Fill in all the details. You can find the Tenant ID in the Azure portal.
It can take a couple of minutes for Nakivo to discover all the resources in your tenant.
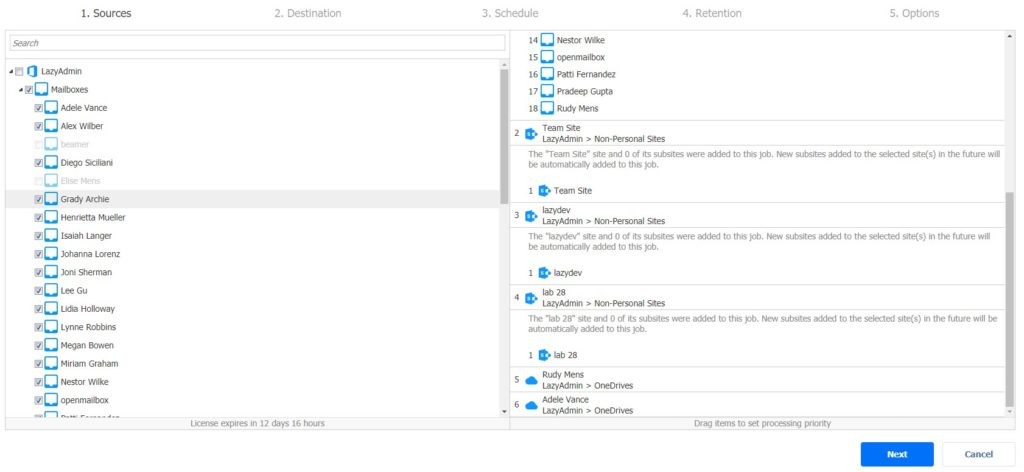
The last step is to create the actual backup job. In Nakivo, go back to the dashboard and click on Create and choose Microsoft 365 backup job. You can select everything in your Office 365 tenant, or create separate backup jobs for only your mailboxes, for example.
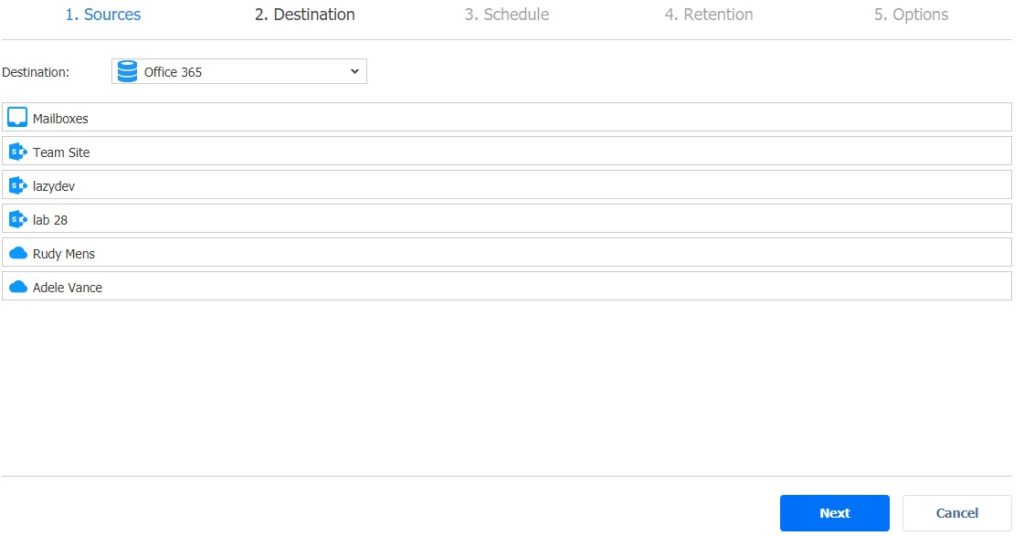
For the destination, we can choose the SaaS repository that we have created earlier.
The last step of the backup job is the schedule and retention. Here we see the advantage of using a backup application that runs in your own environment.
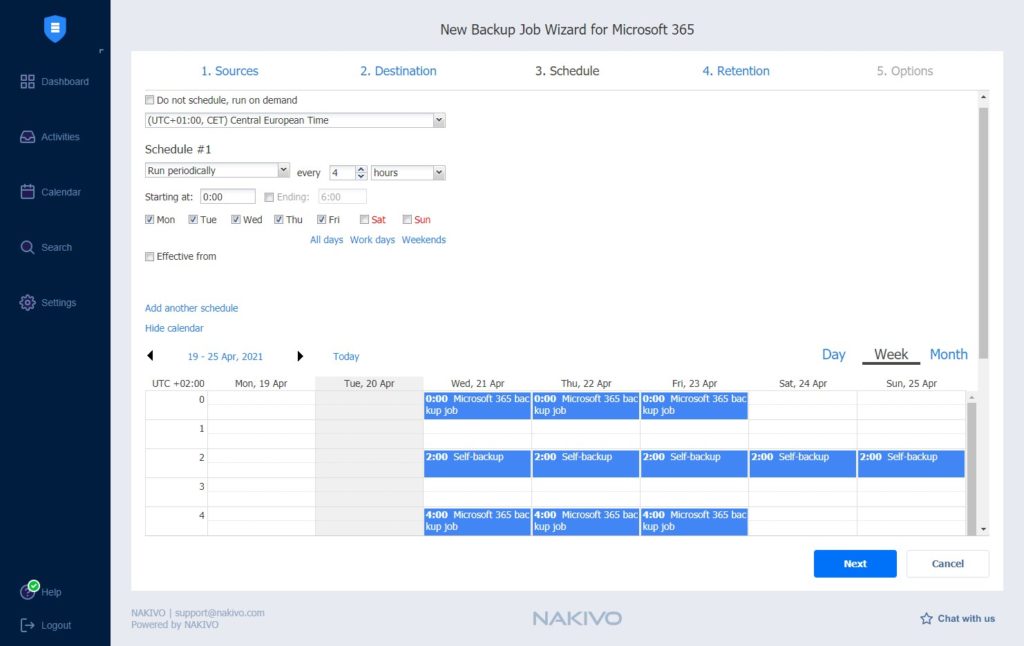
You can add multiple schedules to the job and run it as often as you want. For example, you can create a backup every 4 hours or only once a day. You only need to keep in mind the amount of time that is needed to create the backup.
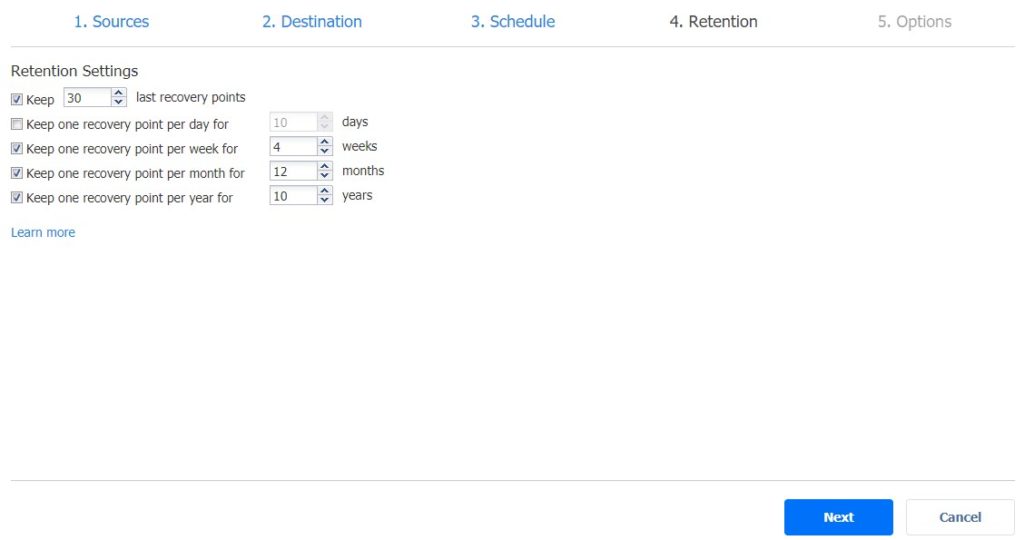
Also, the retention policy can be tailored fit to your needs. Each recovery point allows you to revert to a particular moment in time and recover individual objects from the backup.
Monitoring your backups
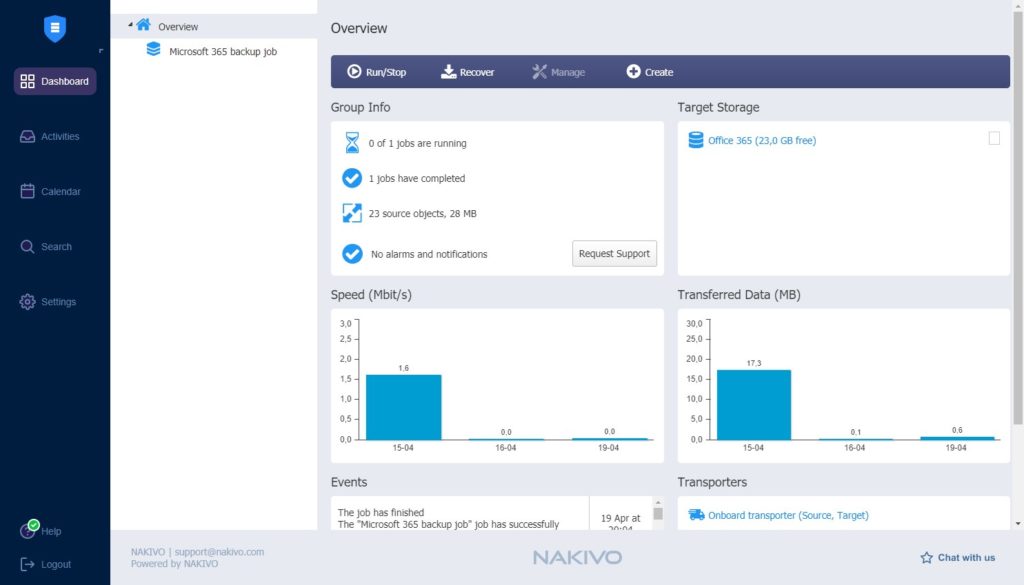
Monitoring your backup jobs is always important—they are, after all, your safeguard if something goes wrong. The dashboard in Nakivo gives you a clear overview of all your backups jobs. A warning is displayed when something is wrong with one of the backup jobs, and the option is given to contact support.
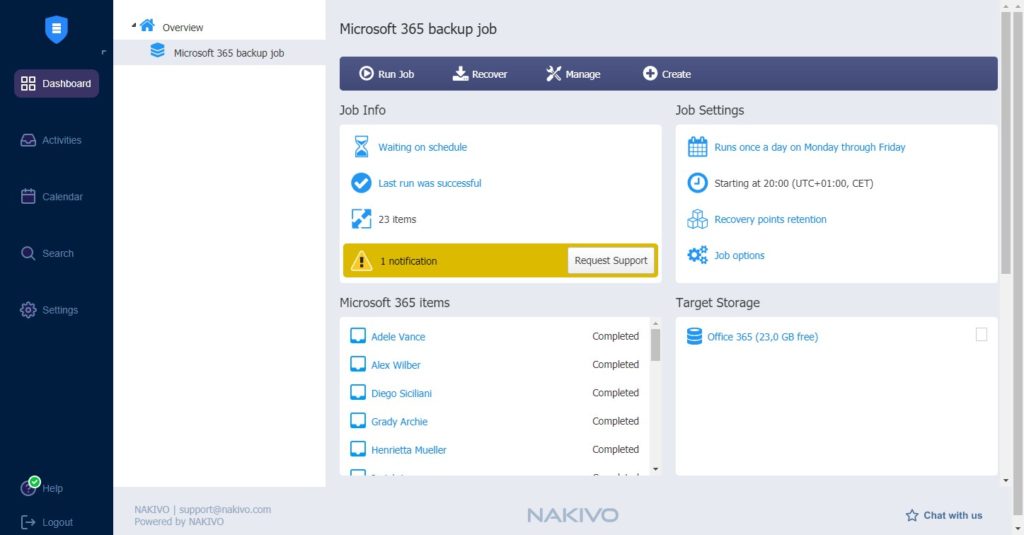
The dashboard also shows how much storage space is left, the backup speed, and how much data are backed up. You can zoom in on each element to get more information about that particular object.

Alerts
You don’t want to log in every day to check the backup status. Just as with any other backup solution, you can set up email alerts. You can get a job log after each job, which is probably a bit too much, but a better option is to send an overview and protection coverage once a week. Of course, you will also receive a notification when there is a warning or error.
The dashboard combined with the overview and protection coverage report gives you all the information you need to monitor your backup jobs.
Restoring Items
Naturally, the most important feature of a backup solution is restoring items. In Nakivo you can only restore Microsoft Office 365 objects back to Office 365. You can choose between the original location or a different SharePoint/Mailbox.
Restoring mailbox items work as you would expect: you can restore items based on the backup job or just search in the repository. After you have selected a recovery point from which you want to restore, you get an overview of the mailbox.
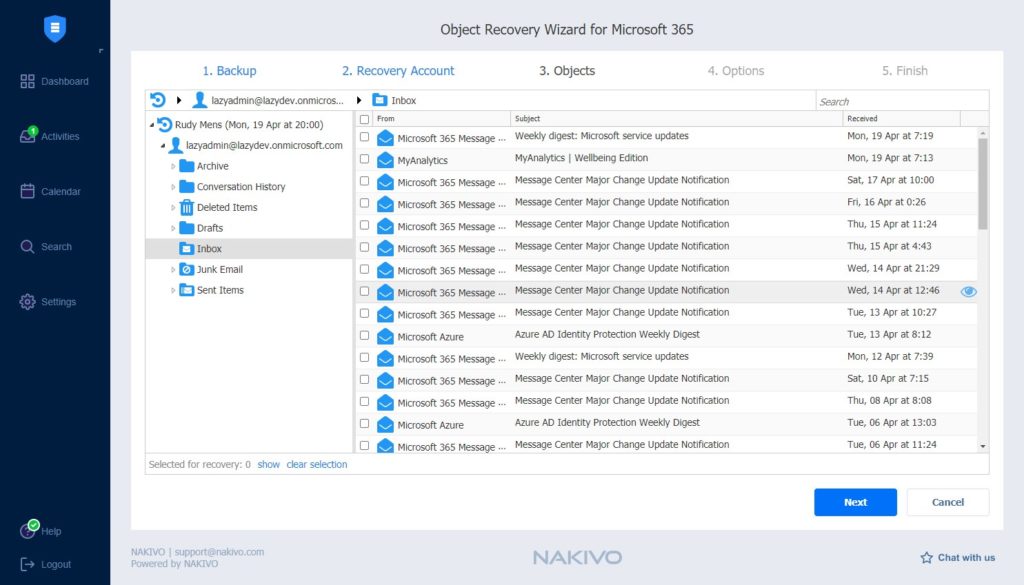
You can search through the mail, browse, and even preview the mail item before you restore it. After you have found the items that you want to restore, you can select the individual items and recover them to the original location or a different mailbox.
With the latest version, 10.3, you can also back up and recover Exchange Online contacts and calendar items, which is a great addition.
Recovering SharePoint items
There is still some room for improvement when it comes to recovering SharePoint items. After you have selected the recovery point from which you want to restore, you can browse through the SharePoint site and even search for individual files.
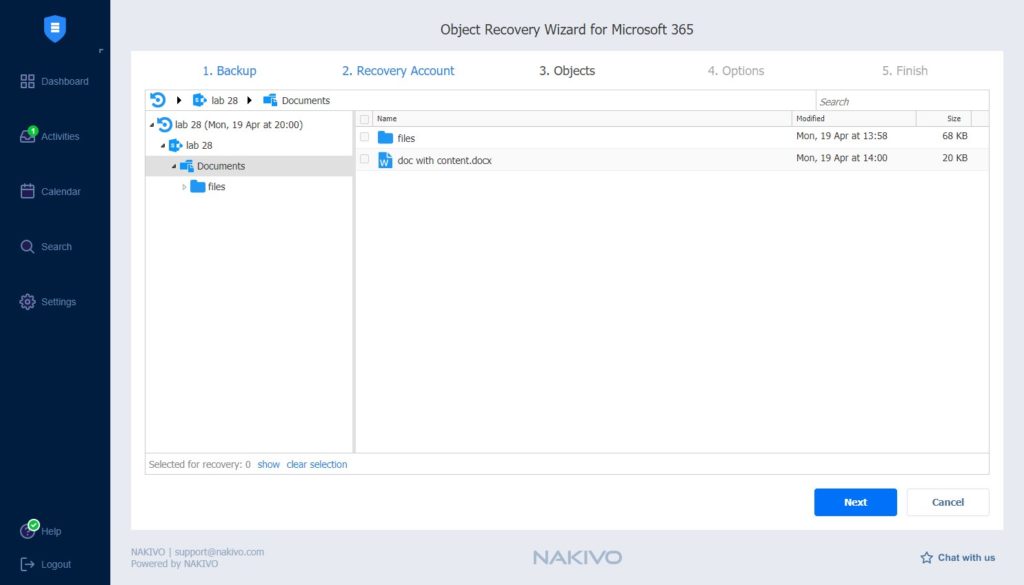
But what you can’t do is restore only a single file or folder. At this writing, you can only recover a document library or list from SharePoint. And that surprised me because you can recover a single file from the OneDrive backups.
OneDrives are basically personal SharePoint sites, so technically it should be possible. I have talked with Nakivo about this and they are currently working on full site recovery and granular recovery of document library and list items. It’s planned to be released in the near future.
You can recover to the original location and skip the items that exist, but that is not a viable option in every situation. A workaround would be to restore the document library to a different SharePoint site and move the files that you need to the original location.
Licensing
Nakivo requires a minimum of 10 licenses, and it goes up in steps of 10. So if you have 17 users, you will need to buy 20 licenses. The price is only $10 per user per year with a one-year subscription. The more users you have, the lower the price per user will be.
Keep in mind that this is without storage. So you will need to have your own storage solution available for backup Office 365 with Nakivo.
Wrapping Up
Setting up Nakivo is a bit more work compared to other Microsoft 365 backup solutions, but it’s well documented and you have to configured it only once. The advantage of running the backup solution in your own environment is that you are fully in control when it comes to the backup schedule, number of restore points, and retention time.
There is some room for improvement when it comes to recovering SharePoint items. It would really useful if you could recover only a single item.
If you have a mixed environment, with (virtual) servers and Microsoft Office 365 then Nakivo is really a powerful all-in-one solution to back up and protect all your business-critical data.
