SharePoint Online comes with default permissions that we can choose from for the site’s owners, members, and visitors. In most cases, these permissions are more than enough, but sometimes you need to create a custom permission level in SharePoint.
For example, when you want to give users read, create, and edit permissions, but not delete. In these kinds of situations, we can create custom permission levels in SharePoint Online. The custom permission can then be applied to a specific document library and assigned to a group or person.
In this article
Let’s take a look at how to create custom permission in SharePoint. We are going to allow users to create and edit but not delete files and folders.
Creating a Custom Permission Level
The first step is to create a custom permission level in SharePoint. It’s possible to edit existing permissions levels, but better is to create a new permission level. This way it’s clear to everyone that the permission is different from the default ones, and makes it easier to manage them. Also good to know is that custom permissions are created per SharePoint site.
- Open the SharePoint site
- Click on the gear icon (settings)
- Open the Site permissions
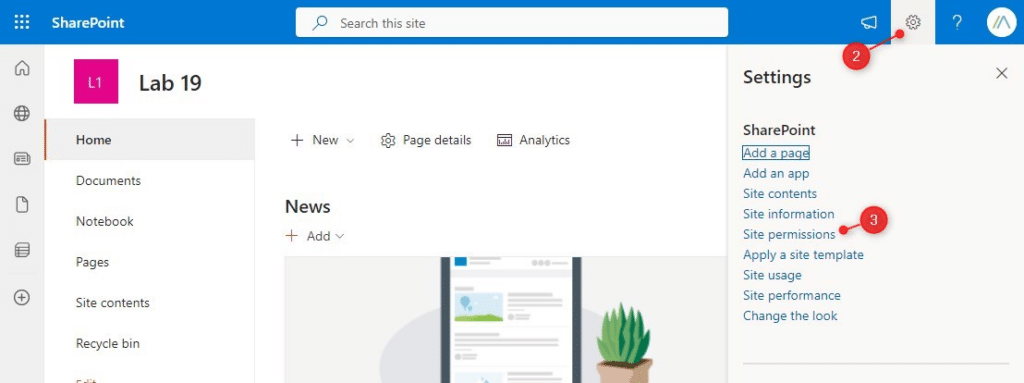
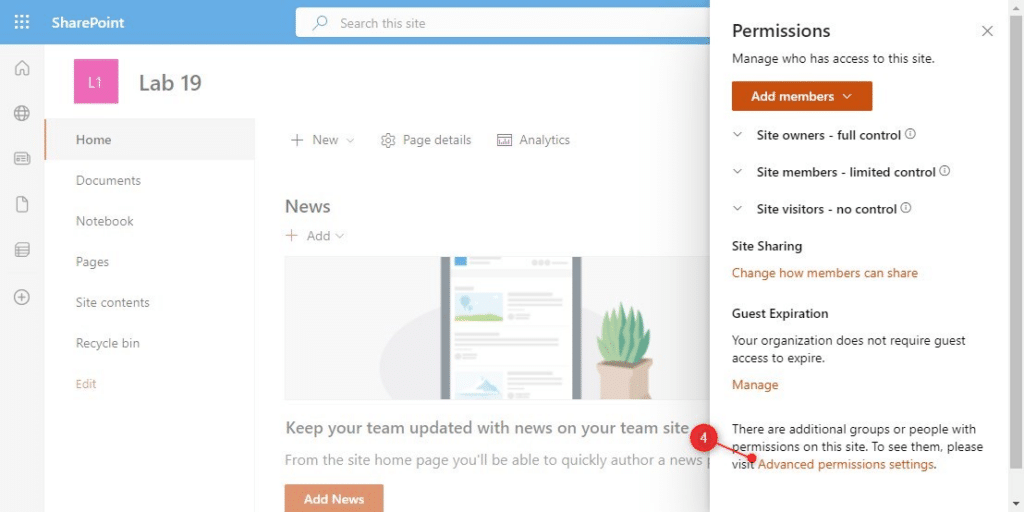
- Choose Advanced permissions settings
- Open the Permissions levels
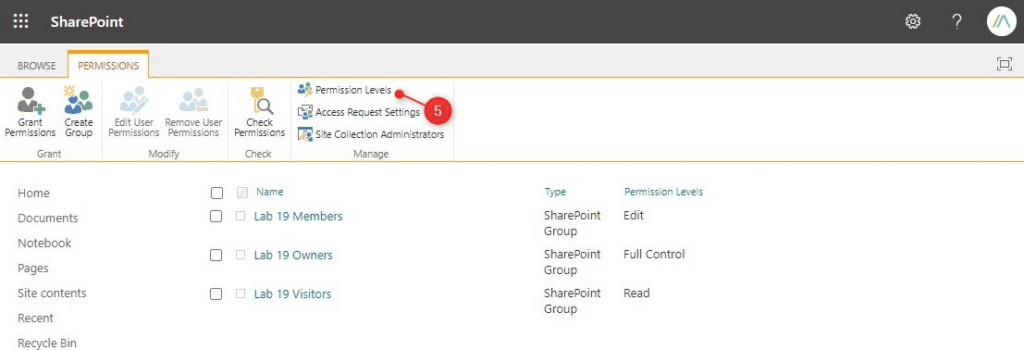
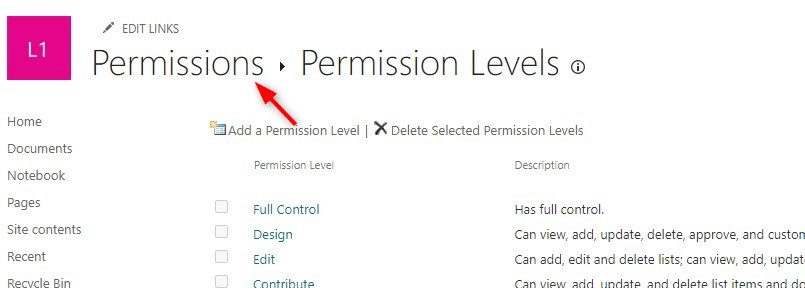
You will now see all default permission levels that are available on the SharePoint site. We can create custom permission from scratch, but it is easier to copy an existing permission level and modify it. This way you can’t forget permissions that are at least required. So for the next step, choose a level that matches most with the custom permission that you want to create.
- Open one of the existing levels (that match most with the one you want to create), for our example we choose Contribute
- Scroll all the way down and click on Copy Permission Level
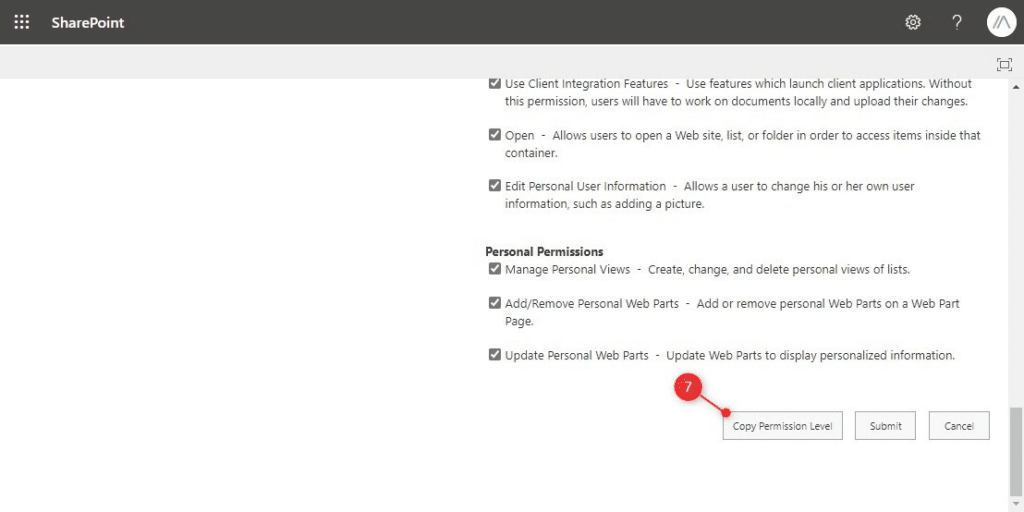
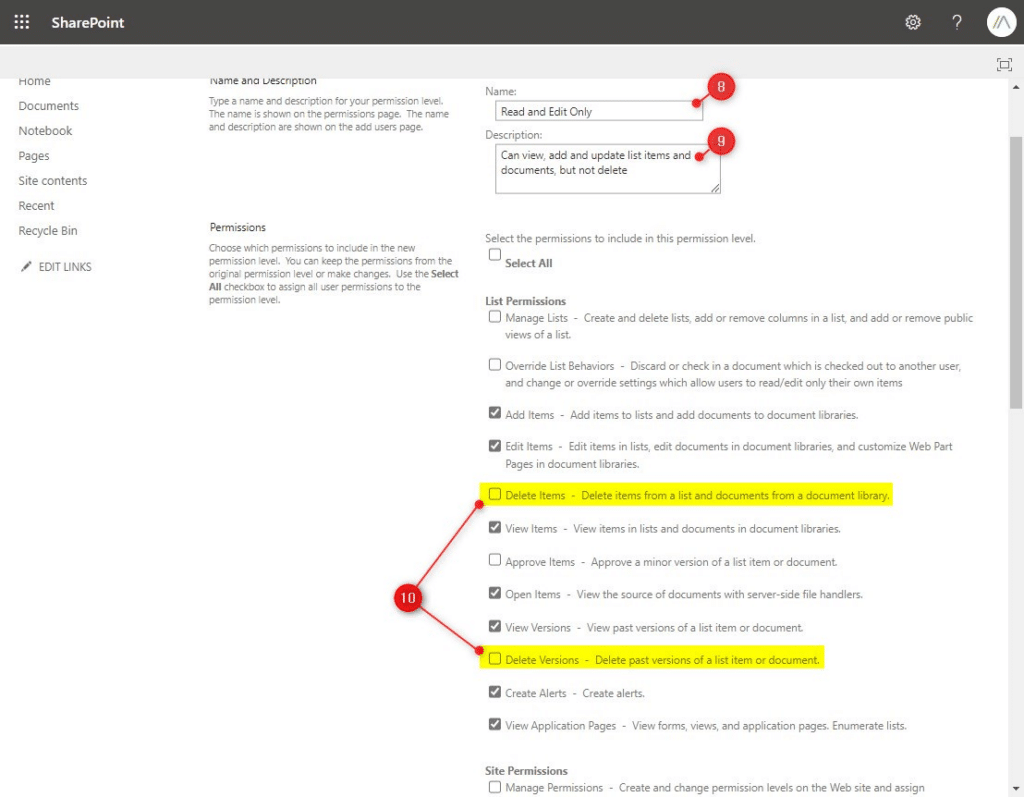
- Give your custom permission level a unique name, for example, Read and Edit only
- Add a description, that describes what the permissions allow
You can now modify the permissions, we are going to create custom permission that allows users to create, edit and view files, but not delete them. So we are going to remove the following permissions:
- Edit the permissions by removing the following:
- Delete Items
- Delete Versions
- Click on Create to save your custom permission level
Tip
Read more about SharePoint Permissions in this complete guide
Assign Custom Permission Level
With the permission created, we can now assign the custom permission in SharePoint Online. If you have the screen with all permissions levels still open, then you can click on Permissions. Otherwise, go back to the Advanced permissions settings (see for the steps in the previous chapter).
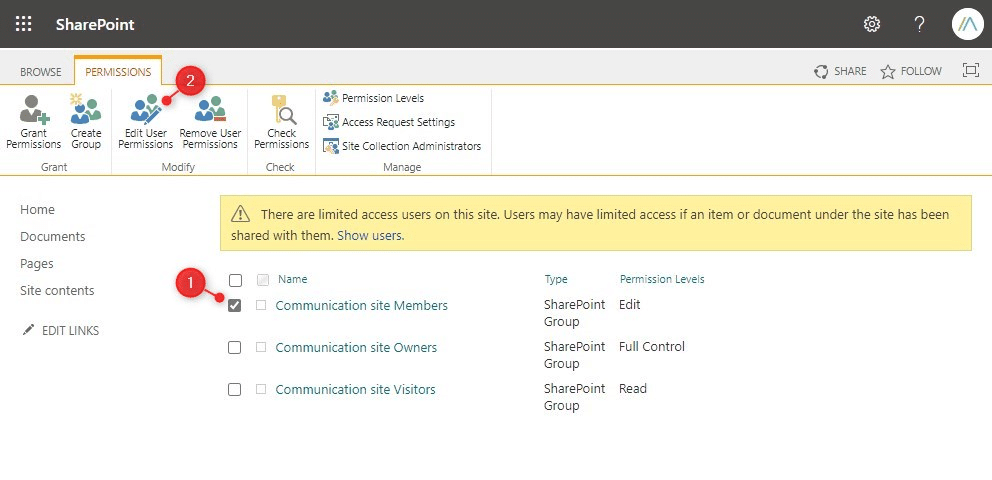
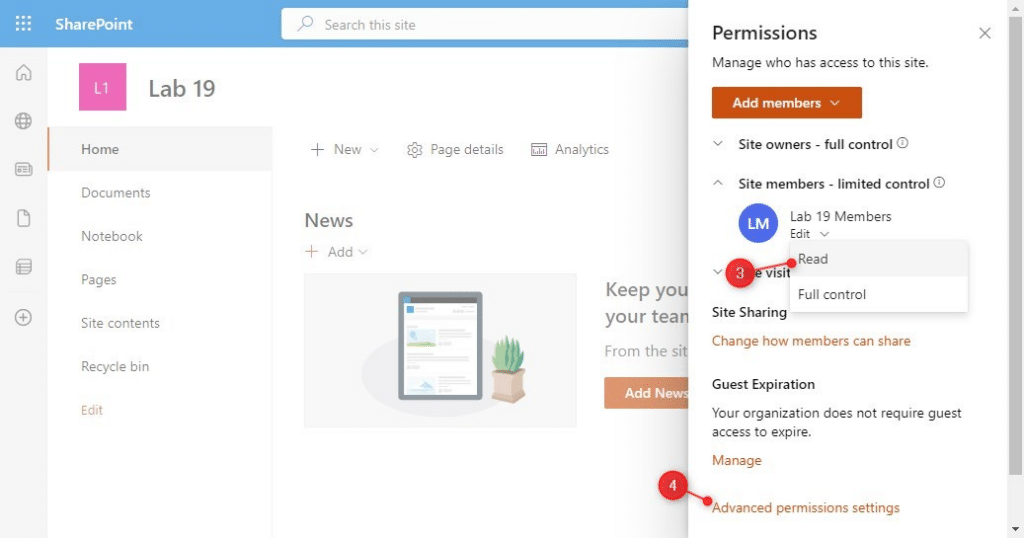
In the SharePoint permissions view, you will see the three default groups, Members, Owners, and visitors. Each group has a permission level assigned to it. We can change the permission level of the groups to our custom permission level.
Note
In modern team sites (SharePoint sites connected to a Microsoft 365 Group), the edit user permission button is greyed out. I will explain how to edit these further down in the article!
- Select the group that you want to edit, for example, the site Members
- Click on Edit User Permissions
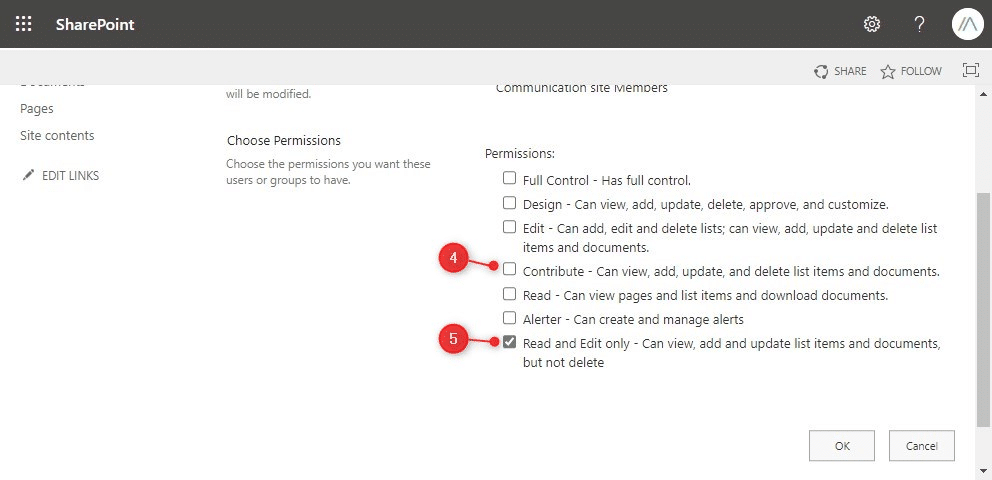
- Remove the assigned permission
- Select the permissions level that we just created
- Click on Ok
Assign Custom Permission Level to Modern Sites
The greyed-out Edit user permissions button is quite annoying, but it’s for a good reason. Changing permissions of default groups in Modern SharePoint sites can result in Teams not working properly anymore for the Teams group. So be careful when changing default groups in modern sites. A better option is to create a new group and grant the custom permission.
But we can edit the permission of the default groups. For this, we are going to change the permission level first to Read-only for the member. Next, we will assign our custom level to the same group. Our custom permission level grants more permissions than the read-only, allowing it to win from the read-only permission.
- Go back to the SharePoint site and click on Setting (gear icon) in the top-right corner
- Choose Site Permissions
- Change the permissions from the Site members to Read
- Open the Advanced permissions settings
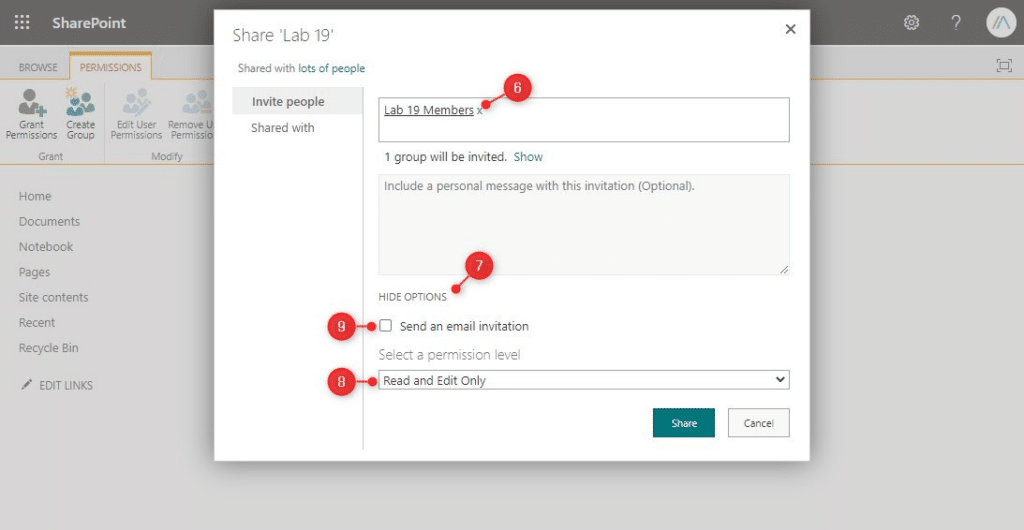
- Click on Grant Permissions
- Search for members, by typing the <site name> members
- Click on Show Advanced Options
- Select our custom permissions level
- uncheck Send an email invitation and click on Share
Instead of modifying the site’s members group, you can also use the method above to grant permissions to individual users or a custom group. Keep in mind though that the highest permission level always wins. So if a user is already a member of the SharePoint site, then you can’t limit their permissions with a custom group.
You will then first need to remove the users from the site members and then assign the custom permission level to the user.
Wrapping Up
Custom permission levels in SharePoint allow you to fully customize and tailor the permission to your needs. Keep in mind that the highest permission level always wins. Make sure that you also check out the complete guide on SharePoint permissions.
I hope you found this article helpful, if you have any questions, just drop a comment below.


Hey Ruud,
can you help me with Custom Fonts import in SharePoint Online (PowerPoint).
I think this is a great idea for your next article.
Best regards,
Max