The Microsoft Graph API allows us to interact with all Microsoft services through a single source. To do this from PowerShell, we always had to install different modules and make different connections. This is no longer necessary with the Microsoft Graph SDK Module for PowerShell.
We could already use the Graph API with the help of Invoke-Webrequests calls, but that was not really easy to work with. The new Microsoft Graph Module comes with a lot of cmdlets to make interacting with the services a lot easier.
In this article
In this article, I will explain how to install the Microsoft Graph Module and how to connect to it using different permissions.
Microsoft Graph PowerShell SDK
The Graph module is actually called the Microsoft Graph PowerShell SDK and is a wrapper for all Microsoft Graph APIs. At the moment it only seems to replace the Azure AD module. The other modules that we use to interact with Microsoft 365 don’t seem to be replaced by it at the moment.
On June 30, 2022, the Azure AD Graph endpoint will be deprecated. This means that calls made with the Azure AD Module won’t get a response anymore. So it’s important to rewrite all your scripts that use the Azure AD Module to the Microsoft Graph module.
As mentioned, the Microsoft Graph PowerShell SDK allows us to interact with all APIs from Microsoft. This means that we could also use the module to interact with SharePoint, Exchange Online, Compliance, etc.
Another advantage of the module is that it supports PowerShell 7 and above. The Azure AD Module, for example, doesn’t work on PowerShell 7.
Installing the Microsoft Graph Module in PowerShell
The Microsoft Graph SDK Module exists, at the moment, out of 38 modules. We can install them all at once, but you might want to consider installing only the modules that you really need.
Note
Make sure that you install atleast the Microsoft.Graph.Authentication module when installing individual modules
You can view all available modules with the following command:
Find-Module Microsoft.Graph*
We are going to install the Microsoft Graph module only for the current user. It’s also possible to install it for all users, but then you will need to open PowerShell with elevated permissions.
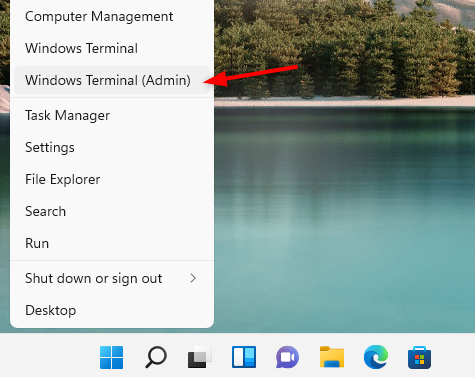
- Open PowerShell or Windows Terminal
– Right-click on Start or press Windows Key + X
– Select Windows PowerShell or Windows Terminal (on Win 11)
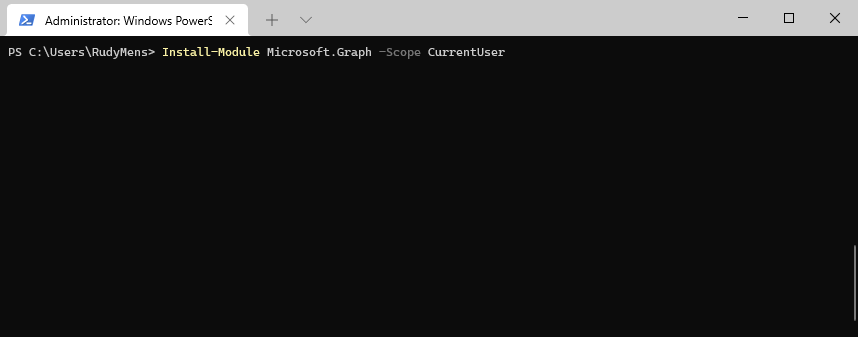
- Install the SDK
Enter the following command in PowerShell to install the module:Install-Module Microsoft.Graph -Scope CurrentUser
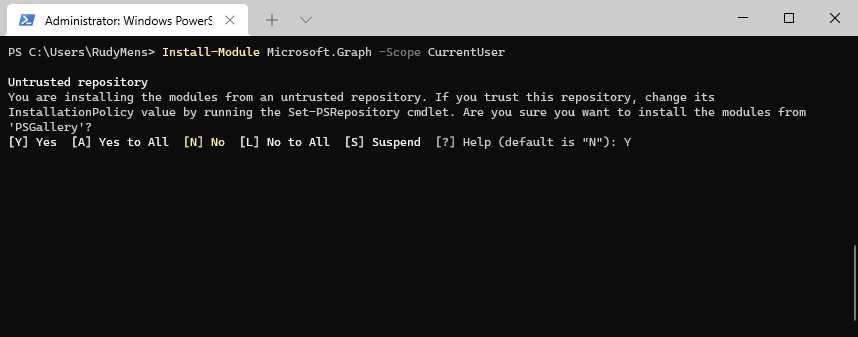
- Accept the Untrusted Repository
Type Y to install from the Untrusted Repository
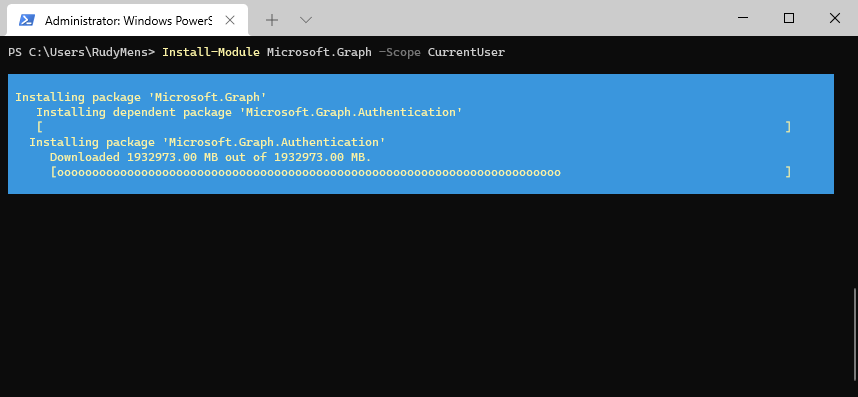
- Wait for the installation to finish
When installing all modules it can take a couple of minutes before the installation is completed
If you want to use the beta version as well, then you will need to install the beta modules separately:
Install-Module Microsoft.Graph.Beta -Scope CurrentUser
Connecting to Microsoft Graph from PowerShell
There are two things important when connecting to Microsoft Graph, you will need to define the scope and there is a beta version of MgGraph. By default, the module will use the stable version of the API. But new features are first released in the beta versions of the cmdlets.
The other important step is that you will need to specify the scopes that you want to use. MgGraph offers access to all APIs from Microsoft. So when you want for example to export or view the Azure AD users, you only need to have User.Read.All permission.
Finding Microsoft Graph Scopes
Finding the right scope can be a bit challenging at the beginning. But there are some options that you can use to determine which scopes you will need to specify:
- Microsoft Graph Explorer
- Microsoft Graph Rest API Reference
- Find-MgGraphPermission cmdlet
The Microsoft Graph Explorer is a great tool to test out API calls to Microsoft Graph. It comes with a lot of example calls to help you get started. But it will also list the required permission for the call.
- Open the Graph Explorer
- Select a Sample Query on the left side
- Click Modify Permissions tab
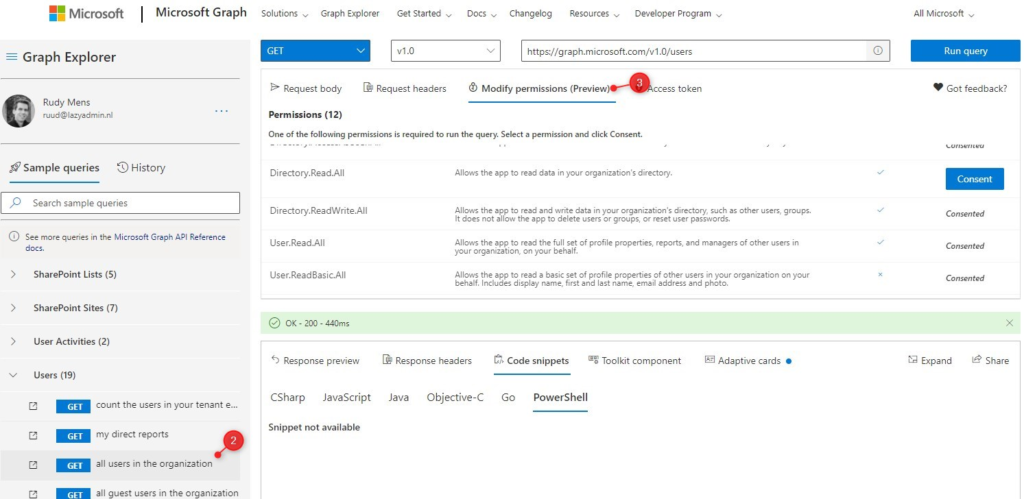
You will need to at at least one of the scopes mentioned in the Permission tab when connecting to MS Graph in PowerShell.
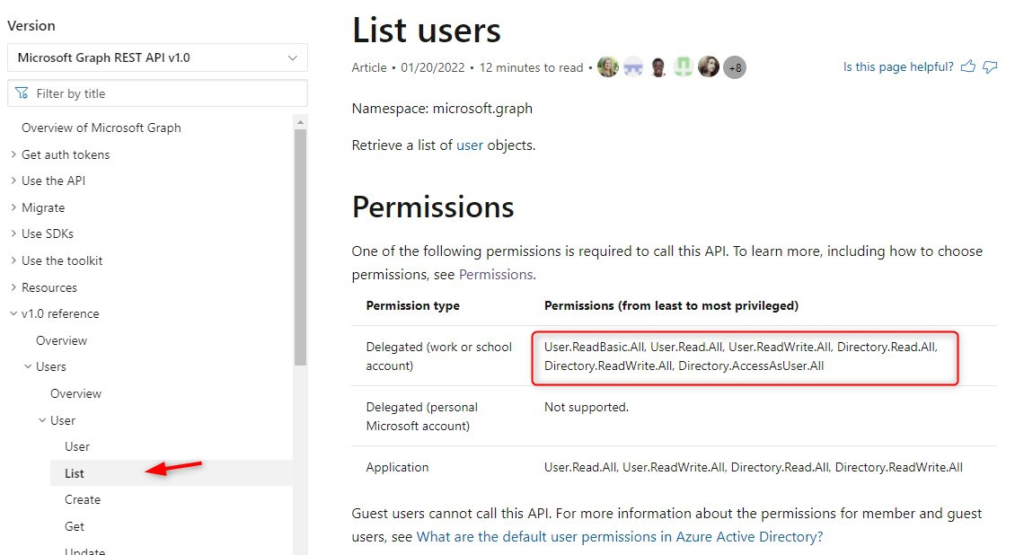
The other option is to use the Rest API Reference. You can select in the left menu one of the entities that you want to work with and then view the required permissions. You don’t need to add all scopes, they are listed from least to most privileged.
The last option is to use the Find-MgGraphPermission or Find-MgGraphCommand cmdlets. Both cmdlets will allow you to look for the required permission for a particular MgGraph cmdlet:
Find-MgGraphCommand -Command "Get-MgUserAuthenticationMethod" | select -ExpandProperty Permissions | Select -Unique name

# Or
Find-MgGraphPermission AuthenticationMethod
Connecting to MgGraph in PowerShell
If you know which scopes you need to use, you can connect to Microsoft Graph. We will be using the normal interactive method, which is great when working locally. But when you want to schedule scripts or use Microsoft Graph inside an Azure Runbook, then you will need to use one of the other authentication options.
Connect to Microsoft Graph with for example the User.Read.All and Group.ReadWrite.All scopes:
Connect-MgGraph -Scopes "User.Read.All","Group.ReadWrite.All"
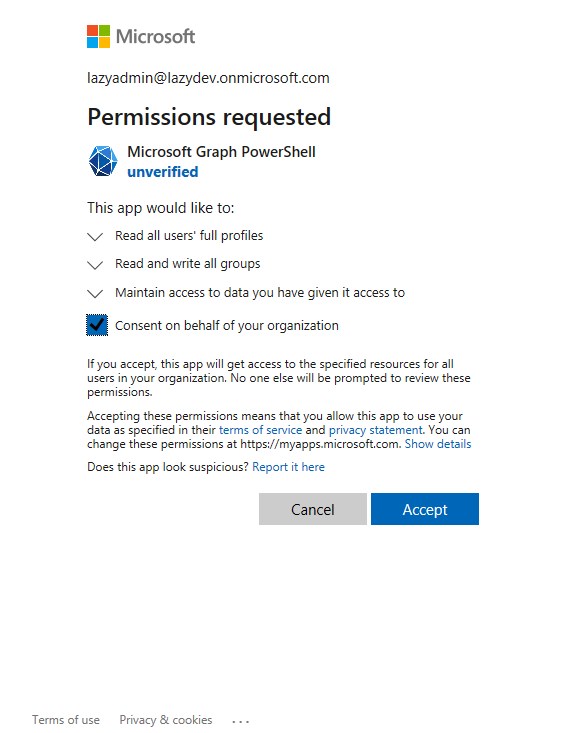
You will need to authenticate and grant permission. Some scopes require to grant permission on behalf of your organization.
You can now use the Graph API. When you are working with Graph in PowerShell you can add additional scopes to your session by simply using the Connect-MsGraph command again with the new permissions.
If you want to use the beta cmdlet, simply add the beta prefix before the resource name of the cmdlet. For example, to use the beta cmdlet of Get-MgUser, you can use Get-MgBetaUser.
Update Microsoft Graph Module
The Microsoft Graph module is still being developed with new features added regularly. So it’s important to keep your module up to date, so you can use the latest Graph cmdlets in your PowerShell scripts.
To update the module, we can use the Update-Module cmdlet in PowerShell, followed by the module name:
Update-Module Microsoft.Graph
Wrapping Up
It can be a bit challenging to find the correct cmdlets of the Microsoft Graph SDK Module, but it’s great that one module allows us to interact with all Microsoft services. At the moment of writing is the documentation still a bit thin, so it’s a lot of trial and error to write scripts with it.
I hope this article helped you to get started with the MgGraph module. If you have any questions, just drop a comment below.


How to do install Microsoft Graph on an off line server with no access to Internet?
Just wondering, what will be the purpose of using Graph on a server without internet access? The module can pretty much only be used to internetact with Microsft Graph.
What do we do if we need powershell snapins that are apparently no longer supported with PS7 and beyond ? (ie. modules supported but not snapins) We need to use PS for Exchange recipient management once we remove our last Exchange server now that we are O365 for all mailboxes and don’t need it for mail relay.
I’m a noobie that is probably misunderstanding this statement:
“On June 30, 2022, the Azure AD Graph endpoint will be deprecated. This means that calls made with the Azure AD Module won’t get a response anymore. ”
When I use the Azure AD module to do things like get-azureADuser it still works. Was the date postponed? Will scripts containing cmdlets from the Azure AD module break in the near future? Thanks for helping a PS new guy get up to speed!
Yes, Microsoft had postponed it again, I think the new date now is medio 2024…
Thanks! This site is a wonderful resource, thanks for that as well.
I wish Microsoft would, for one time stick, to a given solution long enough to actually finish it. Instead, always one half-baked thing seems to replaced by another in quick succession, never ever arriving at a stable state.
I forgot to click Constant on behalf of your organization. Now I do not have enough permissions. any solutions for this.
You should be able to change the permission in Azure (Microsoft Entra), under Applications > Enterprise applications and then filter on Application Type > Managed Identities
Get-IntuneDevicePrimaryUser -Device
The term “Get-IntuneDevicePrimaryUser” is not recognized as the name of a cmdlet, function, script file, or operable program
I downloaded a PS1 script from GITHUB, All I’m trying to do is “Get” the present “Primary Username”, then “Set” the “Primary Username”.
“Get-IntuneDevicePrimaryUser”
“Set-IntuneDevicePrimaryUser”
I constantly find so many of these wonderfully provided programs, missing the instructions as to which specific Powershell Modules are required to even run them.
Please. What module(s) am I missing.
Respectfully.
Can the AzureAD module coexist with the Microsoft Graph module? Or do I need to rewrite scripts right after installing the MG Mod?
You can use them together on your machine.
Hi there,
So to confirm running this process will replace the connecting to Azure AD process that was used previously? When this process is run it will prompt for the tenant ID and the authenticated user to connect to in order to run the main script that will ultimately pull users from Azure AD.
Sorry for the question but I am home sick and just putting some documentation together to start trying to get permissions sorted out on building a script to do all this.
Just not 100% clear what is going to be needed when this is setup in Powershell to run the first time.
The plan is indeed for MgGraph to replace AzureAD. But the exact date is unknown yet.
Why do you start Windows Terminal as an administrator , while all you do is install Microsoft Graph module in the scope of the current user? That doesn’t make sense to me.
Correct, starting the terminal as an administrator is not needed in this case.