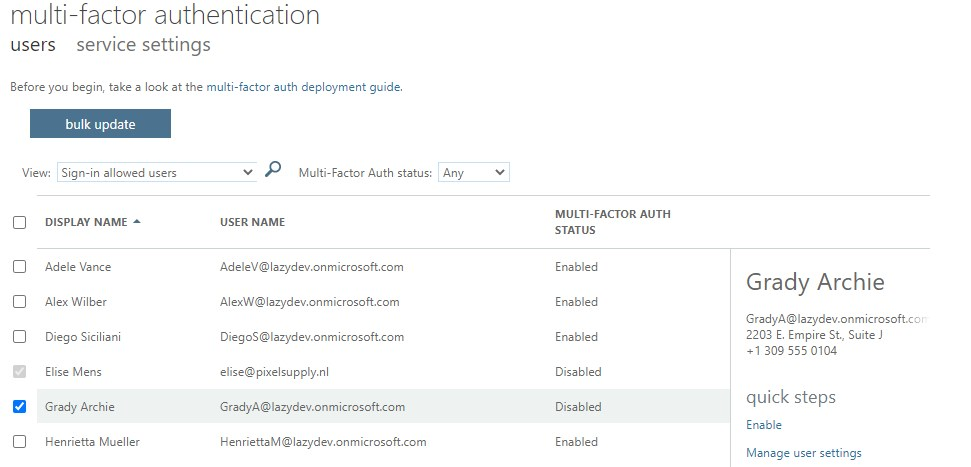
If you don’t have an Azure AD Premium license then you only have two options to enable MFA for your Office 365 users, turn it on for all users with the security defaults or manually for each user in the Admin Center > Active Users > Multi-factor Authentication.
Enabling MFA for each user manually can be a hideous task and is something you will have to do every time you create a new user. With PowerShell, we can easily select a group of users and enable MFA for them.
If you even combine it with the script to find users without MFA enabled you can automate the whole process.
Enable Multi-Factor Authentication for Office 365 Users with PowerShell
Before we start with enabling MFA in Office 365 with PowerShell we need to connect to the Microsoft Online Service:
Connect-MsolService
To enable MFA with PowerShell we first need to create a StrongAuthenticationRequirement object with the required parameters. Next, we can set this object on each user that we want to enable MFA for.
# Create the StrongAuthenticationRequirement Object
$sa = New-Object -TypeName Microsoft.Online.Administration.StrongAuthenticationRequirement
$sa.RelyingParty = "*"
$sa.State = "Enabled"
$sar = @($sa)

# Enable MFA for the user
Set-MsolUser -UserPrincipalName $user -StrongAuthenticationRequirements $sar
I have wrapped this in a function so we can easily pipe this behind another cmdlet (to select the users or based on a CSV file). The function will try to enable MFA for each user and output an object with the users and the status of MFA.
Function Set-MFAforUser {
<#
  .Synopsis
    Enables MFA for an Office 365 User

  .DESCRIPTION
    Enable MFA for a user, you can turn it on for a single user or input a list of users

  .NOTES
    Name: Set-MFAforUser
    Author: R. Mens - LazyAdmin.nl
    Version: 1.0
    DateCreated: jan 2021
    Purpose/Change: Initial script development

  .LINK
    https://lazyadmin.nl

  .EXAMPLE
    Set-MFAforUser -UserPrincipalName johndoe@contoso.com

    Enable MFA for the user John Doe

  .EXAMPLE
	  Import-Csv -Delimiter ";" -Path ("path\to\file\users-to-enable.csv") | Foreach-Object { Set-MFAforUser $_.UserPrincipalName }

    Enable MFA for all users in a CSV file
#>
 [CmdletBinding(DefaultParameterSetName="Default")]
  param(
    [Parameter(
      Mandatory = $true,
      ValueFromPipeline = $true,
      ValueFromPipelineByPropertyName = $true,
      ParameterSetName  = "UserPrincipalName",
      Position = 0
      )]
    # Enter a single UserPrincipalName or a comma separted list of UserPrincipalNames
    [string[]]$UserPrincipalName
	)

Begin {}

Process {
	if ($PSBoundParameters.ContainsKey('UserPrincipalName')) {
		foreach ($user in $UserPrincipalName) {
			try {
		    # Src: https://docs.microsoft.com/en-us/azure/active-directory/authentication/howto-mfa-userstates
		    $sa = New-Object -TypeName Microsoft.Online.Administration.StrongAuthenticationRequirement
		    $sa.RelyingParty = "*"
		    $sa.State = "Enabled"
		    $sar = @($sa)

		    # Change the following UserPrincipalName to the user you wish to change state
		    Set-MsolUser -UserPrincipalName $user -StrongAuthenticationRequirements $sar -ErrorAction Stop

		    [PSCustomObject]@{
			    UserPrincipalName = $user
			    MFAEnabled        = $true
		    }
	    }
	    catch {
		    [PSCustomObject]@{
			    UserPrincipalName = $user
			    MFAEnabled        = $false
		    }
	    }
	 }
	}else{
		Write-Verbose "No UserPrincipalName given"
	}
  }
}
You can also find the complete script here on my GitHub.
Excluding users
If you need to exclude users or accounts from the script then you can add the following part to it:
# Create a list of excluded accounts
$exclusions = @("archive@lazyadmin.nl",
                "info@lazyadmin.onmicrosoft.com")

# Replace the following line (160 in the complete script above)
$MsolUsers = Get-MsolUser -EnabledFilter EnabledOnly -MaxResults $MaxResults | Where-Object {$_.IsLicensed -eq $isLicensed} | Sort-Object UserPrincipalName

# With this
$MsolUsers = Get-MsolUser -EnabledFilter EnabledOnly -MaxResults $MaxResults |
            Where-Object {$_.IsLicensed -eq $true -and $_.UserPrincipalName -notin $exclusions -and !$_.StrongAuthenticationMethods -and !$_.StrongAuthenticationRequirements} |
            Sort-Object UserPrincipalName
Wrapping up
Turning MFA on is really important when it comes to securing your environment. Security defaults are a great solution for smaller tenants, but it doesn’t work when you have system accounts for example. By using PowerShell and a scheduled task you can still automate the MFA in Office 365, keeping your accounts safe.
If you have any questions, just drop a comment below.


This is great. Is there a way to have the admin’s email auto populated in the mfa window that pops up when running connect-msolservice or connect-azuread?
No, not with msol or azuread unfortunately
This method appears to have stopped working in the last week It returns an error: Cannot convert value “System.Object[]” to type “System.Management.Automation.SwitchParameter”. Boolean parameters accept only Boolean values and numbers, such as $True, $False, 1 or 0. At line:3 char:1 + $sar = @($sa) Any ideas what’s happened?
Just tested the code again (using it on a weekly basis here though), but seems to run fine. Which version of PowerShell are you using?
Couple of questions. Can you target MFAEnforced? I have users that have MFAEnabled but have not set factors.
OK so I used your other script to export the users to a CSV but it has a bunch of columns so if I target it for this script I get errors because all it wants is UPN. How can I fix that?
Finally do you know anyway to exclude users? ie “On-Premises Directory Synchronization Service Account” I do not want MFA turned on. Thanks
Have you taken a look at this script? You can use the StrongAuthenticationRequirements property of the MsolUser cmdlet.
You should be able to use the following code to process the CSV file. Make sure that the excel has headers with one of them being UserPrincipalName
Import-Csv -Delimiter ";" -Path ("path\to\file\users-to-enable.csv") | Foreach-Object { Set-MFAforUser $_.UserPrincipalName }I have updated the Get MFAStatus article with an example to exclude addresses.