When running PowerShell scripts automatically you will need a way to log any errors or warnings that occur. One option is to create your own log function, but there is an easier way, the Start-Transcript cmdlet.
The Start-Transcript cmdlet writes everything that happens during a session to a log file. These are the commands that you enter in a PowerShell session and all output that normally appears in the console. You can use this during your normal PowerShell session, but it’s more useful for creating log files.
In this article, we are going to take a look at how to use the Start-Transcript cmdlet.
Using Start-Transcript in PowerShell
The Start-Transcript cmdlet in PowerShell is pretty straightforward to use. It only comes with a couple of parameters and by default, you don’t even have to specify a file path.
| Parameter | Description |
|---|---|
| -Path | Location of the transcript (log) file |
| -Append | Append content to an existing file |
| -Force | Overwrite files with Read-only flag |
| -NoClobber | Prevent overwriting of existing files |
| -IncludeInvocationHeader | Add the timestamp to a command in the log file |
| -UseMinimalHeader | Prepend a short header instead of the full header (PS6+) |
| -OutputDirectory | Specify the output directory (filename will be created automatically) |
There are two ways to use the Start-Transcript cmdlet in PowerShell. You can either start the transcript in your PowerShell session or include it in your script.
Without any parameters, the transcript will be saved in the user’s documents folder. The filename will automatically be generated and consists of the device name, random characters followed by a timestamp.
c:\users\name\documents\PowerShell_transcript.DEVICENAME.qp9EOTN2.20220301132612.txt
The random characters ensure that the filename is unique when two PowerShell sessions are started simultaneously.
To start the transcript we can simply use the cmdlet Start-Transcript. Then after we have executed the scripts that we want to run, we can stop the transcript with Stop-Transcript.
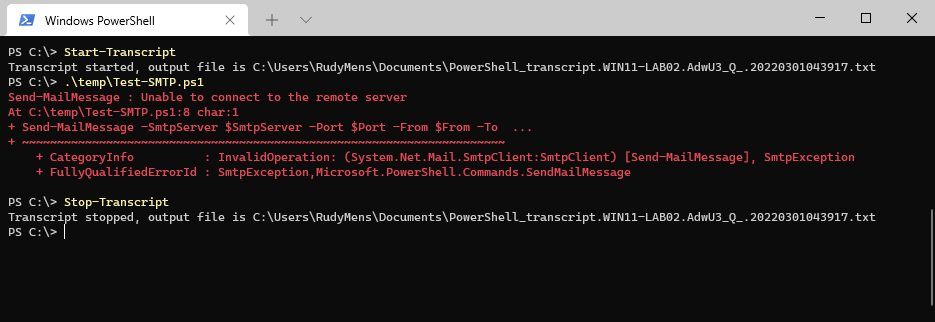
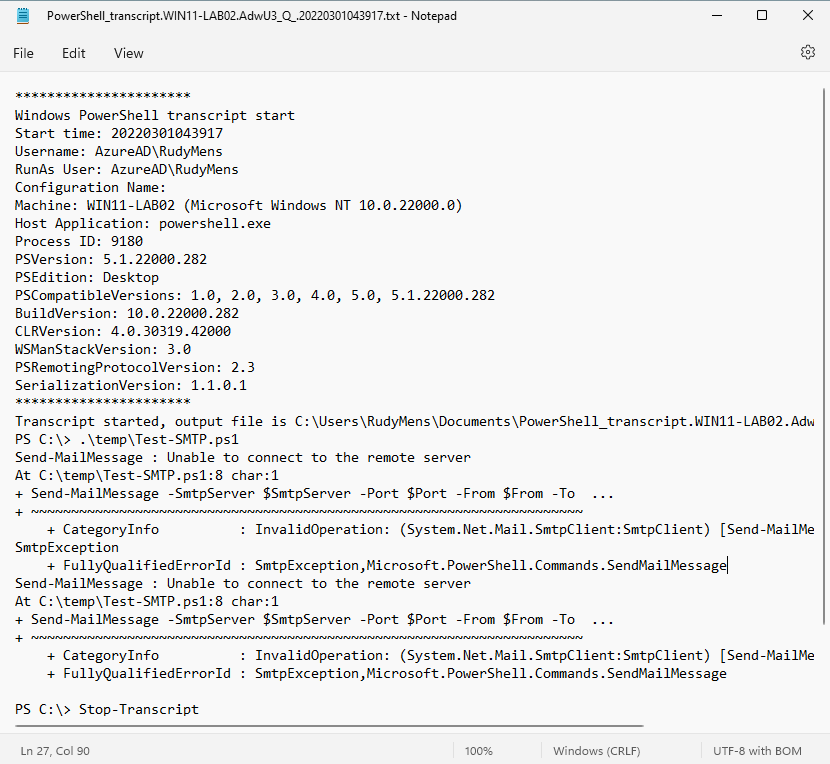
The transcript will contain all the information that you see in the console as well, including a very detailed header with information of the host that you have used:
Path and Output Directory
The default path is great when you are only using PowerShell on your own machine. But most of the time you want to centralize the log files. There are two options for this, we can use the -Path parameter or the -OutputDirectory parameter for this.
With path, we will need to specify the full path, including the file name. This is useful when you want to have a single log file for a script and append all the transcripts into a single file.
# Append the transcript to a mfastatus-result.log file.
Start-Transcript -Path c:\logfiles\mfastatus-result.log -Append

# Or use -NoClobber to prevent overwriting of existing files
Start-Transcript -Path c:\logfiles\mfastatus-result.log -NoClobber
You can also use the -path parameter without the append, but keep in mind that the Start-Transcript parameter by default will overwrite any existing content in the file.
Another option is to use the -OutputDirectory parameter. This way we can specify the directory where we want to store the log file, and allow the cmdlet to create the unique filename.
Start-Transcript -OutputDirectory c:\temp\logfiles

# Result:
Transcript started, output file is c:\temp\logfiles\PowerShell_transcript.WIN11-LAB02.uftVAXsv.20220301045218.txt
Minimal header
Each transcript starts with a fully detailed header with information about the host. When using this for logging of scripts that run automatically this information is just a bit too much. In PowerShell 6 and higher, we can use the parameter -UseMinimalHeader for this.
This will limit the header information to only a timestamp of when the transcript is started:
Start-Transcript -OutputDirectory c:\temp\logfiles -UseMinimalDeader

# Start of transcript with minimalheader
**********************
PowerShell transcript start
Start time: 20220301135543
**********************
Include Invocation Header
The invocation header includes a timestamp before each step or command in the transcript. This is especially useful when you have a large script that takes some time to run.
Start-Transcript -OutputDirectory c:\temp\logfiles -IncludeInvocationHeader

**********************
Transcript started, output file is c:\temp\logfiles\PowerShell_transcript.WIN11-LAB02.VKwZ2RF5.20220301050111.txt
**********************
Command start time: 20220301050122
**********************
PS C:\> .\Temp\Test-SMTP.ps1
Use Start-Transcript inside a PowerShell script
Besides starting the transcript manually from the terminal in PowerShell you can of course also include the cmdlet inside your script. Simply start your PowerShell script with the Start-Transcript and end your script with Stop-Transcript:
Start-Transcript -OutputDirectory c:\temp\Logfiles -UseMinimalHeader

# Your script here

Stop-Transcript
Wrapping Up
The Start-Transcript cmdlet is a great tool when you are debugging new scripts that run automatically. Personally, I don’t use it much, I prefer a log function combined with Try-Catch blocks for example inside script for better error handling.
When you want to use the transcript to see your command history then keep in mind that you also can use the Get-History cmdlet in PowerShell. This will show all commands that you have entered during your PowerShell Session.
If you have any questions, then just drop a comment below.


Hi,
Your presentation is clear, but when I’m using the Start-Transcript command in my PS ISE script shows on the console but doesn’t appear in the transcript file. There are no error messages. The file is only the header. What am I missing?
Start-Transcript -Path “.\Documents\UpdateTranscript.txt”
ForEach loop that is working. Output (from Select-Object command) shows in PS ISE console.
Stop-Transcript
Result in file:
**********************
Windows PowerShell transcript start
Start time: 20230915171253
Username: INT\###
RunAs User: INT\###
Configuration Name:
Machine: ### (Microsoft Windows NT 10.0.17763.0)
Host Application: C:\Windows\system32\WindowsPowerShell\v1.0\PowerShell_ISE.exe
Process ID: 2972
PSVersion: 5.1.17763.4840
PSEdition: Desktop
PSCompatibleVersions: 1.0, 2.0, 3.0, 4.0, 5.0, 5.1.17763.4840
BuildVersion: 10.0.17763.4840
CLRVersion: 4.0.30319.42000
WSManStackVersion: 3.0
PSRemotingProtocolVersion: 2.3
SerializationVersion: 1.1.0.1
**********************
Transcript started, output file is .\Documents\UpdateTranscript.txt
**********************
Windows PowerShell transcript end
End time: 20230915171253
**********************
Just did a quick test from ISE, but seems to work fine. What happens if you specify the full path for the transaction log?
I think we figured it out:
The Start_Transcript was prior to the recursive loop.
The Stop_Transcript was after it.
I assumed that the output we were getting was created with the Start_Transcript command, but what was happening was that the recursive loop was overwriting the output with every iteration. When we used -append, we got the complete output.
Any idea how to evaluate these logs?
We log the scripts which have been run by different admins on a specific server and there are tons of logs.
There is no fixed pattern or a way to get it somehow as csv
It really depends on what you are looking for. If you want to monitor the logs for particular commands, then I would write a scripts that would read-out all log files and search for a specific word or string. Think that is the easiest option.