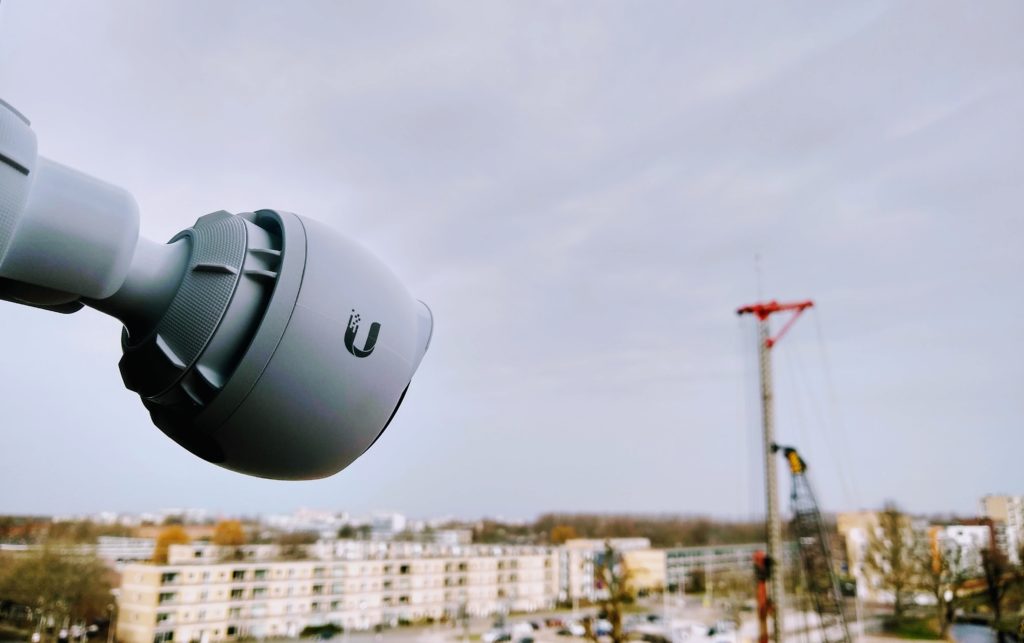
Unifi cameras are great versatile devices that you can use in pretty much any situation. In this case, I needed to make a timelapse from a construction site. I have chosen to use a G3 bullet for this because it’s easy to mount and has great video quality.
Unifi Protect doesn’t come with any timelapse features, but you can get a snapshot from the camera. With a small script, we can automate this, to get a snapshot from one or multiple cameras every x minutes.
In this particular case the camera, and Cloudkey, was placed offsite. So besides storing the snapshots on the CloudKey alone, I also wanted to upload the files to a cloud storage provider so we have a backup of all the snapshots.
Capturing snapshots from an Unifi Protect Camera
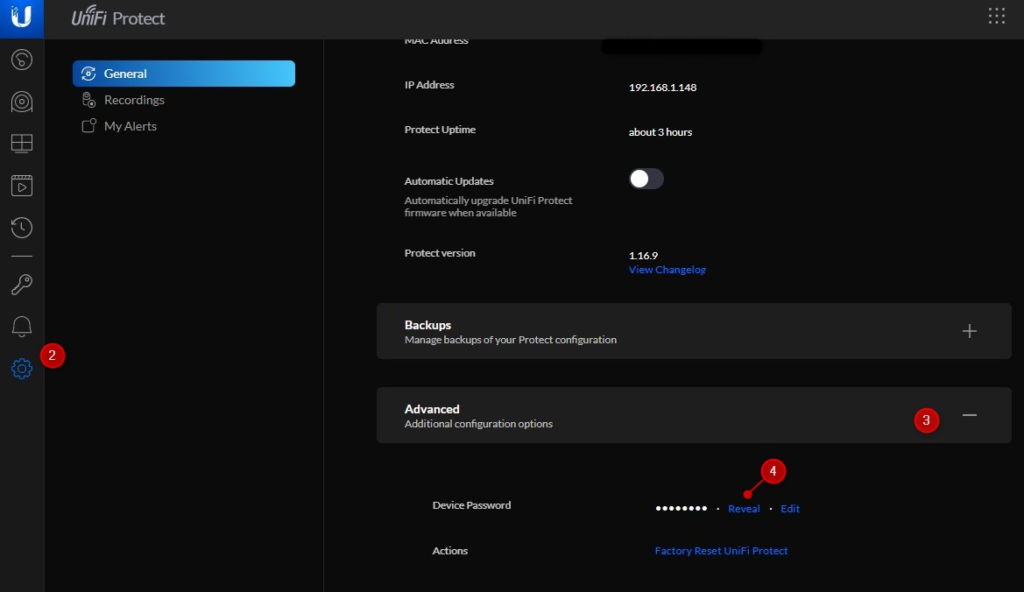
The first part is to automatically get snapshots from the camera. First, you need to allow anonymous snapshots from the cameras. You will need the device password for this, which you can find in Unifi Protect:
- Open Unifi Protect
- Select Settings
- Expand Advanced
- Click on Reveal to copy the password
Next, we need to open the camera directly. Make sure you have the IP address of the camera, you can also find it under devices in Unifi Protect.
- Navigate to http://<ip-address-camera>
- Login with ubnt and your device password
- Enable anonymous snapshot and click Save Changes
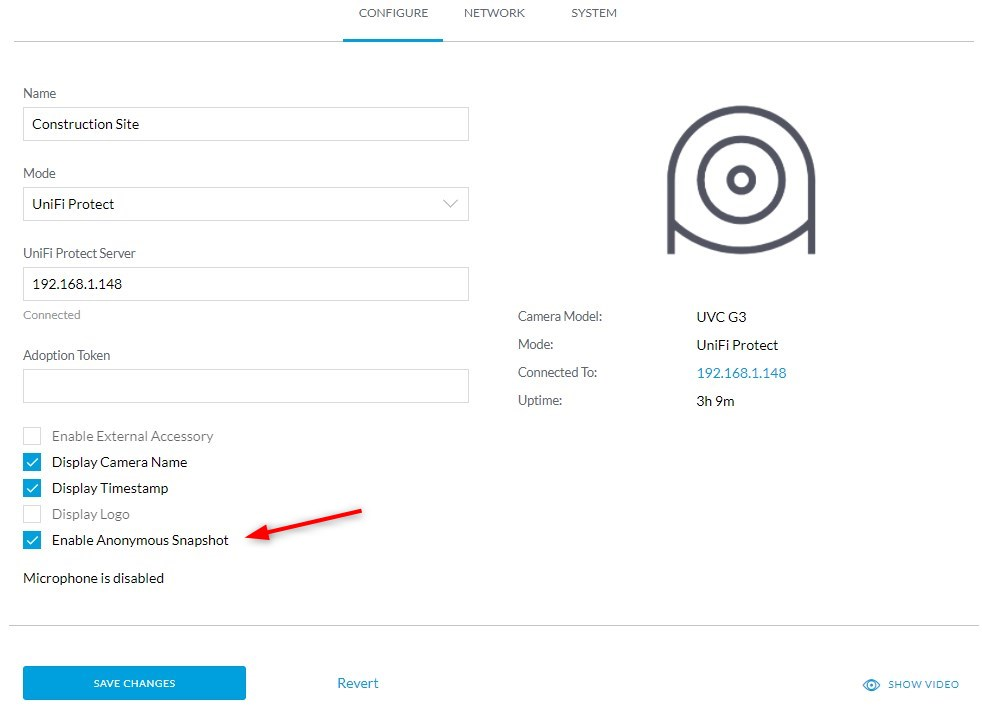
You should now be able to see a snapshot of the camera by navigating to http://<ip-of-your-camera>/snap.jpeg
Automating the snapshots
To get the snapshots automatically we are going to use a small shell script. There is no need to re-invent the wheel, sfeakes @Github create a script that we can use perfectly for this. It also comes with a bonus, because you can also create the timelapse video with the script.
I have placed the scripts on the CloudKey, to do this you will need to enable SSH access. You can do this on the CloudKey under Advanced. Make sure you set a strong password.
To copy or edit the scripts below, you can either use WinSCP to make an SFTP connection or use the terminal if you like.
- Copy the script unifi-timelapse.sh to the CloudKey in the folder /home
- We need to edit the script:
- Add the IP Address(es) and name(s) of the camera(s) that you want to capture
- Change the snap_base path to /media:
# Set the local directory to store the snapshots
SNAP_BASE="/media"

# Add the list of cameras with the details of your camera(s)
CAMS["LA Driveway"]="http://192.168.1.140/snap.jpeg"
You should now be able to create a snapshot by running the command below. Make sure you use the camera name as you have defined in the file unifi-timelapse.sh.
/home/unifi-timelapse.sh savesnap "name camera 1" "name camera 2"
If you configured everything correctly you should see an output similar to:
savingSnap http://192.168.1.140/snap.jpeg to /media/LA Driveway/LA Driveway - 2021-02-22 20:15.jpg
If you get a permission error, then you will need to change the chmod rights on the unifi-timelapse.sh file to 755:
chmod 755 /home/unifi-timelapse.sh
We only need to create a cronjob to automatically great the snapshots, which we will do at the end of the article.
Copy the snapshots to the cloud
The next step is to copy all the snapshots to an external (cloud) storage. This step is optional, but if anything happens to the Cloudkey or the hard disk in the Cloudkey, then we still have all the snapshots.
We are going to use Rclone for this. I have written about making backups of your Cloudkey with Rclone before. For the timelapse, I have used cloud storage from Mega. The advantage of Mega is that you get 50Gb of storage for free, which is more than enough for this situation.
Install and configure rclone
First we need to install rclone and configure our cloud storage, Mega, in this case. We start with installing rclone on our Cloudkey:
curl https://rclone.org/install.sh | sudo bash
Run rclone config when the installation is finished:
rclone config

# Add a new remote
n

# Enter a name
mega_timelapse

# Choose storage provider
24
And your username and password from rclone to finish the configuration.
Copying the files to the cloud storage
With the remote connection set up, we can now start with copying the files. Rclone comes with two options to copy the files, you can either use sync or copy. Because we want to create a backup, we are going to use the copy method.
Sync will keep your Cloudkey and remote synchronized, so files that are deleted on your Cloudkey will also be deleted on the remote, and we don’t want that.
I have created a folder in Mega named “timelapse”. You can test the reclone configuration with the following command:
# Copy the files to the cloud: rclone copy <folder-on-cloudkey>  <rclone-remote-name>:<remote-folder-name>
rlcone copy /media/ mega_timelapse:timelapse
The files should now be copied to your cloud storage.
Creating the Cronjobs
We have everything configured, we only need to create the cronjobs so the timelapse pictures are taking every x minutes and the files are backed-up to our cloud storage.
Type crontab -e and add the following to the end of the file:
# Create the timelapse snapshot every 5 minutes
*/5 * * * /home/unifi-timelapse.sh savesnap "name camera 1" "name camera 2"

# Copy the timelapse pictures every hour
0 * * * rclone copy /media mega_timelapse:timelapse

# Press Ctrl + X to close and choose Y to save.
# On the CloudKey press Ctrl + C twice and then type :wq to save and close
Save and close the file and you are all set.
If you want to create the snapshots between specific times, then you can use the following format to create the snapshots:
*/5 07-19 * * * /home/unifi-timelapse.sh savesnap "name camera 1" "name camera 2"
This will create a snapshot every 5 minutes between 07.00 and 19.00.


Hi there
To do it having a Synology NAS in the LAN
Control Panel – Task Scheduler – Create – Scheduled Task – User-defined Script
d=”$(date +”%Y-%m-%d_%H-%M”)”
curl http://192.168.1.11/snap.jpeg -o /volume1/Test/Timelapse/Eingang_”$d”.jpeg
Hi All,
Just following up on this as I worked out some of the issues.
If you are logged on as root (root@Cloud-Key-2:~# ), then you need to use Sudo command in cronjob. Ie for my job
You also need to ensure that you have 5 of the “*” wildcards. In both of the examples at section “Creating the Cronjobs” there are only 4 *’s. This didn’t work for me. I needed to add in the extra *.
ie */5 * * * * sudo /home/unifi-timelapse.sh savesnap “name camera 1” “name camera 2”
My commands:
—–
#Every 30 minutes, between 6am and 4pm, Monday to Friday take a photo
*/30 06-16 * * 1-5 sudo /home/unifi-timelapse.sh savesnap “Rear_build” “Mid_build” “Top_build”
#Every hour, from 6am – 5pm, Monday – Friday, upload to Mega.
0 06-17 * * 1-5 sudo rclone copy /media timelapse:timelapse
—–
I also used sudo when creating the Cron commands to edit and list (not sure if this is neccesary. However, this worked for me.
sudo crontab -l
sudo crontab -e
—–
As always… save what you script. When Unifi OS updates… you lose your cron jobs.
Good luck!
I’ve progressed and got to the same point as the one from Newbie-Nerd239, but I also have the “not found” issue. Do you have any thoughts on how to proceed?
Hey, did you ever get this working? I have been looking to do this but I see its designed for the cloud key not the UDM?
I never did get this working. I gave up after not being able to resolve my issue.
Hi Rudy – great article. I’m trying to get this up and running, but I’m no expert on SSH or the instructions needed to copy the script across using Terminal on my Mac. Do you have any hints or resources that will tell me how to do that? I can also use Putty on Windows. I’ve got as far as this bullet point in your guide:
Copy the script unifi-timelapse.sh to the CloudKey in the folder /home
I just used Filezilla. Was way simpler.
Thank you for this tutorial. I can’t believe that capturing and downloading snapshots cannot be done in a simple matter, like most other NVR. Any way…
I’m stuck running the script after copying it to the UDM Pro. I’m logged in as root and copied the script “unifi-timelapse.sh”. When I run the script I get “permission denied”. When I run chmod 755 against the script, the error changes to “file not found”. Please advise.
Great article! Struggling to get the chron job working, but guessing a permission issue.