We all know that it’s important to make regular backups of your data. This is also important for all your data in Microsoft 365. Because even though it’s stored in the cloud, there isn’t an actual backup of it. This is where Microsoft 365 backup comes in.
Microsoft already makes backups of your data, but that is only for emergency recoveries. You can’t request Microsoft to restore a single file or mailbox for example.
In this article
In this article, we are going to take a look at the features of Microsoft 365 Backup, and how to set it up and use it.
Microsoft 365 Backup
When we talk about the necessity to back up your data in Microsoft 365, most will argue that Microsoft already takes backup of your data. And while this is true, most don’t know that these backups are only for disaster recovery.
File versioning in SharePoint or OneDrive does allow you to restore a file to a prior point in time, but that also has its limitations. Versioning is great for restoring a single file, but when you need to restore a lot of files after for example a ransomware attack, then this method won’t work well.
Microsoft 365 Backup, however, allows you to create regular backups of your data and more importantly, quickly restore it.
Features of Microsoft 365 Backup
The advantage of Microsoft 365 Backup is that your backups are stored close to your Microsoft 365 data. This means that restore times are a lot faster compared to when you would be using a third-party backup solution.
With Microsoft 365 Backup, your backups are protected against malicious overwrites by the Append-Only storage solution. Data can only be added in new content blobs. Existing data can’t be changed and can only be deleted through the offboarding feature in the backup tool.
Note
Microsoft 365 Backup is currently in Preview. This means that features and limitations are subject to change.
Microsoft 365 Backup comes with predefined backup frequencies and periods which you can’t change. The current RPO (recovery point objective) and backup duration for the backups are:
| Resource | RPO 0-14 days in the past | RPO 15-365 days in the past | Duration |
|---|---|---|---|
| SharePoint and OneDrive | 15 minutes | One week | 1 Year |
| Exchange Online | 10 minutes | 10 minutes | 1 Year |
Other important features to note are:
- Data remains in the geographic location of your current data (and never leaves Microsoft 365)
- Fast backup within hours (depending on the amount of data, first backup of small sites within minutes during my test)
- Restore complete sites within an hour (less than 12 hours for 1,000 sites)
- Full SharePoint and OneDrive restore (File-level restore for SharePoint and OneDrive will be added later)
- Full mailbox and mail item level restore for Exchange
Limitations
There are of course also some limitations to Microsoft 365 Backup. You can’t for example change the backup frequency and period of the backups. These are predefined by Microsoft and can’t be edited.
This means that you also can only have one backup policy per resource. Normally with a backup, you might want to create separate backup policies for active and inactive SharePoint sites. This isn’t possible with Microsoft 365 Backup.
Other limitations to take into account are:
- Rule-based scopes are static. For example, if you select the security group All Users for the Exchange backup policy, new users are not automatically added. This is with all rule-based selection methods.
- Teams can not be backed up. Data of Teams is stored in SharePoint and Exchange, but you can’t restore a Teams chat for example (will be added later)
- You can only restore the complete SharePoint or OneDrive site to a previous state or to a new URL (file-level restore will be added later)
- SharePoint Admin must have Read permissions to the sites to be able to find and restore the sites. A specific Backup role will be added later to solve this.
- SharePoint and OneDrive sites won’t be locked during a restore. This can cause data loss. The feature will be added later.
- Restore to a new URL can take up to 15 minutes
- Can’t restore mailboxes and OneDrive accounts that are in legal or in-place hold
- Can’t restore mailboxes and OneDrive accounts of a deleted user. (you need to manually recreate the user first)
- Email drafts are not backed up
- OneDrive and SharePoint accounts that have changed the site URL can’t be restored.
You can find a complete overview, with all the details here in the Microsoft documentation.
Pricing
The pricing model for Microsoft 365 Backup is based on pay-as-you-go. This means that you pay only for the amount of data that you are using. The current price is $0.15 per GB per month.
To know how much data you are going to back up, you will need to know what counts towards the storage cost and of course how much data is currently used by your SharePoint sites, OneDrive accounts, and Exchange accounts.
For SharePoint and OneDrive, you will need to look in the usage reports in the Microsoft 365 admin center to know how much data is being used. For Exchange, you will need to look at the size of the mailbox and online archive of the user.
Keep in mind that you pay for the storage that is used for the backup, this means that if you backup a SharePoint site of 10GB, and remove 2GB of data after 2 months from the site, you’re still charged for the initial 10GB until the data is deleted from the backup after 1 year.
Microsoft has released an Excel sheet that you can use to calculate the backup price. Make sure you take a look at it to get a good estimate of the backup costs.
Partner Solutions
It seems that third-party backup solutions can also be used with Microsoft 365 Backup. I couldn’t find a lot of information about it yet, but it seems that you can use Veeam, AvePoint, and a couple of other backup solutions in combination with Microsoft 365.
Setting up Microsoft 365 Backup
Microsoft 365 Backup is part of Microsoft Syntex, which uses pay-as-you-go billing. So we need to make sure that we have an Azure subscription and enable Microsoft Syntax before we can activate Microsoft 365 Backup.
Step 1 – Enable Syntex Billing
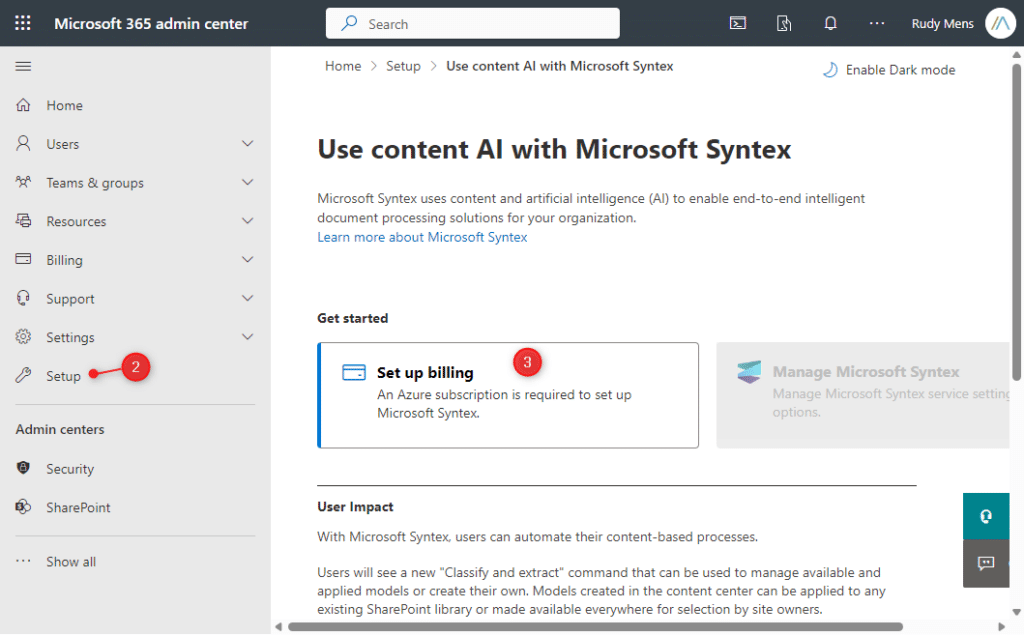
- Open Microsoft 365 Admin Center
- Go to Setup and select Use content AI with Microsoft Syntex
- Click on Set up billing
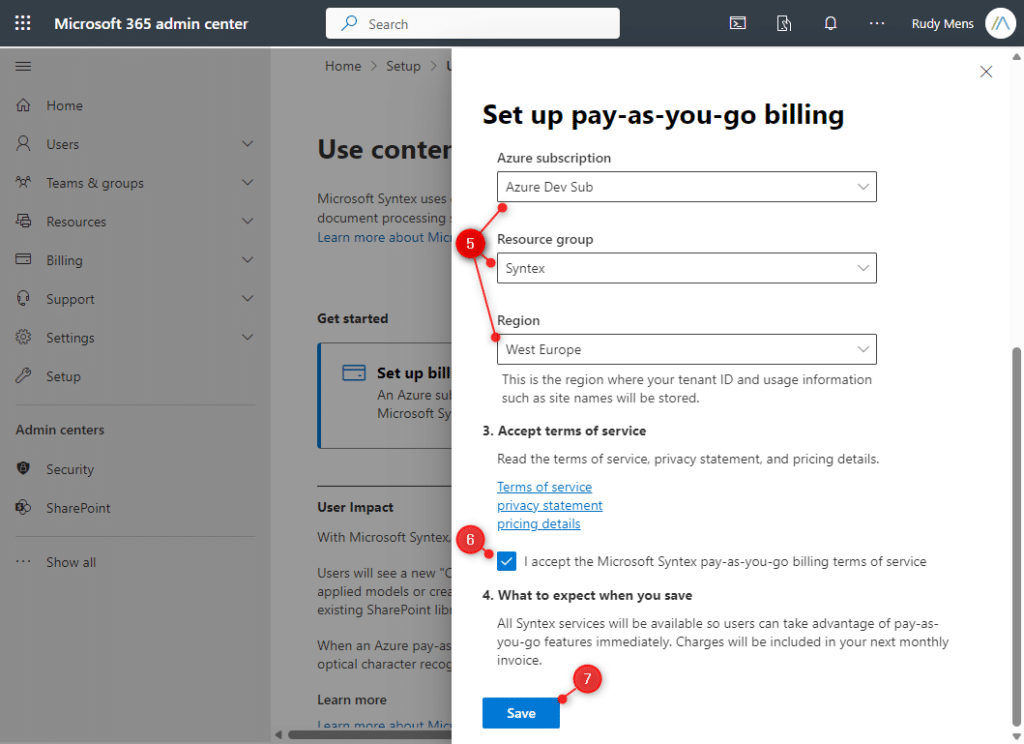
- Make sure that you have an Azure subscription and resource group(otherwise add one)
- Select your Azure Subscription, Resource Group, and Region
- Accept the terms
- Click Save
Step 2 – Enable Microsoft 365 Backup
With the billing configured, we can enable Microsoft 365 Backup:
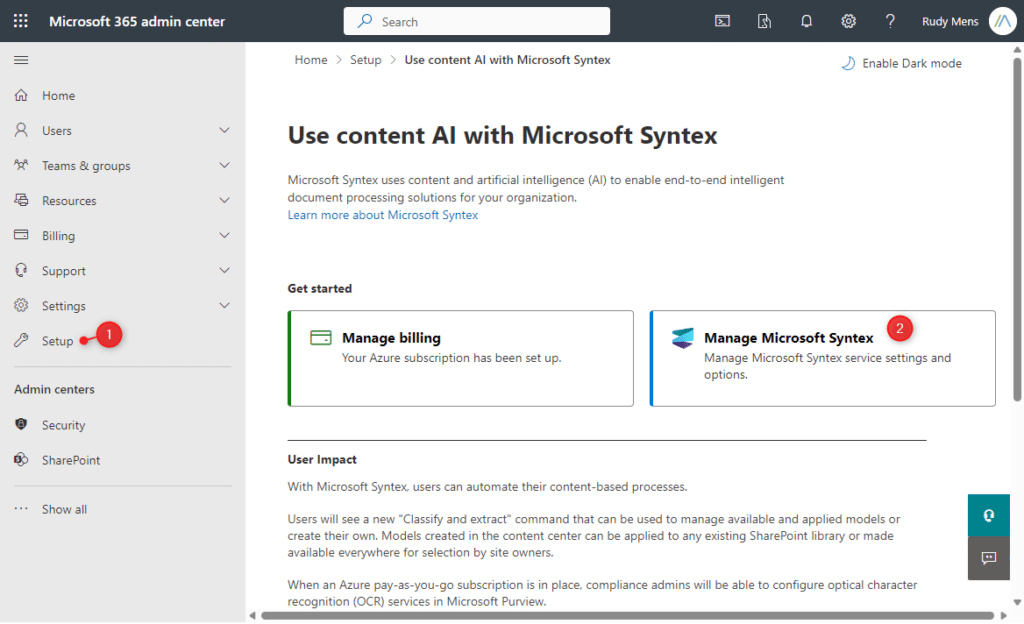
- Go back to Setup > Use content AI with Microsoft Syntex
- Click on Manage Microsoft Syntext
- Select Backup and click on Turn on and Save
Step 3 – Configure Backup Policies
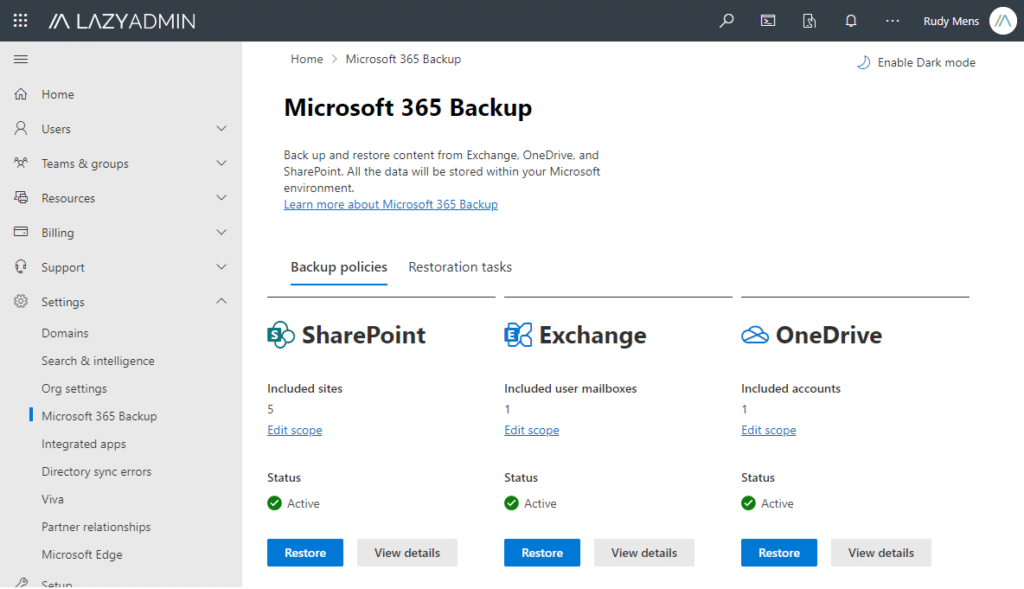
With the Microsoft 365 Backup enabled, we can now configure the backup policies for SharePoint, OneDrive, and Exchange Online.
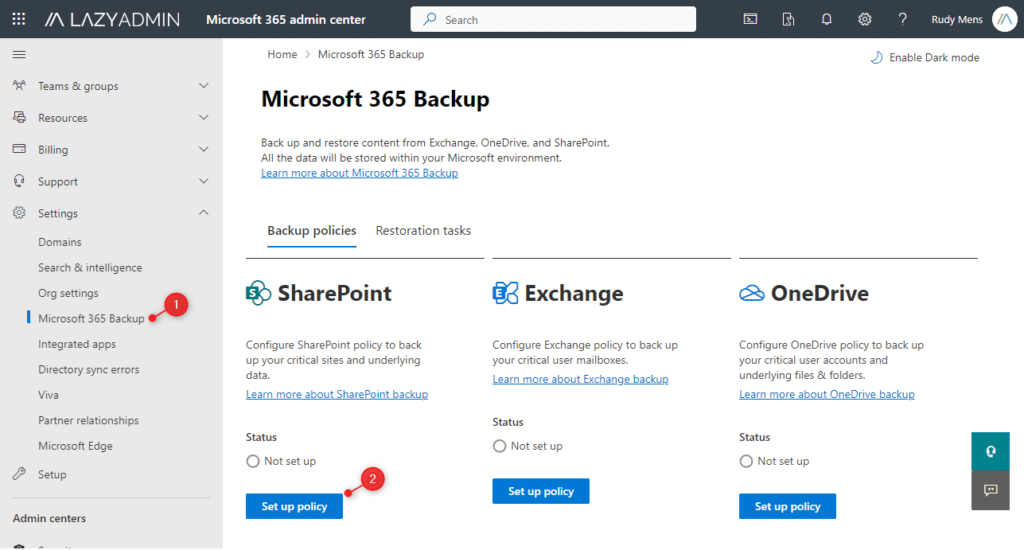
- In Microsoft 365 Admin, expand Settings and open Microsoft 365 Backup
- Click on Set up policy under SharePoint
- You will see the overview of the policy, you can’t change the backup frequency. Click Next
- Select the sites you want to back up. (note, when using the rules, new sites won’t be added automatically)
- Review the policy and click Create Policy

It can take up to 15 minutes for the policy to become effective.
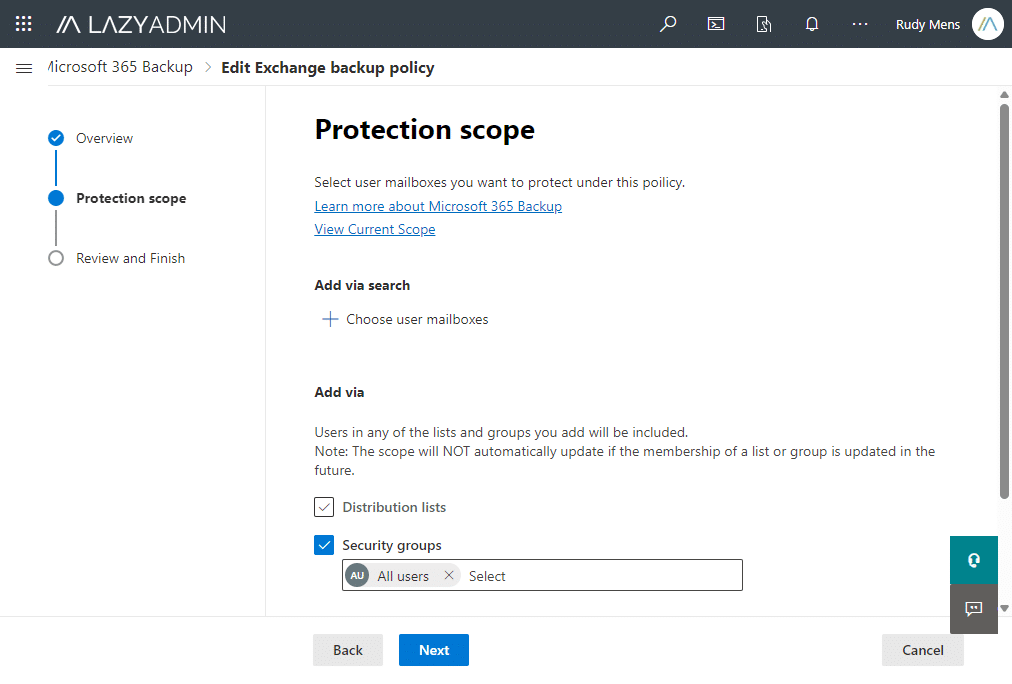
For the OneDrive and Exchange policy, we can either select individual users or add the users via a distribution list or security group. Just like with the SharePoint sites, the scope won’t automatically update the list when new users are added.
View & Edit Policies
After you have created the policies for each resource, you can view and edit the scopes. Simply click on View Details to view the policy details, and which sites or accounts are included in the scope.
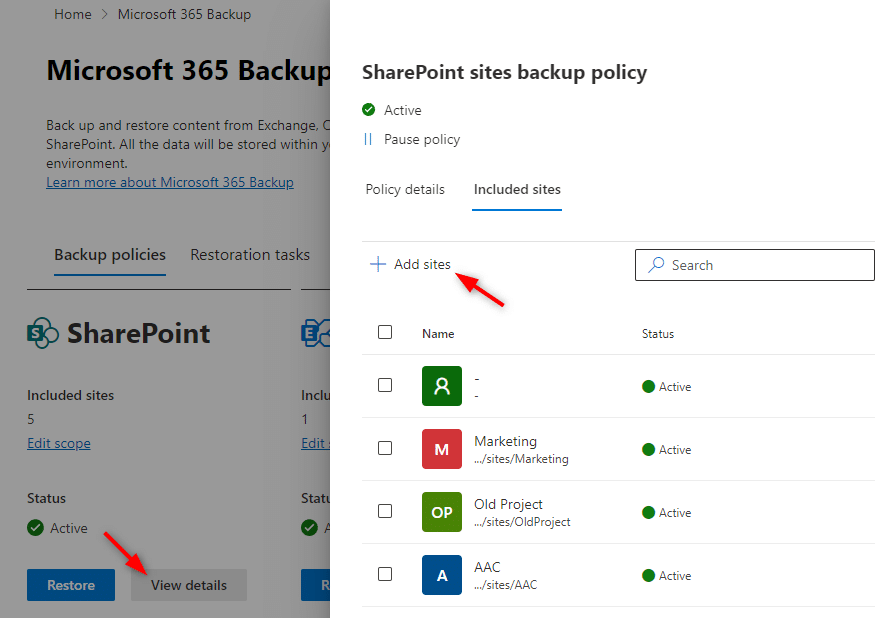
You can only Add or Remove sites or accounts from the scopes. For example, if you have selected the All Users security group for the Exchange account, and want to change that to only the Management security group for example.
Then you will need to remove all the existing accounts first from the backup policy and then add the new Security Group.
When you remove an account or site from the protection scope, then it will only stop making new backups for that account. The existing backups will remain.
Restoring Data
There comes a moment when you need to restore data from the backup. At the moment of writing, you can only restore a complete SharePoint site or OneDrive account to a previous point in time (rollback restore). This will overwrite any existing data that is in the site or account.
Now you can restore to a new URL, so if you only need a specific file or folder, then you can do a restore to the new URL, and download or move the data from the new location. File-level restore will be added later.
When it comes to restoring mailbox items, you can do a roll-forward restore where only the changed items are restored. Also with mailboxes, it’s possible to restore to a new folder, so you can avoid overwriting any existing data.
To restore data, simply click on Restore in the Microsoft 365 Backup overview page.
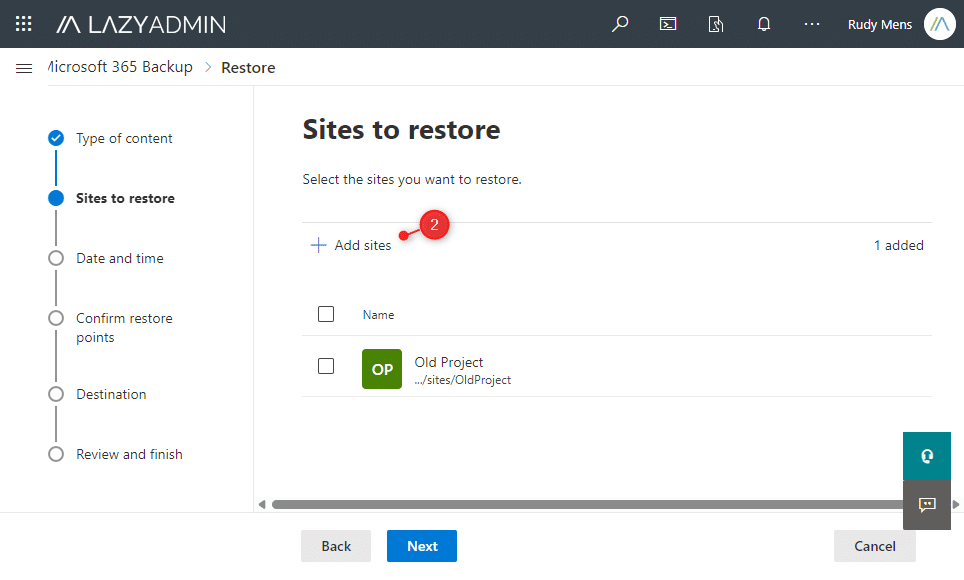
- Select the type of content you want to restore (SharePoint, Exchange, or OneDrive)
- Add the sites or accounts you want to restore (in the case of SharePoint or OneDrive)
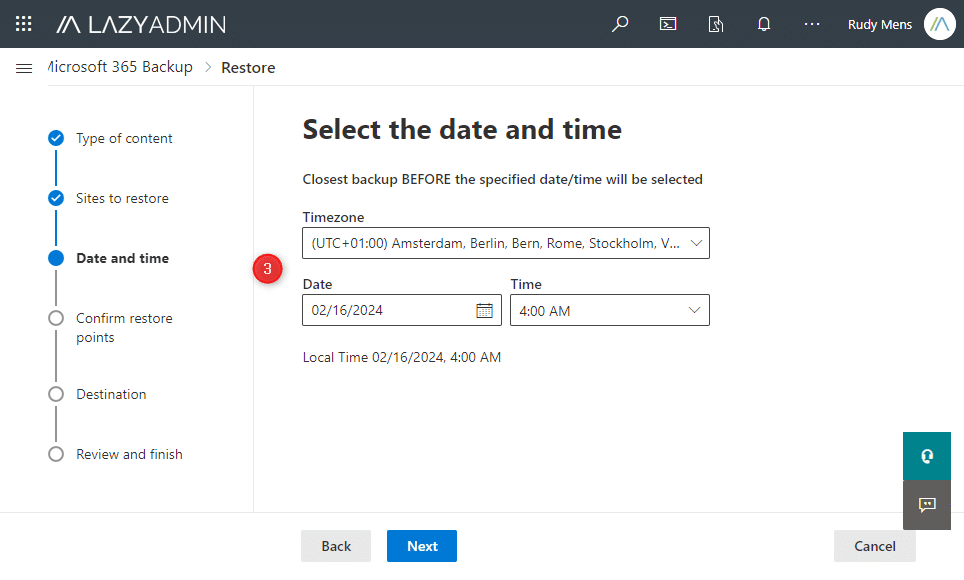
- Select the data and time (the closest backup before that will be picked)

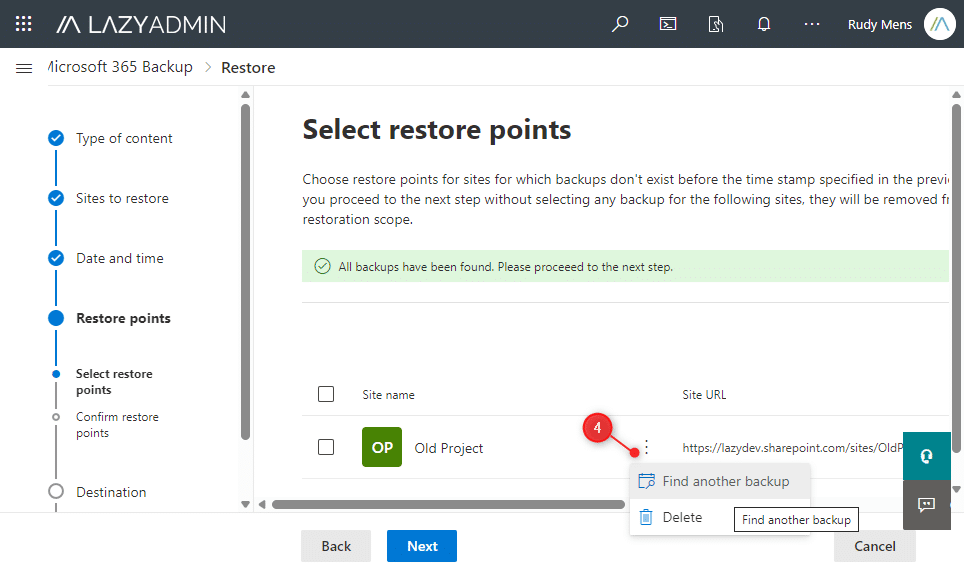
- Check the Restore point (optionally select another restore point)
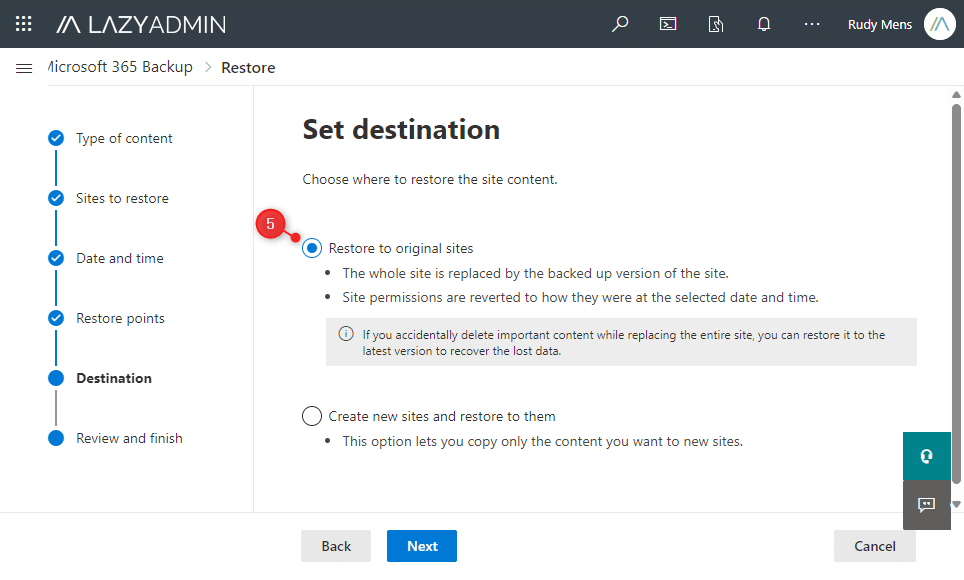
- Choose the destination (original location or new site/account)
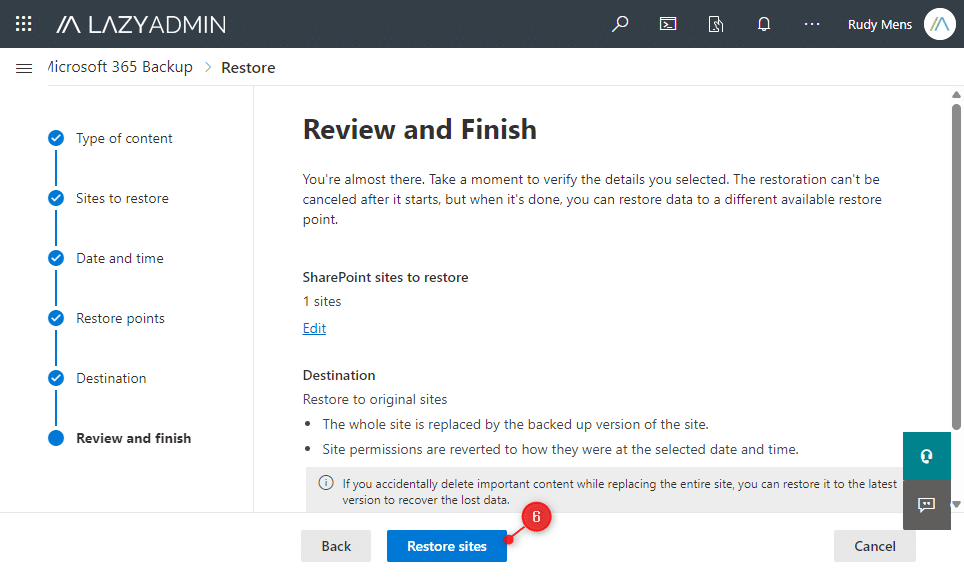
- Review and click on Restore Sites
When it comes to restoring data from Exchange Online, you will first need to select the user mailbox that you want to restore. You can then choose if you want to restore all content (Emails, Notes, Contacts, Calendars, and Tasks) or selected content only.
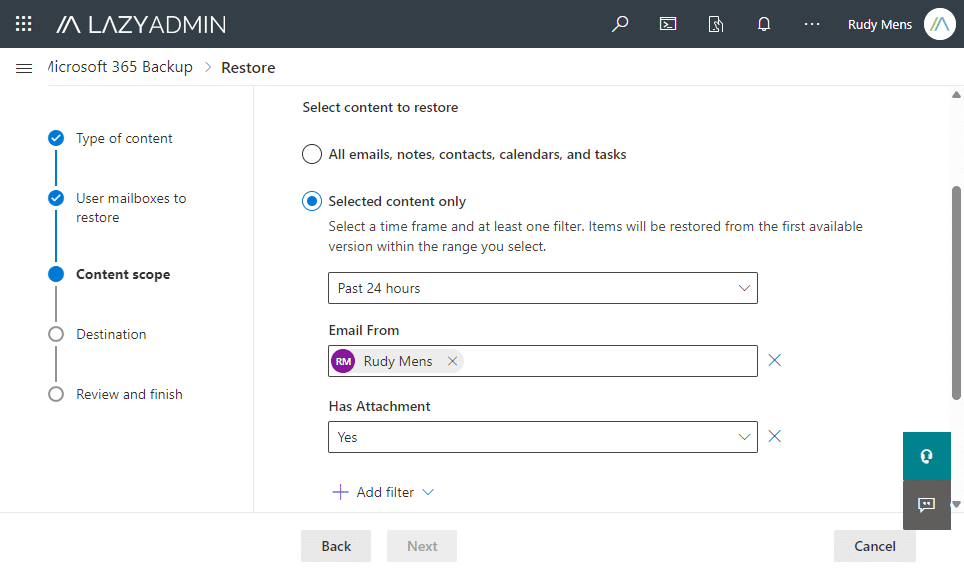
For the selected content, you can specify the time frame, and search on the sender, recipient, subject, and if the email contains attachments. You can only specify 5 keywords, so you are quite limited in the search options.
Wrapping Up
Common practice is to move your backup as far away as possible from your production data. This means storing it on another server in a different data center, or even in a different region. With Microsoft 365 Backup, your data remains in the Microsoft ecosystem. This has advantages but can also impose risks.
However, Microsoft replicated copies of your data across geographically spread data centers, and your data is stored in an immutable way. These combined should ensure that your backups can’t get corrupted or lost in the event of an attack.
You should decide for yourself if you are comfortable with storing your Microsoft 365 backup at Microsoft or if you prefer to store the backups on a completely different third-party platform.
I hope you liked this article, if you have any questions, just drop a comment below.


After enabling Syntex, does this open a pandora’s box in cost or can it be constrained to Backups? We already have a third party backup in place but I am testing faster solutions for point-in-time snapshots during SharePoint migrations and figure the native backup would be fastest but do not want to incur more charges than is necessary or at least be aware of exactly what will happen and like all M365 products, this is difficult to find.
It will be limited to the backup only. You really need to enable features before you get charged for it.