Even though the first version of PowerShell 7 was released in 2020, you will still find PowerShell 5.1 installed by default on new Windows computers. But luckily, we can install PowerShell 7 manually and even side-by-side with the old version.
PowerShell 5.1 (named Windows PowerShell), isn’t being developed anymore. New modules and cmdlets are only being released for PowerShell 7, which is also a lot faster than the old version. So this is a good reason to start using the new version.
In this article
In this article, I will show you the different methods to install PowerShell 7.
Install PowerShell 7
There are different methods to install PowerShell 7 on Windows, but the three most common methods are:
- Winget – Recommended method to install PowerShell on Windows 10 and newer
- Microsoft Store – Easy method for casual users
- MSI – For deployment scenarios
Note
To update PowerShell, make sure that you read this article.
Each installation method will automatically install the latest version of PowerShell. It’s possible to install older versions, which I will show you as well for each method.
Install PowerShell with WinGet
The recommended way to install PowerShell on Windows is to use the built-in command-line tool for the Windows Package Manager, Winget. This tool allows you to quickly install, upgrade, or remove applications on Windows devices.
It’s pre-installed on Windows 11 and the latest versions of Windows 10. If you don’t have Winget, then use one of the other methods described in this article.
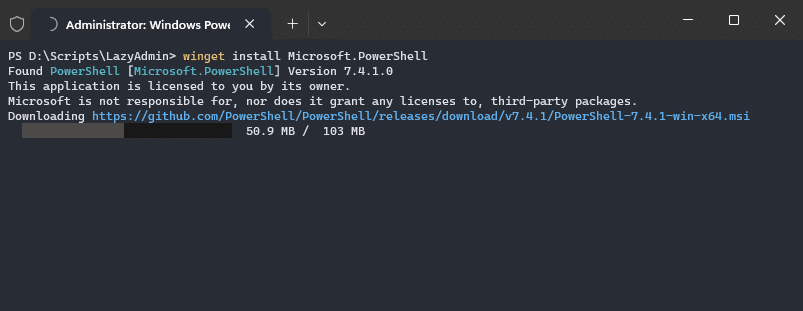
- Open PowerShell (admin) or Terminal (admin)
- Run the following command
winget install Microsoft.PowerShell
- Wait for the installation to finish
Once the installation is completed, you can use PowerShell 7 by opening it through the start menu or by selecting it in a new tab in Windows Terminal.
If you want to use the preview version of PowerShell, then you need to change the package name to Microsoft.Powershell.Preview. You can’t use Winget to install older versions of PowerShell.
Using Microsoft Store
PowerShell 7 can also be installed through the Microsoft Store these days. The advantage of this method is that it will automatically keep PowerShell up-to-date for you.
- Open Microsoft Store (search Store in the Start Menu)
- Type PowerShell in the search bar and press enter
- Select PowerShell
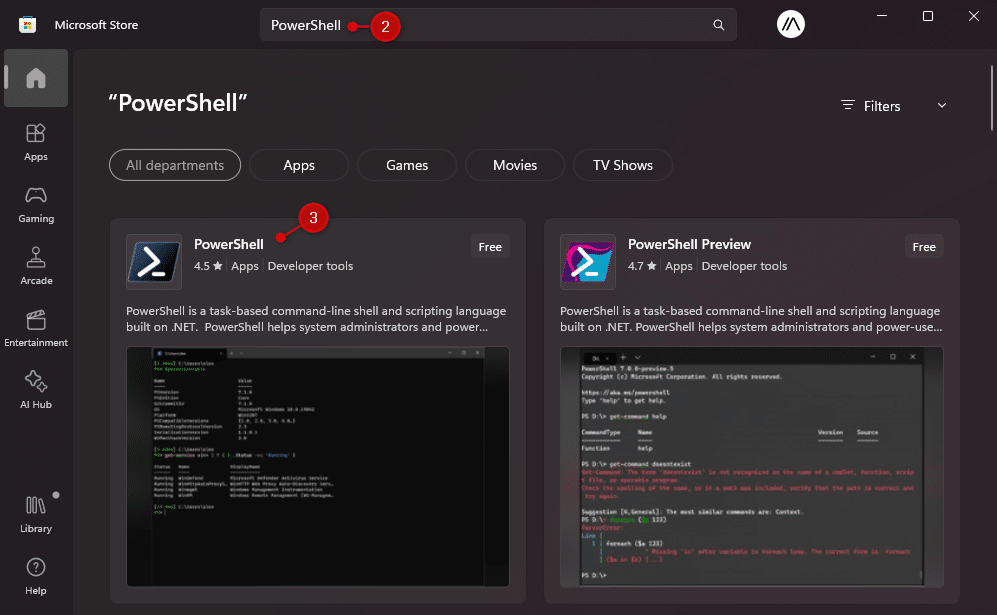
- Click on Get to install PowerShell
You can also use this direct link to the Microsoft Store item to install PowerShell. It’s not possible to install older versions with this method, but you can install the preview version as well using the Store.
Using the MSI Package
The last common option to install PowerShell is to use the MSI package. The advantage of the MSI package is that you can choose which version you want to install. Recommend is of course to install the latest stable version.
But if your environment for example requires version 7.2, then you can download the MSI for this version.
You can download the latest stable version using the link here in the Microsoft documentation. Another option is to use the Github release page and select the version you want to install.
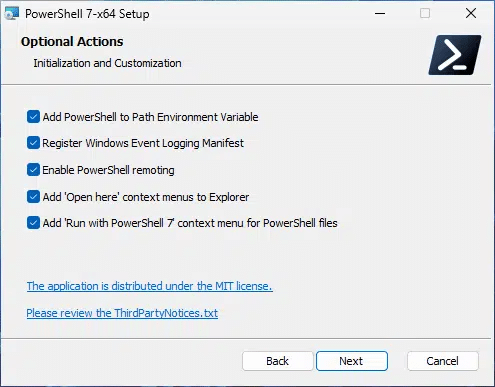
Simple run the MSI to install PowerShell. I recommend to leave all the options selected, including the updating options.
Just like with any MSI file, you can install an MSI using the command line. This method is commonly used in deployment scenarios. To silently install PowerShell with all options, you can use the following command:
msiexec.exe /package PowerShell-7.4.1-win-x64.msi /quiet ADD_EXPLORER_CONTEXT_MENU_OPENPOWERSHELL=1 ADD_FILE_CONTEXT_MENU_RUNPOWERSHELL=1 ENABLE_PSREMOTING=1 REGISTER_MANIFEST=1 USE_MU=1 ENABLE_MU=1 ADD_PATH=1
Using PowerShell 7
To use PowerShell 7, you will need to actively open it. If you would just open Windows PowerShell, or Terminal, then you would still be using the older PowerShell version (5.1). You can check which version you are running with the command $PSVersionTable.
I recommend using Terminal for PowerShell 7. If you open Terminal, then you can click on the new tab icon to select PowerShell 7. It’s also possible to make it your default version, by changing your preference in the Terminal settings.
Another option is to open Start and search (type) PowerShell. You can then select PowerShell 7.
Updating PowerShell
If you have used the Microsoft Store or MSI installation method, then PowerShell will be updated through the Windows Updates. But if you have used the recommended Winget method, then you will need to keep PowerShell up to date yourself.
You can do this by running the following command:
winget upgrade Microsoft.PowerShell
If you want to know more about updating PowerShell, then make sure you check out this article with all the options.
Wrapping Up
To install PowerShell 7, I recommend using the Winget method. This is the easiest method, and it allows you to control which version you are using.
Keep in mind that some cmdlets are not fully backward compatible in PowerShell 7. So make sure that you test your scripts before you fully switch over.
I hope you found this article helpful, if you have any questions, just drop a comment below.


