When you need to search through a string or log files in Linux we can use the grep command. For PowerShell, we can use the grep equivalent Select-String. We can get pretty much the same results with this powerful cmdlet.
Select-String uses just like grep regular expression to find text patterns in files and strings. It can search through multiple files and report the location including the line number of the string for each file. It’s also possible to find only the first occurrence of string or for example, return only the files that don’t match a string.
In this article
In this article, we are going to take a look at the PowerShell grep equivalent Select-String. We are going to take a look at different examples that you can use to find a string with PowerShell. Make sure you read through the end for a nice little bonus tip!
Finding a String with PowerShell Select-String
Before we dive into all the possibilities of the select-string cmdlet, let’s first take a look at a couple of common examples. To search for a particular string in log files we can use the following cmdlet in PowerShell:
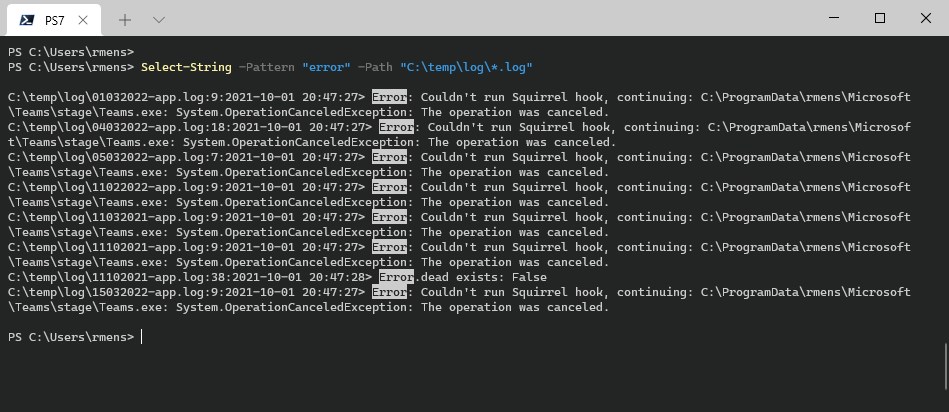
# Search for the string error in the path
Select-String -Pattern "error" -Path "C:\temp\log\*.log"

# or in short:
Select-String "error" "C:\temp\log\*.log"
The grep equivalent would be:
grep "error" .\log\*.log
By default, the output of the select-string cmdlet will show the filename, line number, and the complete line where the string was found:
The advantage of PowerShell is that we can easily format the output to a more readable format. If you for example are only interested in the filename, path, and line number then you could format the results into a table and select only the fields that you need:
Select-String -Pattern "error" -Path "C:\temp\log\*.log" | Select LineNumber, FileName, Path

# Result:
LineNumber Filename         Path
---------- --------         ----
         9 01032022-app.log C:\temp\log\01032022-app.log
        18 04032022-app.log C:\temp\log\04032022-app.log
         7 05032022-app.log C:\temp\log\05032022-app.log
         9 11022022-app.log C:\temp\log\11022022-app.log
         9 11032021-app.log C:\temp\log\11032021-app.log
         9 11102021-app.log C:\temp\log\11102021-app.log
        38 11102021-app.log C:\temp\log\11102021-app.log
         9 15032022-app.log C:\temp\log\15032022-app.log
Select-String Parameters
So we have taken a quick look at the basic usage of the cmdlet, now let’s dive a bit deeper into all the possibilities of the search-string cmdlet in PowerShell. The cmdlet comes with a couple of parameters that will help us with searching for strings and selecting the results:
| Parameter | Description |
|---|---|
| -Pattern | The text or string to find. Accepts a regular expression |
| -Path | Specify the file or path to files to search through. Accepts wildcards |
| -CaseSensitive | Search-string is case sensitive |
| -Context | Show lines before and/or after the pattern |
| -Quiet | Only return true or false |
| -Raw | Return only the matched string like grep |
| -List | List only the first match in the files. Used to get a list of files with pattern |
| -SimpleMatch | Treat the pattern as a simple string |
| -Include | Specifies files to include in the search (“*.txt”,”*.log”) |
| -Exclude | Specifies files to exclude from the search path |
| -NotMatch | Return only the items that didn’t match the pattern |
| -AllMatches | Return all matches of the result |
Showing lines before and after with Context
The Select-String cmdlet returns the line where it found the string that we searched for. But when searching through log files, for example, you probably also want to know what happened before or after the error.
This is where the -context parameter comes in. It allows you to specify the number of lines that need to be returned for and/or after the matched line. The first digit is the number of lines before, the second is the number of lines after. If you only supply a single digit then it will be used for both.
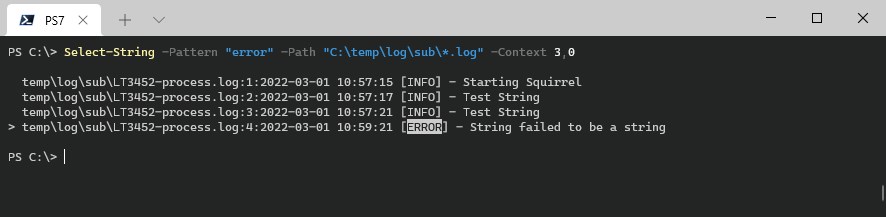
# Return 3 lines before
Select-String -Pattern "error" -Path "C:\temp\log\sub\*.log" -Context 3,0

# Return 2 lines before and 2 lines after the error:
Select-String -Pattern "error" -Path "C:\temp\log\sub\*.log" -Context 2
The line that matched the pattern is indicated with > and the string is highlighted:
Return True or False with Quiet
When using the PowerShell grep equivalent select-string inside a script you sometimes only need to know if the string exists or not. By default, the cmdlet will return a MatchInfo object. An object with the line number, path, string, etc.
To check if the log files contain an error or not we can do the following:
# Returns true or False
Select-String -Pattern "error" -Path "C:\temp\log\sub\*.log" -Quiet

# Result:
True
Return only the matched string with Raw
If you are used to the Linux grep command then you may have noticed that the result of select-string is slightly different. The PowerShell equivalent returns an object, instead of only the string that the grep command does.
When you add the -raw parameter to your command then the cmdlet will only return the string that matched the pattern:
Select-String -Pattern "error" -Path "C:\temp\log\sub\*.log" -Raw

# Result:
2022-03-01 10:59:21 [ERROR] - String failed to be a string
Search through multiple file types
The path parameter already accepts wildcards, allowing us to search through multiple files. But in this case, we can only search through one file type. When using the -include parameter we can specify multiple file types that we want to search through.
To use the parameter we still need to supply the path, otherwise, the cmdlet will search in the script root location.
# Search in the txt and log files
Select-String -Pattern "error" -Path "C:\temp\log\sub\*" -Include "*.txt","*.log"

# Result
C:\temp\log\sub\LT3452-process.log:4:2022-03-01 10:59:21 [ERROR] - String failed to be a string
C:\temp\log\sub\LT4423-process.txt:3:2022-02-01 05:49:21 [ERROR] - Squirrel failed to find process
It’s also possible to exclude file extensions with the -exclude parameter.
List only the files with Select-String
When searching through multiple files with the select-string cmdlet, PowerShell will return all instances of the string that it has found. But sometimes you only want to know if a log file, for example, contains an error.
If we search through the log files for the pattern error we can see that the file 11102021-app.log is found two times:
Select-String -Pattern "error" -Path "C:\temp\log\*" | Select LineNumber, Filename

# Result:
LineNumber Filename
---------- --------
         9 01032022-app.log
        18 04032022-app.log
         7 05032022-app.log
         9 11022022-app.log
         9 11032021-app.log
         9 11102021-app.log
        38 11102021-app.log
         9 15032022-app.log
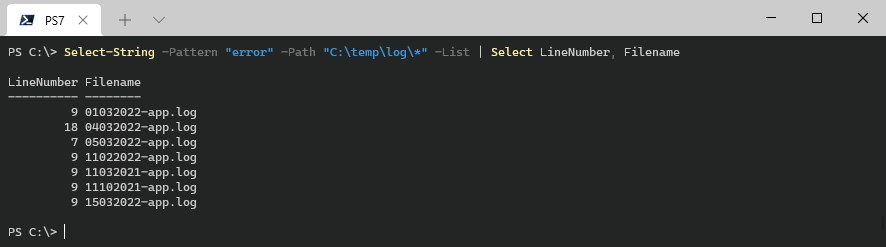
By using the parameter -List only the first instances are returned, resulting in a unique list of filenames that contain the matching pattern:
Select-String -Pattern "error" -Path "C:\temp\log\*" -List | Select LineNumber, Filename
Return lines without pattern
All this time we have been searching for strings inside log files that contain the string “error”. But what if you want to get the opposite? All the lines that don’t contain the word “error”?
For this, we can use the -NotMatch parameter. This will return all the lines in the path that don’t match the pattern that we have supplied:
Select-String -Pattern "error" -Path "C:\temp\log\*" -NotMatch | Select LineNumber, Filename
Find files that not Match pattern
The Select-String cmdlet searches on line level through files. This means that we can’t simply use this cmdlet to return only the files that don’t contain a particular string.
To get all the files that don’t contain the string we will need to use the Get-ChildItem cmdlet, and use the Select-String cmdlet on each file.
By using the -quiet parameter we can return true or false, allowing us to only select (and return) the files that don’t contain the pattern:
Get-ChildItem -path "C:\temp\log\*" | Where-Object { !( $_ | Select-String -Pattern "error" -Quiet ) }

# Result:

    Directory: C:\temp\log

Mode                 LastWriteTime         Length Name
----                 -------------         ------ ----
d----           15-3-2022    13:52                sub
-a---           15-3-2022    14:09           4120 04032022-app.log
-a---           15-3-2022    12:59           2860 11032022-app.log
PowerShell Select-String Recursive
The select-string cmdlet in PowerShell only searches in the given directory. It won’t go through the subfolders, even if you use wildcards. To search in all subfolders as well we will need to combine the cmdlet with Get-ChildItem.
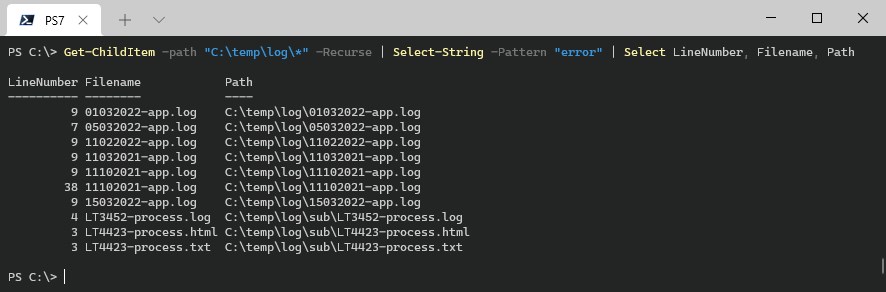
So to search in all subfolders we first will get all the items with Get-Childitem using the parameter -Recurse to search recursively. And then pass each file to the Select-String cmdlet:
Get-ChildItem -path "C:\temp\log\*" -Recurse | Select-String -Pattern "error" | Select LineNumber, Filename, Path
PowerShell Select-String Multiple Patterns
When searching through log files of other text files you sometimes need to search for multiple patterns. Now you could simply run the Select-String cmdlet twice, but that isn’t really efficient.
Luckily we can supply multiple patterns to the Select-String cmdlet. You can simply create an array with strings or comma-separated the strings:
Select-String -Pattern "error","warning" -Path "C:\temp\log\*" -List | Select LineNumber, Filename, Pattern
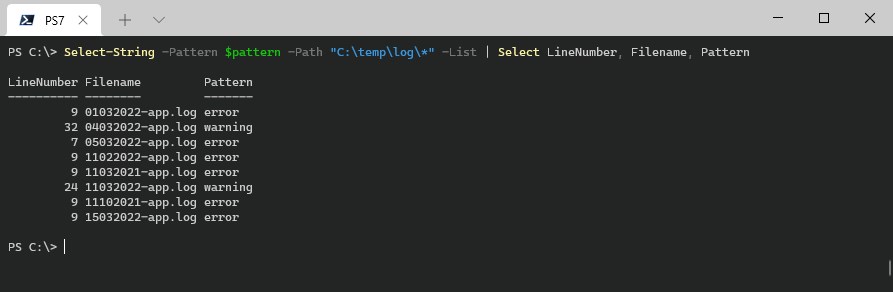
As you can see I have added the property Pattern to the select statement. This way we can see which pattern has matches in the file and on which line.
Wrapping Up
The PowerShell grep equivalent Select-String is a great tool to find strings inside text files or other output streams. If you really like to use the command grep, then I have a small tip for you. You can create a new alias in PowerShell so that the select-string cmdlet is used when you type grep.
To create the alias type:
new-alias grep select-string
Now you can use grep just like in Linux:

I hope you found this article useful, if you have any questions, just drop a comment below.


hi. looking to make the -Pattern parameter require it finds BOTH and not one of the strings. Any thoughts? Thanks.
-Raw does not work anymore. Which completely breaks entire tool for me. There is a lot of possible workarounds manipulating output as an object, but none of that works with -Context.
Classic Microsoft. Everything through the asshole and even some parts that somehow are useable – will get ruined eventually.
Very helpful Blog – I appreciate it