When retrieving data with PowerShell you often need only a few of the properties of an object. To do this we can use the cmdlet Select-Object, which allows us to select the data that we need.
What most people don’t know is that Select-Object can do much more than only select the properties that you need. We can for example select the first x or last x properties, expand properties, or even create calculated properties.
In this article
In this article, we are going to take a look at how to use Select-Object, the different selection options and I will show you a couple of examples.
PowerShell Select-Object
The Select-Object cmdlet is always piped behind another cmdlet in PowerShell. It allows you to select or modify properties from objects that come down the pipeline. The selected properties are then only displayed in the results or can, for example, be exported to a CSV file with the Export-CSV cmdlet.
For selecting properties we have a couple of options that we can use:
| Parameter | Description |
|---|---|
| -Property | The properties to select. Select multiple using a comma-separated list |
| -ExcludeProperty | Exclude properties from the results. |
| -First | Select first x objects from the results |
| -Last | Select the last x objects from the results |
| -Skip | Skip x amount of objects |
| -SkipLast | Skip the last x records |
| -Index | Select the first x objects from the results |
| -SkipIndex | Skip the selected objects from the results. |
| -Unique | Select unique results |
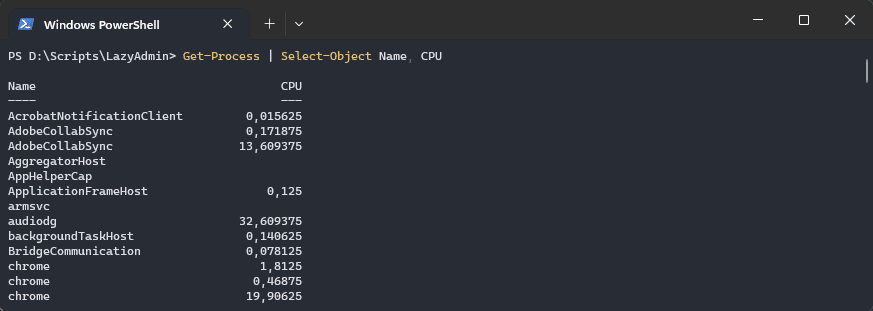
Let’s start with the basics and we will dive deeper into to abilities of PowerShell Select-Object along the way. To simply select a couple of properties from an object we can use a comma-separated list with the property’s names:
Get-Process | Select-Object -Property Name, CPU

# You can also leave out the parameter -Property
Get-Process | Select-Object Name, CPU
We don’t always have to use the full name of the properties, it’s also possible to use wildcards when selecting properties. For example, if we want to return all properties that end with the word Size, then we can do:
Get-Process | Select-Object Name, CPU, *Size
Excluding Properties
Instead of selecting the properties that we want, we can also exclude the properties that we don’t need with the parameter -ExcludeProperty. Just like with selecting properties, we can use a wildcard to exclude all properties that start or end with a particular string.
For example, we get all the items from the given path, and want to exclude the attributes and all properties that start with PS:
Get-ChildItem -Path c:\temp | Select-Object -ExcludeProperty Attributes, PS*
Limiting the number of results
A common question however is, how do you know which properties are available? To get all the possible properties we can use the -first parameter of Select-Object combined with a wildcard. The wildcard will return all properties, and -first 1 ensure that only one object is returned:
Get-Process | Select-Object * -First 1
The parameter -first and -last allow you to select the first or last x number of objects from the results. Good to know is that you can use both parameters simultaneously, so you could for example select the first 3 and the last 3 objects from the results:
Get-Process | Select-Object -First 3 -Last 3
Skipping Items
Besides selecting the first or last x items we can also skip a number of items with the parameter -skip. Good to know is that you can combine skip with first or last. So let’s say we want to return the objects 11 until 15:
$numberArray = 1..20
$numberArray | Select-Object -Skip 10 -First 5
Skip will always start at the beginning of the results, which makes sense. But what if you want to skip the last 10 items of the result? In that case, you can use the parameter -SkipLast, which will skip the x last results from the list:
$numberArray = 1..20
$numberArray | Select-Object -SkipLast 10
Selecting Specific Results with Index
If you know which specific object(s) you want to return then you can also use the parameter -index to select them. I don’t use -index a lot, but a good example is when you are reading out the contents of a file. If you know which line you need from the file, then you can use -index to select the line(s). Keep in mind that the index starts with 0.
# Select the 3 row from the CSV file
Get-Content -Path c:\temp\example.csv | Select-Object -index 2
You can also use -SkipIndex to skip a specific object (or line in the example above) from the results.
Select Unique
When you get all the running processes on your computer, you will probably see that some processes occur multiple times in the results, for example, Chrome (if you are using that as a browser of course). To get all the unique processes we can use the parameter -unique.
However -unique will determine if an object is unique based on all the properties, not only the name for example. So to get all unique processes that are running on your computer, we will first need to select a single property, in this case, the name, and then use the parameter unique:
Get-Process | Select-Object -Property Name -Unique
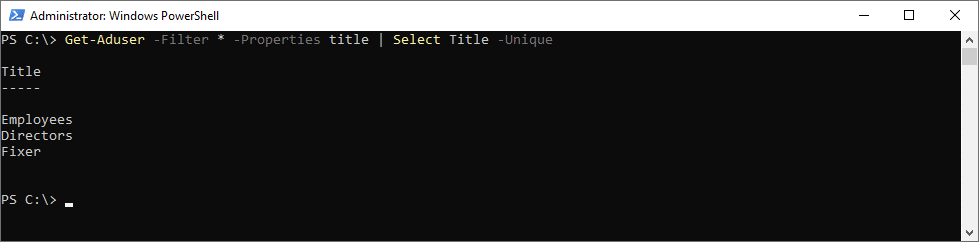
Another good example is when you want to get all the possible job titles that are used in your Active Directory. To do this, we will get all the users, with the property title, select only the title, and extract the unique values from it:
Get-Aduser -Filter * -Properties title | Select Title -Unique
Select Object Advanced Features
PowerShell Select-Object cmdlet also has some advanced features that you really should know. These features are based on a hashtable, which allows us to rename properties and create calculated properties.
The structure of the hashtable can look a bit overwhelming at first, so let’s break it down and explain it before we are going to take a look at a couple of examples. Take the following command:
Get-Service | Select-Object @{Name="ServiceName"; Expression={$_.DisplayName}}
As you can see, we get all the services and are going to select an object from it. Let’s take a look at what each part of the hashtable does:
@{Name="ServiceName"; Expression={$_.DisplayName}}– This is the hashtable-based parameter. It defines a custom property named “Servicename” which is presented in the original service objects.- Name=”ServiceName” – Specifies the new custom property to be added to the output
Expression={$_.DisplayName}– The expression that calculates the value of the new custom property. In this case, we will take the property DisplayName of each object and return it as ServiceName
Renaming Properties
To rename properties we can use the example above. We will add a new custom property and for the expression, we will take the value of the property DisplayName. You can still add other properties as well.
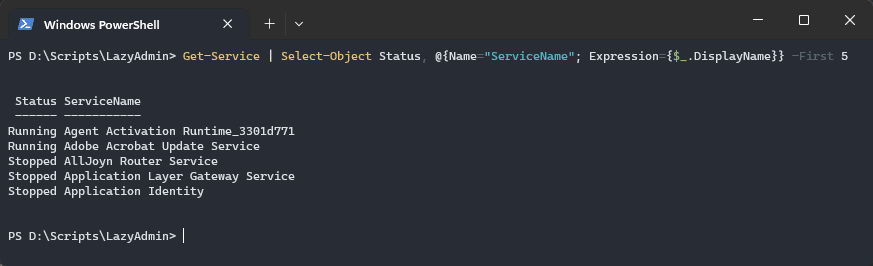
Get-Service | Select-Object Status, @{Name="ServiceName"; Expression={$_.DisplayName}}
Getting Nested Properties
We can use the rename method also to get nested properties with Select-Object. For example, we want to get the last 5 events from the event log and add the message length to the result. We can create a new custom property MessageLength, and in the expression select the property length from the property message:
Get-EventLog -LogName Application -Newest 5 | Select-Object TimeGenerated, EntryType, @{Name="MessageLength"; Expression={$_.Message.Length}}
Calculated Properties
The expression part in the hashtable-based parameter allows us to make calculations. The principle is still the same. First, we define a new custom property and in the expression, we can do any calculation that we want.
For example, to get the free space of your disk in GB, we can use the Get-WmiObject cmdlet to get the information from the disks. But it will return the free space in bytes, so we are going to calculate it in GB:
Get-WmiObject Win32_LogicalDisk | Select-Object DeviceID, MediaType, @{Name="FreeSpace (GB)"; Expression={"{0:N2}" -f ($_.FreeSpace / 1GB)}}
The Expression calculates the available free space on the disk by dividing the FreeSpace property by 1GB (gigabytes). It also uses the format operator -f to format the result with two decimal places using the {0:N2} format specifier.
Expand Property
When working with nested objects you sometimes want to include the result, but in the same column as the other data. In these cases, we can use the parameter -ExpandProperty so the results are displayed in the same column. Take the following object:
$myObject = [PSCustomObject]@{
    Name = "John"
    Age = 30
    Address = @{
        Street = "123 Main St"
        City = "Anytown"
        State = "CA"
    }
}
We could get the street by using the nested property method:
$myObject | Select-Object Name,@{Name="Street"; Expression={$_.Address.Street}}

# Result
Name Street
---- ------
John 123 Main St
But to get the results as separate objects, we will need to use the -ExpandProperty parameter like this:
$myObject | Select-Object Name, @{Name="Street"; Expression={$_.Address.Street}} -ExpandProperty Street

# Result
John
123 Main St
Wrapping Up
The PowerShell cmdlet Select-Object allows you to select the results that you need. The -First and -Last parameters are a great way to check the results before outputting all results. If you want to learn more about PowerShell, then check out this getting started guide.
I hope this article helped you to better understand how the cmdlet works. If you have any questions, just drop a comment below.


I’ve been studying the subject of PowerShell pipeline binding and stumbled upon an example that utilizes the Select-Object cmdlts and that made it worse to grasp, your explanation made it easy to understand.
Thank you very much, I was too close to give up learning PS.