The output of PowerShell commands is by default displayed in the terminal. But in some situations, it’s more useful to redirect the output to a file in PowerShell. For this, we are going to use the Out-File cmdlet.
There are different ways to output the results of a PowerShell script or command to file. It’s even possible to show the output in the terminal and export it to a file at the same time. And did you know that you can also export only the success, warning, or error results?
In this article
In this article, we are going to take a look at how to write the output to a file in PowerShell. I will also explain how you can append to an existing file or how you can create a log file.
Powershell Write Output to File
There are a couple of ways to write the output of PowerShell to a file. The most common ways are to use the Out-File cmdlet or the redirection operator >. Other options are to use the Set-Content and Add-Content cmdlet. We are going to focus on the first two, but I will briefly mention the alternative if relevant.
The Out-File cmdlet and redirect operator > allows you to write and append (>>) the PowerShell output to a file. The difference between the two is that the first accepts parameters and the latter doesn’t.
With the Out-File cmdlet we can use the following parameters:
| Parameter | Description |
|---|---|
| -Filepath | Set the location and name of the file |
| -Append | Append the output to the existing content of the file |
| -Force | Overwrite a read-only file |
| -NoClobber | Prevent overwrite of file |
| -NoNewLine | No newline character will be written. |
| -Width | Limit the number of characters on each line (default 80) |
| -WhatIf | Run in test mode |
PowerShell Redirect Operator
The redirect operator however doesn’t have any parameters. But it has an advantage compared to Out-File. When using the Out-File cmdlet, only the successful results are exported, so warnings or errors won’t be written to the file.
When using the redirect operator we can specify which stream we want to export:
| Operator | Description / Stream | Write cmdlet |
|---|---|---|
| > | Success only | Write-Output |
| 2> | Error only | Write-Error |
| 3> | Warning only | Write-Warning |
| 4> | Verbose only | Write-Verbose |
| 5> | Debug only | Write-Debug |
| 6> | Information only | Write-Information |
| *> | All |
I will explain more about the different streams later, but let’s first take a look at how we can simply write the output to a file in PowerShell.
To write the output to a file all you have to do is pipe the Out-File cmdlet behind your script or command and specify the path. If the file doesn’t exist, then it will be created by the cmdlet:
Get-Process -Name explorer | Out-File -FilePath c:\temp\process.txt
# Same as:
Get-Process -Name explorer > c:\temp\process.txt
# The results
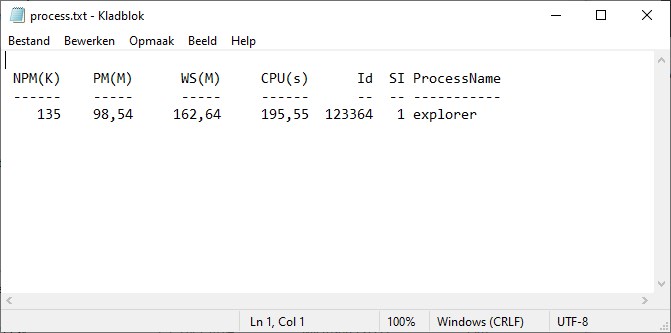
Get-Content C:\temp\process.txt
NPM(K) PM(M) WS(M) CPU(s) Id SI ProcessName
------ ----- ----- ------ -- -- -----------
132 94,56 158,22 131,45 123364 1 explorer
PS C:\>
As you can see, the results of the Get-Process cmdlet is stored in the process.txt file:
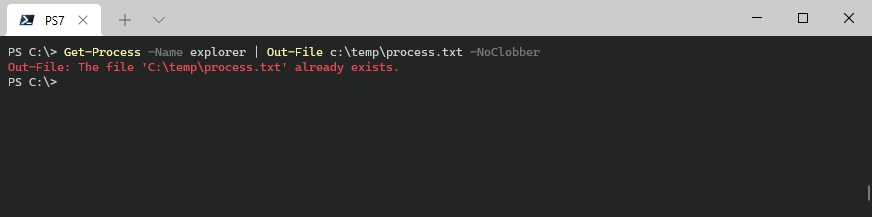
If you don’t specify any other parameter, then the Out-File cmdlet and redirect operator will overwrite any existing file by default. We can prevent this by adding the -NoClobber parameter to the cmdlet
Get-Process -Name explorer | Out-File c:\temp\process.txt -NoClobber
Note that you can’t prevent overwriting with the redirect operator
If the file already exists, then an error will be thrown:
If you want to output to a file inside a script then I recommend that you use the Test-Path cmdlet first to determine if the file already exists. This way you can write a better solution, like appending a date to the file name, instead of simply trying to write to it:
$exportPath = "C:\temp\process.txt"

If (Test-Path $exportPath) {
    # Show a warning or change the file name here
    Write-Warning "File already exists"
    $exportPath = "C:\temp\process-1.txt" # create something nice with a date or timestamp
}else{
    Get-Process -Name explorer | Out-File $exportPath -NoClobber
}
PowerShell Append to File
Instead of overwriting, we can also append the output to the existing content of the file. For this, we can either use the -append parameter or use the redirect operator >>. In both cases, the contents of the output will be added to the existing file.
You can also append to a non-existing file, both methods will create a new file if the specified file doesn’t exist.
# Append with the Out-File cmdlet
'Apple' | Out-File -FilePath C:\temp\fruits.txt -Append
Get-Content -Path c:\temp\fruits.txt

# Result
Apple

# Append with the redirect operator
'Pear' >> C:\temp\fruits.txt
Get-Content -Path c:\temp\fruits.txt

# Result
Apple
Pear
When appending output to an existing file the content will be placed on a new line. If you want to have the content on one single line, creating one long string, then you will need to use the Out-File cmdlet with the -NoNewLine parameter.
The newline character is placed after the value that you have added to the file. So it’s important to add the -NoNewLine parameter to the first Output as well.
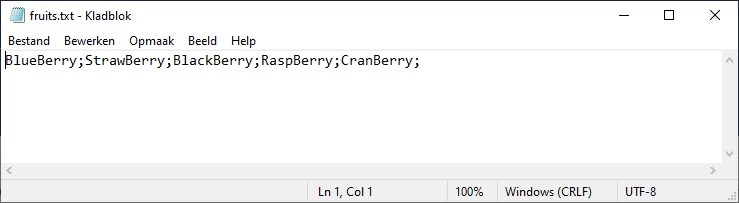
# Note that you will need to specify NoNewLine for the first entry as well
'BlueBerry;' | Out-File -FilePath C:\temp\fruits.txt -NoNewline

# Appending more berries
'StrawBerry;' | Out-File -FilePath C:\temp\fruits.txt -Append -NoNewline
'BlackBerry;' | Out-File -FilePath C:\temp\fruits.txt -Append -NoNewline
'RaspBerry;' | Out-File -FilePath C:\temp\fruits.txt -Append -NoNewline
'CranBerry;' | Out-File -FilePath C:\temp\fruits.txt -Append -NoNewline
To make the result more readable I have added a semi-colon to all values. As you can see all the results are on the same line:
Using PowerShell Add-Content
Another option to add content to a file is to use the Add-Content cmdlet. One of the biggest advantages of the Add-Content cmdlet is that it allows you to append content to multiple files at once.
Just like with the Out-File cmdlet and redirect operator, the Add-Content cmdlet creates a new file if the file doesn’t exist
So to simply add content to a file we can use the following command:
Add-Content -Path c:\temp\file.txt -Value "New line to add"
To add the same content to multiple files we have a couple of parameters to help us. We can use wildcards in the path to specify the files that we want to update. Also, we can exclude files names and even use a filter.
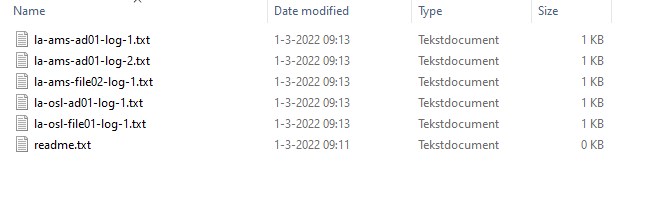
The example below will add the current date to all TXT files in the path c:\temp\files, except in the file with readme in the filename:
Add-Content -Path C:\temp\files\*.txt -Value (Get-Date) -Exclude "readme*"
All the files, except the readme files, are updated:
Both the include and exclude parameters allow you to specify a string array of files that you want or do not want to update.
If we take the example from above, we could also use the filter parameter to select only the files that include the word log:
Add-Content -Path C:\temp\files\* -Value (Get-Date) -Filter "*log*"
Write only Errors, Warnings, or Success to file
The out-file cmdlet will write only the successful result of your command or script to a file. But sometimes you also want warnings or errors to be outputted as well.
To achieve this, we can use the redirect operator. It allows you to specify which stream you want to output to a file.
Let’s take the script below as an example:
Function Get-ProcessCpu {
param(
[Parameter(Mandatory = $true)]$name
)
Get-Process -Name $name | select cpu
}
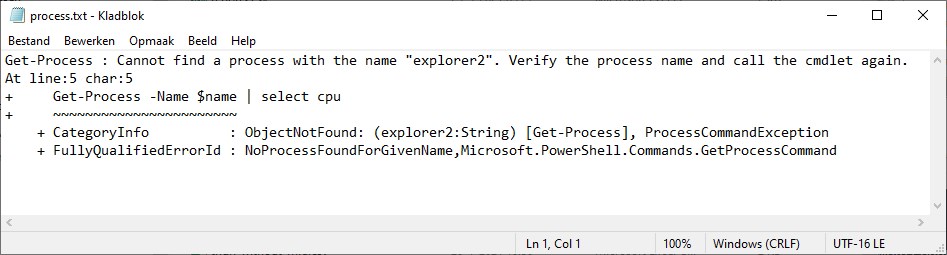
Get-ProcessCpu -name "explorer2" | Out-File C:\temp\process.txt
The process “Explorer2” doesn’t exist, so the Get-Process cmdlet will throw an error. If we run the script like this, then the process.txt file will be completely empty.
However, if we use the redirect operator we can specify which stream we want to output.
# Write all results to the file:
Get-ProcessCpu -name "explorer2" *> C:\temp\process.txt

# Write only the error to the file:
Get-ProcessCpu -name "explorer2" 2> C:\temp\process-error-log.txt

# Write only warnings to a file:
Get-ProcessCpu -name "explorer2" 3> C:\temp\process-error-log.txt
As you can see, the error is written to the text file with the redirect operator:
Powershell Write to Log File
The best option to write to a log file is to use the Start-Transcript cmdlet, but we can also write our own log function using the Add-Content cmdlet or the redirect operator.
Using the redirect operator will limit your possibilities, but is a great way if you only want to write the errors of a script to a log file:
Function Get-ProcessCpu {
    param(
        [Parameter(Mandatory = $true)]$name
    )
    Get-Process -Name $name | select cpu
}

# Write only errors to a log file
Get-ProcessCpu -name "explorer2" 2>> "C:\temp\files\$env:computername-process.log"
But when you are writing messages to a log file you probably want to have a bit more control. With log files it’s important we can see when the event happened and the severity of the event. So what we want to do is add a timestamp and an event level to the log message.
This way we can easily read the log file and identity any errors that have occurred.
# Set log file path
$logFile = "C:\temp\files\$env:computername-process.log"
Function Write-Log {
param(
[Parameter(Mandatory = $true)][string] $message,
[Parameter(Mandatory = $false)]
[ValidateSet("INFO","WARN","ERROR")]
[string] $level = "INFO"
)
# Create timestamp
$timestamp = (Get-Date).toString("yyyy/MM/dd HH:mm:ss")
# Append content to log file
Add-Content -Path $logFile -Value "$timestamp [$level] - $message"
}
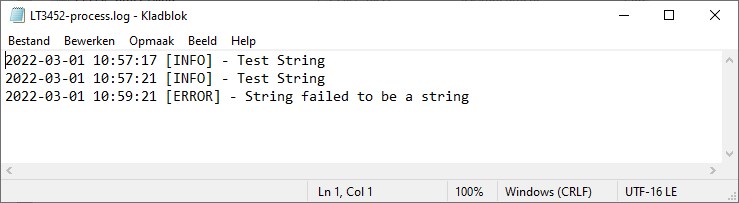
Write-Log -level ERROR -message "String failed to be a string"
The function above is an example of a simple log file creator for PowerShell that allows you to write messages (events) to a log file with the severity and timestamp.
Wrapping Up
As you have seen there are multiple ways in PowerShell to output the results to a file. To quickly output something to a file you can use the redirect operator or the Out-File cmdlet.
When you want to export the output to a CSV file, then make sure that you read this article. It’s also possible to replace content inside a file using the Replace method.
If you have any questions, just drop a comment below.


I don’t get any output from Expand-Archive. Shouldn’t there be anything? New to this 🙂
Expand-Archive -Path F:\repl\akronymer.zip -DestinationPath F:\akronymer\excel\ -Force >> F:\\repl\test.log
According to the documentation, there is indeed no output from the cmdlet. Only the extracted files of course.
Great article, it helped me a lot!
Hi Ruud, very nice content on your website, congrats!
There is a way to write a CSV output file without limit? I’m only get the first 100 records for each Enterprise Application I am consulting
The CSV output is not throwing in the limit, it’s the command before that. Use
Get-AzureADApplication -all | Export-CSV