When you need to bulk add new users to your Active Directory, then the easiest method is to import them. To do this we can use a CSV file and import the users in our Active Directory with the help of PowerShell.
The advantage of using a CSV file to import AD Users is that you can quickly fill in the required fields (or let the HR department fill in the details) and easily create new user accounts.
In this article, I will show you how to import users in your Active Directory from a CSV file, and at the end of the article, I have a complete script for you.
Import AD Users from CSV
The easiest way to import users into the Active Directory is to take a CSV file, where you have set all the headers exactly to match the New-ADUser cmdlet properties and use the Import-CSV and New-ADUser cmdlet.
To create the CSV file with the correct headers, I recommend that you export some of your current users from your AD with the needed properties:
Get-Aduser -Filter * -SearchBase 'OU=Users,OU=Oslo,DC=lazyadmin,DC=nl' -Properties DisplayName,EmailAddress,Title | Select Name,GivenName,SurName,DisplayName,Title,SamAccountName,UserPrincipalName,EmailAddress | Export-CSV "C:\users.csv"
You can of course add more properties to the export if you want. Remove the existing user accounts from the CSV file and add your new users to it. Then simply import the CSV file and create the new users:
Import-CSV c:\users.csv | New-ADUser -Enabled $True -Path 'OU=Users,OU=Oslo,DC=lazyadmin,DC=nl' -AccountPassword (ConvertTo-SecureString 'Pass123!' -AsPlainText -force)
Tip
Always test the actions before actually creating the new users. You can do this by adding the -WhatIf parameter behind the New-User cmdlet
The method above is really basic and won’t do any error checking for example.
Creating an Import Script
When you are going to create new user accounts in bulk there are some things that you will need to take into consideration. For example, you will at least need to check if the user account doesn’t already exist in your Active Directory.
But also when you are creating a user, some fields are formatted based on the name of the user. For example, the email address, login name, and the userprincipalname. I prefer to format these inside the PowerShell script to ensure they are consistent.
For example, with the email address, we can use the following small PowerShell function to format the email address of the user:
# Format the email address
$emailAddressFormat = $givenName + "." + $surName

# Replace hyphens, apostrophe and whitespace, format to lowercase.
return $emailAddressFormat.Replace('-','').Replace(' ','').Replace("'",'').ToLower() + $domain

## Input: Mary-Ann O'Sullivan
## Result
maryann.osullivan@lazyadmin.nl
Another common problem that occurs when using a CSV to import users in the Active Directory is trailing whitespaces. These can result in problems with the username or email address if you don’t trim them.
Import AD Users Script
Below you will find a complete script that allows you to easily bulk import users into your Active Directory. In the script, we will first set a couple of default values:
- Path – This is the path to the OU where the new users need to be stored
- Password – Default password for the new user
- Enabled – New accounts will be enabled when created
- Domain – This is the domain that is used for the email address.
In the script, you will also find a couple of functions. These functions are for example used to create the samAccountName (which is also the login name), which is recommended to keep within 20 characters, and the email address function. You can modify these of course to your preferred format.
Another function that you will find in the script is to look up the manager of the user. If you supply the manager’s name in the CSV file, then the script will look up the distinguished name of the manager.
param(
  [Parameter(
    Mandatory = $false,
    HelpMessage = "Enter the path to the CSV file"
  )]
  [string]$CSVpath
)

# ----
# Default values
# ----

# Default OU for new users
$path = 'OU=Users,OU=Oslo,OU=Sites,DC=lazyadmin,DC=nl'

# Default password for new users
$password = 'welcome@lazyadmin2024'

# Enable new accounts
$enabled = $true

# Email domain (you can also use a column in the CSV file for this)
$domain = '@lazyadmin.nl'

function Get-SamAccountName{
  PARAM(
    [parameter(Mandatory=$true)]
    [string]$givenName,
    [parameter(Mandatory=$true)]
    [string]$surName
  )

  # Create SamAccountName from given- and surname
  return (($givenName.Substring(0,1)) + $surName).Replace('-','').Replace(' ','').Replace("'",'').ToLower()
}

function Get-EmailAddress{
  PARAM(
    [parameter(Mandatory=$true)]
    [string]$givenName,
    [parameter(Mandatory=$true)]
    [string]$surName
  )
  # Format the email address
  $emailAddressFormat = $givenName + "." + $surName

  # Replace hyphens and whitespace, format to lowercase.
  return $emailAddressFormat.Replace('-','').Replace(' ','').Replace("'",'').ToLower() + $domain
}

function Get-Manager{
  PARAM(
    [parameter(Mandatory=$true)]
    [string]$name
  )

  # Get the manager
  Get-AdUser -Filter {name -like $name} -Properties * | select -ExpandProperty DistinguishedName
}

# Import CSV file and create users
ForEach ($user in (Import-Csv -Path $CSVpath)) {

  # Create the samAccountName and userPrincipalName
  $samAccountName = Get-SamAccountName -givenName $user.givenName -surName $user.surName
  $userPrincipalName = $samAccountName + $domain

  # Set Display Name
  $displayName = $user.givenName.Trim() + " " + $user.surName.Trim()

  # Make sure that user doesn't already exists
  if ((Get-ADUser -Filter {UserPrincipalName -eq $userPrincipalName} -ErrorAction SilentlyContinue)) {
    Write-Host "User $($displayName) already exists" -ForegroundColor Yellow
    continue
  }

  # Get Email address
  $emailAddress = Get-EmailAddress -givenName $user.givenName -surName $user.surName

  # Create all the user properties
  $newUser = @{
    AccountPassWord = (ConvertTo-SecureString -AsPlainText $password -force)
    ChangePasswordAtLogon = $true
    City = $user.city
    Company = $user.company
    Country = $user.country
    Department = $user.department
    Description = $user.description
    DisplayName = $displayName
    EmailAddress = $emailAddress
    Enabled = $enabled
    GivenName = $user.givenName.Trim()
    Manager = if ($user.manager) {Get-Manager -name $user.manager} else {$null}
    Mobile = $user.mobile
    Name = $displayName
    Office = $user.office
    OfficePhone = $user.phone
    Organization = $user.organization
    Path = $path
    PostalCode = $user.postalcode
    SamAccountName = $samAccountName
    StreetAddress = $user.streetAddress
    Surname = $user.surname.Trim()
    Title = $user.title
    UserPrincipalName = $userPrincipalName
  }

  # Create new user
  try {
    New-ADUser @newUser
    Write-Host "- $displayName account is created" -ForegroundColor Green
  }
  catch {
    Write-Host "Unable to create new account for $displayName" -ForegroundColor red
    Write-Host "Error - $($_.Exception.Message)" -ForegroundColor red
  }
}
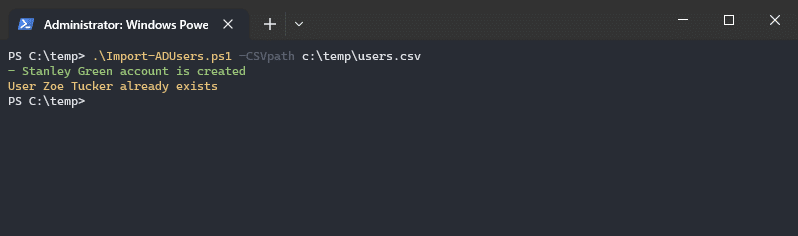
To use the script, you can use this Excel file as a template, or create one using the method described earlier. Make sure that you enter the default values for your environment and run the script:
Import-ADUsers.ps1 -CSVpath c:\temp\users.csv
A good option before you import the users is to see what the results are before actually creating the users. You can do this by adding the -WhatIf parameter behind the New-ADUser cmdlet on line 127.
I have also created a more advanced PowerShell script that you can use to create a single user. This script has a bit more error checking in it, and will also email the new account details to the manager for example.
Wrapping Up
When you need to bulk create new AD users, then the easiest method is to Import AD Users from a CSV file. You can use a CSV file with the exact headers and fill in everything in Excel, including the SamAccountName, OU Path, and Email address.
But another option is to automatically format these using PowerShell. The advantage of the latter is that you can include some error checking while making sure that all the formatting is consistent.
I hope this article helped you with Importing AD users, if you have any questions, just drop a comment below.


