We all know the Net Use command that we can use to map network drives from the command line. Although we can use Net Use in PowerShell, there is a more powerful alternative, the New-PSDrive cmdlet.
With the New-PSDrive cmdlet, we cannot only map network drives but also create drive mappings to local folders or registry keys on our computer. Drives created with the cmdlet can be temporary for only the current PowerShell sessions or persistent so they can be used in Explorer.
In this article, we are going to take a closer look at all the possibilities of the New-PSDrive cmdlet with some useful examples for you to use.
Temporary vs Persistent drives
Before we are going to take a look at how to create network drives, I first want to explain the difference between temporary and persistent drives.
Temporary drives can only be used in the current PowerShell session. They won’t be visible in Windows Explorer and will be gone when you close the PowerShell session. They are great to use when you need to interact with a remote folder or a long folder path on your local computer.
Persistent drives are assigned a drive letter and therefore can also be used in Explorer. They will remain available when you close the PowerShell session or even reboot your computer.
Adding a new network drive with New-PSDrive
To map a network drive with PowerShell, we are going to create a persistent network connection. This way the network drive will be available in Explorer and other tools and not only in PowerShell.
There are a couple of required parameters to create a network connection:
| Parameter | Description |
|---|---|
| Name | Must be an available drive letter |
| PSProvider | Set to FileSystem for network shares and folders |
| Root | The network location that you want to map |
| Persist | To make it available outside PowerShell (in Explorer) |
So to map the network share \\VBoxSvr\Win11 and assign it the drive letter v: we can use the following command:
New-PSDrive -Name V -PSProvider FileSystem -Root \\VBoxSvr\Win11 -Persist

The network location will now be available in Explorer or any other tool that you want to use.
Using different credentials for the mapped network drive
Just like with Net Use we can use different credentials to open a remote network drive. For this, we first need to create a credential object that we can use to map the network drive.
# Get the credentials
$cred = Get-Credential

# Create the drive mapping with the credentials
New-PSDrive -Name V -PSProvider FileSystem -Root \\VBoxSvr\Win11 -Persist -Credential $cred
Creating a Temporary Drive Mapping in PowerShell
As mentioned we can also create a temporary drive mapping with PowerShell. With temporary mappings, we are not limited to letters only. We can give any name we want to the mapping. Also, we can create a mapping to a local folder on our computer.
For example, we can create a mapping to our log folder with:
New-PSDrive -Name Log -PSProvider FileSystem -Root c:\temp\logfiles -Description "Log Folder"
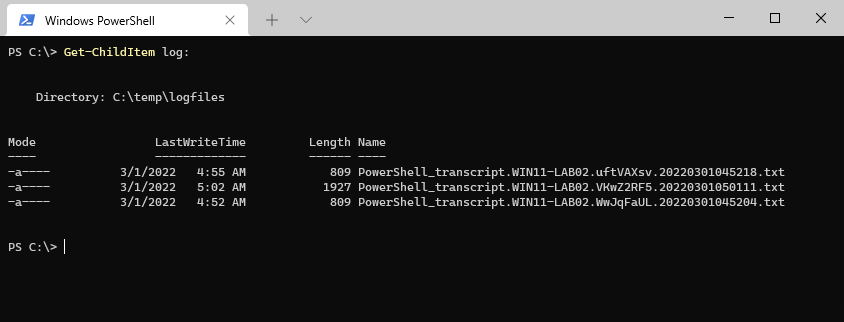
This way we can quickly navigate to the log files with cd log:. But we can not only navigate to the folder, we now also reference the mapping in other cmdlets. For example:
Get-ChildItem log:
Creating a persistent mapping to a local folder
Temporary mappings are gone after you close the PowerShell window. There is no option to store mappings to local folders with New-PSDrive. But when you need to access a long folder path often from PowerShell then you could add the cmdlet to your PowerShell Profile. This way the mapping will be recreated every time you open PowerShell.
First, open your profile:
ise $profile
If you get an error that your profile is not found, then follow this article to quickly create one.
In your PowerShell profile add the following line:
# Create shotcuts to long folder paths
New-PSDrive -Name Log -PSProvider FileSystem -Root c:\temp\logfiles -Description "Log Folder" | Out-Null
Note that we added | Out-Null to the cmdlet. By default, the cmdlet will output the results of the drive mapping. But we don’t want that every time when we open a new PowerShell session.
Mapping Registry keys with New-PSDrive
Besides mapping network drives and folders, we can also map registry keys with the New-PSDrive cmdlet. By default, you will find already a mapping to the HKEY_CURRENT_USER key and HKEY_LOCAL_MACHINE key. You can few these with the command:
Get-PsDrive -PSProvider Registry

# Result
Name           Used (GB)     Free (GB) Provider      Root                   CurrentLocation
----           ---------     --------- --------      ----                   ---------------
HKCU                                   Registry      HKEY_CURRENT_USER
HKLM                                   Registry      HKEY_LOCAL_MACHINE
If you want to create a mapping to the HKEY_USERS hives you can do the following:
New-PSDrive -Name HKU -PSProvider Registry -Root HKEY_USERS
We are not limited to the top-level registry gives, you can create mappings to any registry key you want. For example, the HKCU Windows NT key:
New-PSDrive -Name WinNT -PSProvider Registry -Root HKEY_CURRENT_USER\Software\Microsoft\Windows NT
You can now easily add, edit or remove registry keys using the create mapping:
# WinNT: is the mapping that we created earlier
New-Item –Path WinNT: –Name LazyAdmin
Wrapping Up
To be honest, there is little advantage to using the New-PSDrive if you only want to map a network share that is also available in Explorer. The Net-Use command is shorter and more convenient to use.
But when you only need to create a mapping in a PowerShell session, or when you want to create a shortcut to local folders or the registry, then the cmdlet can be quite useful.
If you have any questions, just drop a comment below!


I forgot to mention that I absolutely loved your article. It was the best one that I found while trying to learn how to use Powershell to map a network drive.
I want to create a PS script for a laptop PC, that would map the drive letter F to a network share, EG, \\XYZ-PC\F, if and only if the laptop is connected to the network where that Network share is available. I would use the script as part of my boot-up routine on the laptop. I don’t want the assignment of the drive letter F to persist if I am using my laptop outside of my home network.
Based on what I read at the New-PSDrive reference page, I have the impression that the drive letter F assignment will remain in effect if I choose the persist option regardless whether the network share is available, resulting in errors when I am away from my home network. But if I don’t choose the persist option, the network share will not be available in Windows Explorer. What to do?
Because you are using PowerShell, you could simply check if the remove computer is online or not. When it’s not available, we can remove the PSDrive
$computer = "192.168.56.1"
$mappedDrive = "\\localhost\c$"
$driveName = "V"

if (Test-Connection $computer -Quiet) {
    New-PSDrive -Name $driveName -PSProvider FileSystem -Root $mappedDrive -Persist
}else{
    Remove-PsDrive -Name $driveName
}
Another option would be to create PowerShell that runs on Logoff as well, that removes the mapped network drive.