You have installed and configured Azure AD Connect, but how do you force the synchronization? When you change a user in your local Active Directory you might want to speed things up by forcing a delta sync to Azure AD.
We can use a simple PowerShell command to manually sync the latest changes from your local AD to Azure AD. You can safely run this command any time you need.
In this article, we are going to take a look at the default sync schedule, how to force a delta sync and how to change the schedule permanently.
Sync Azure AD
The Azure AD Connect Tool will sync changes on a regular interval by default. For this, it uses two schedules, one for password changes and one for all other objects (users, computers, groups) changes. The default synchronization intervals for Azure AD are:
- Passwords every 2 minutes
- Object changes every 30 minutes
To force the sync manually we are going to use PowerShell. On the server where the Azure AD Connect tool is installed, you don’t need to install any additional modules. Let’s first take a look at the default schedule:
Get-ADSyncScheduler
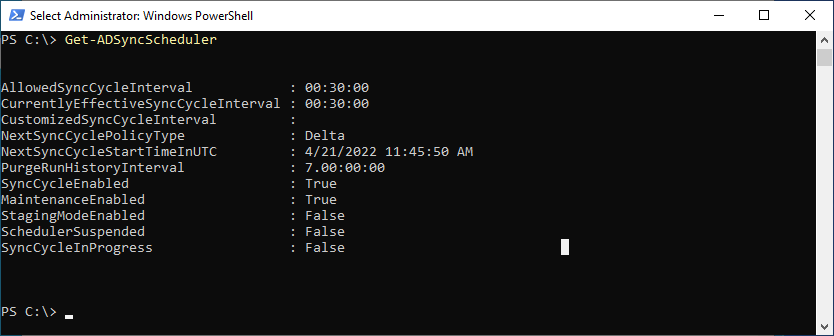
We can see that the next sync cycle will run at 11:45:50 AM and that it will be a Delta sync. There are two types of syncs possible:
| Sync Type | Description |
|---|---|
| Delta | Sync only the latest changes |
| Initial | Full sync – only needed when changing Azure AD Connect configuration |
Force Delta Sync Azure AD
When you change for example a user in your Active Directory or Azure AD, then you can force the synchronization with a Delta sync. This will find all changes since the last run and applies them to either side.
Delta sync is also used when you create a new user in your Active Directory and want to speed up to synchronization to Microsoft 365 so you can assign the license for example.
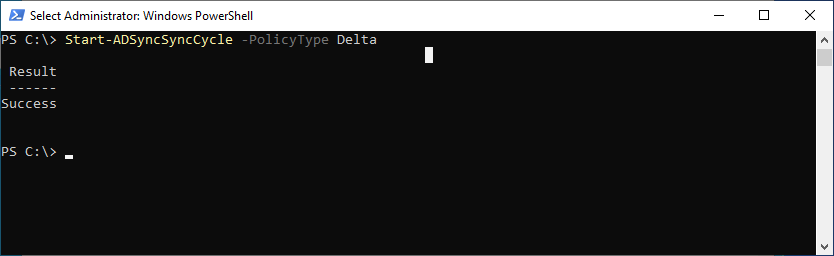
To force an Azure AD Delta Sync we need to run the following cmdlet:
Start-ADSyncSyncCycle -PolicyType Delta
If there is already a sync running you will get the following error:
Sync is already running. Cannot start a new run till this one completes.
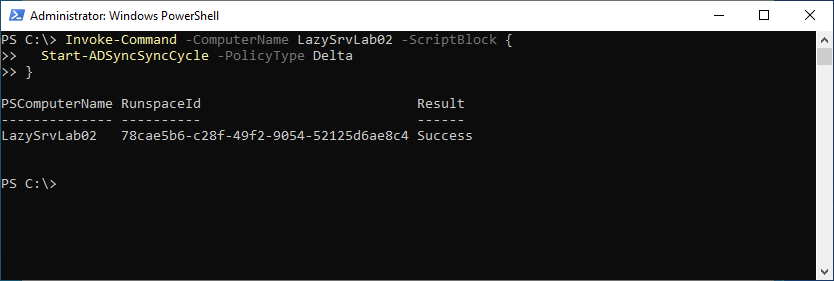
The Start-AdSyncSyncCycle command needs to be run on the server where the Azure AD connect tool is installed. You don’t need to log in on the server to actually run the cmdlet. We can also remotely start the sync with PowerShell:
# Replace LazyServer01 with the computername of the server that has
# Azure AD Connect installed on it

Invoke-Command -ComputerName LazySrvLab02 -ScriptBlock {
  Start-ADSyncSyncCycle -PolicyType Delta
}
Full Azure AD Sync
The full sync will go through all the Active Directory objects and synchronize them again. This is something you barely need and it also takes a lot more time to sync. The only use case that you need to do a full synchronization is when you change the Azure AD Connect configuration, after adding for example an extra OU to the scope.
To run a full sync you can use the policy type Initial:
Start-ADSyncSyncCycle -PolicyType Initial
Using the Synchronization Service Manager
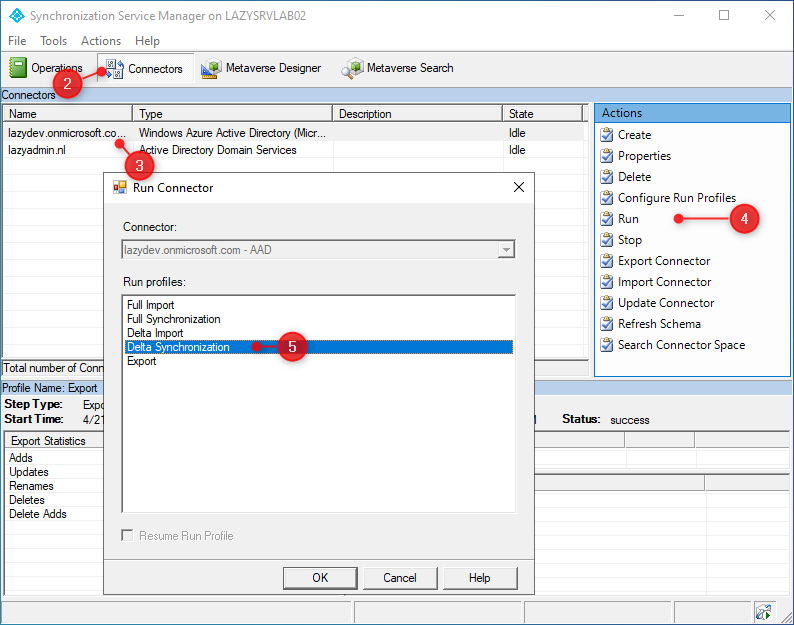
If you don’t like or want to use PowerShell, then you can also force the synchronization using the Synchronization Service Manager. This tool is automatically installed with Azure AD Connect and allows you to troubleshoot synchronization errors and manually start and stop the synchronization.
- In the Start Menu open Synchronization Service (located under Azure AD Connect)
- Click on Connectors
- Select the local connector
- Click on Run in the sidebar
- Choose Delta Synchronization and click Ok
Change the Azure AD Sync Schedule
It’s possible to change the default schedule of every 30 minutes to something else. But there is an upper and lower limit to the interval. The Sync Cycle needs to run at least once per 7 days. And it can’t run more than once per 30 minutes.
So you can’t change the schedule to run every 15 min for example. But it’s, however, possible to change the setting to once per hour or even once per day.
To change the schedule to once per hour we are going to use the Set-ADSyncScheduler cmdlet:
# Run every hour
Set-ADSyncScheduler -CustomizedSyncCycleInterval 01:00:00

# Run once per day
Set-ADSyncScheduler -CustomizedSyncCycleInterval 1.0:0:0
To apply the settings you will need to run a delta sync. After that, your new schedule will be active.
Wrapping Up
The delta synchronization is in most cases more than enough. It allows you to quickly synchronize the latest changes between your local AD to Azure AD. Keep in mind that passwords are synced every two minutes, so there is no need to force a delta synchronization when you change a password.
If you want to know more about configuring the Azure AD connect tool, then make sure you read this article.
If you have any questions, then just drop a comment below.


