Having a homelab is a great way to learn new skills and test out new features without the risk of damaging a production environment. To run your homelab we will build our own home server, which will be low-power and affordable.
Home servers often run 24/7, so you want to keep the power consumption low. Depending on the server’s location, you probably want to keep the noise level down. This means that most enterprise servers are not really an option for a homelab. That is why we are going to build our own server.
In this article
In this article, we will look at the different hardware options, and I will walk you through the build of your home server.
Best Home Server Components
Building your own home server isn’t really difficult and it’s also rewarding to do. But which components do you need? What you need depends on how you intend to use your homelab server. If you want to learn new IT skills, try out a new OS, or need a VM for testing purposes, then a small, and lower-power server is a great option. But if you want or need to store a lot of data, then we will need to build a system that supports more disks for example.
In all cases, you want to keep the power consumption as low as possible for your home server. So let’s take a look at the main components that are a good choice to build your home server with:
- Motherboard – The motherboard has a major role in the energy efficiency of your system. Simple motherboards, that don’t have a lot of features are the best choice. They consume the least amount of power, compared to gaming orientate motherboards. A good choice are ASRock motherboards, which are really designed to be energy efficient.
- Processor – A dual-core or quad-core processor is for most homelabs more than sufficient. The most energy-efficient processors are the Intel i3-9100 and 9th gen Pentium Gold lines. The i3-9100 isn’t made anymore, so they will be harder to get, unfortunately. Go for the 10th generation processor if you can’t get your hands on a 9th gen.
- Memory – If you are not going to run VMs on your home server, then 4 GB is in most cases enough. Otherwise, go for 8 or 16 GB.
- Storage – SSD consumes the least amount of energy but are a bit more expensive than HDD disk. If you are going to use your homelab only for testing then go for SSD disks. If you also want to use it for storage (NAS), then get an SSD for the OS and HDDs for the storage. This way the HDDs can be turned off when they are not used.
- Cooling – When you want to keep the noise down, then Noctua coolers are the best choice.
Low Power Home Server

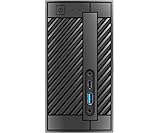
The first configuration we are going to look at is the low-power home server which is also small and really quiet. I used the ASRock H310M-STX motherboard, which is only available in the ASRock Deskmini 310 barebone system. The advantage of the DeskMini 310, is that it comes with an external power adapter, supports 2 disks, and comes with the 1151 socket, which can be used for the Intel i3-9100.
For the processor, I used the Intel i3-9100. This process is available in boxes and tray versions. Boxed means that a cooler is included, and tray is only the processor. Tray is often a lot cheaper (can save you around $30 on the i3), but know that the stock cooler also fits inside the DeskMini 310.
To keep the system quiet I used the Noctua NH-L9i CPU cooler. You really can’t hear this cooler and it keeps the i3 perfectly cool, even under load. Because I plan to run a couple of VMs simultaneously I have gone for 16 GB of memory. A single bank is enough, the performance gain of dual-channel is minimal in these systems.
The last component is the disk, a single SSD of 250GB or 500GB is more than enough for a homelab system. Samsung SSDs are the most energy-efficient SDDs at the moment.
This whole setup will cost you around $470 and consumes around 6 watts when running idle with Windows 2022 installed and one VM running:
- Supports Intel 8th processors (socket 1151) (max. TDP 65W)
- not backward compatible with older generation of LGA 1151 CPUs

- 4 Cores /4 Threads
- Up to 4.2 GHz

- Ultra-compact low-profile cooler with only 37mm total height – ideal for…
- 100% compatibility RAM- and PCIe-compatibility due to 95x95mm footprint,…
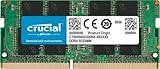
- Allow convenient and fast access to the stored information your computer is…
- Up to 3200 MHz speed with CL22 latency for smooth computer performance

- Interface: achieves the maximum SATA limit of 560/530 MB/s sequential…
Low Power NAS Server
If you want to use your server also to store a lot of data, then the DeskMini 310 isn’t the best option. You can’t place HDDs in it, and it only supports 2 SSD disks. So we will need something a bit bigger.
The ASRock H610M motherboard supports the latest Intel processors (Gen 12 and 13). This gives us a bit more choice in available processors. The board also comes with 4 SATA3 connectors and 1 Ultra M.2 slot. So enough room for the storage disks.
For the processor we are going to use an i3 again, only this time a 12th Gen model. Try to get the tray version, because these are cheaper than the boxed ones. (tray comes without CPU cooler). If you don’t plan to run VMs on the server, then 8 GB of memory is more than enough, otherwise, get a 16 GB module.
Because we are not starting with a barebone system, we will need a case and power supply. For the Power Supply, the Corsair RMX Series – 2021 model is a good option. It’s really quiet and efficient. The challenge with the case is to find one that is small, doesn’t come with a bunch of LEDs, and has atleast 4 2.5″ HDD slots. The Coolmaster MASTERBOX Q500L is a good option for our NAS server.
As last, we will need to get a couple of disks of course. We are going to use an M.2 disk for the OS, and 2.5-inch HDDs for the storage. The advantage of 2.5-inch disks is that they only use around 4 watts compared to 20 watts for the 3.5-inch disk on boot.
Without the Seagate disk, this system will cost around $600. When configured optimally it should consume around 10 watts when running idle.
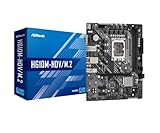
- Supports 12th Gen Intel Core Processors (LGA1700) 6 Phase Power Design…

- Intel® Core® i3 3.30 GHz processor uses less power and the…
- 12 MB of L3 cache rapidly retrieves the most used data available to improve…
- Proven premium heatsink (more than 200 awards and recommendations from…
- Only 37mm height allows it to fit compact HTPC and Small Form Factor (SFF)…
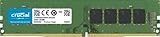
- 3200MHz RAM can downclock to 2933MHz or 2666MHz if system specification…
- Improve your system’s responsiveness, run apps faster and multitask with…
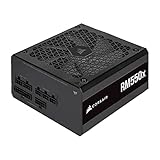
- Fully modular, so you only connect the cables that your system needs.
- A 135mm ML fan utilizes a magnetic levitation bearing and custom engineered…
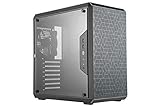
- Minimized dimensions for standard ATX: The Master Box Q500L supports…
- Fully perforated chassis: The top, front, rear, and bottom panels are fully…

- The BarraCuda mobile internal hard drive is the go-to upgrade for on-the-go…
- Tackle projects, maneuver applications, and multitask like a pro with a…

- INNOVATIVE V-NAND TECHNOLOGY: Powered by Samsung V-NAND Technology, the 970…
- BREAKTHROUGH READ WRITE SPEEDS: Sequential read and write performance…
Building your Home Server
With the components sorted, let’s start with the build of our home server. Building a computer isn’t really difficult as long as you keep in mind that connectors, memory modules, and processors only fit one way.
For the processor, it’s important to note the small pin 1 indicator in the lower-left corner and the two notches on either side. These must line up with the notches and pin 1 indicator on the motherboard.

With the DeskMini 310 comes an excellent step-by-step guide on how to mount the processor, and install the disks. When installing the CPU cooler, make sure that you apply the thermal paste on the processor. This only has to be a small drop of 5mm (the size of a pea) in the center of the processor.
The SSD disks are mounted on the back of the motherboard, where you will also find the SATA3 connectors. Now these connectors are a bit difficult to get on. You will have to make sure that they really click.

With all the components mounted we can slide the motherboard back into the DeskMini 310 case. Make sure that you connect the front panel cable (the red wire sits on the CPU side). We can now start our new home server.
To install Windows 2022 on it, you can make a bootable USB with the Windows Server 2022 ISO and Rufus. If you want to run VMs on the home server, then check out this article on how to install and configure Hyper-V.
Optimizing Power Settings
With the server running and Windows installed we can now go through the energy saving settings. To save energy we will have to turn off components and services that we don’t need. Another part of the energy saving is achieved by making sure that components go into sleep state.
For example, HDD disk that are not used can be turned off. And for the processor we canconfigure the C-states. These are sleep states of the processor ranging from C3 to C10 which will result in much lower energy usage.
Bios settings
We are going to start with the bios settings. The steps below are specific for the ASRock DeskMini 310, but you can also use these as a guide for your motherboard. At the end I will also give some general tips/settings to look for.
In the bios, make sure you open the advanced settings, by pressing F6. Open the tab Advanced:
- CPU Configuration > Set CPU C States support to enable. Set CPU C3, C6, C7, C10, and Package C State to enabled.
- Chipset Configuration >
- Enable PCI Express Native Control
- Disable Onboard HD Auto, WAN Radio, BT Control
- Storage Configuration > Enable SATA Aggressive Link Power Management

For non ASRock motherboards you want to look for and enable settings like:
- ErP Ready
- CEC Ready
- Energy Star Ready
- Intel SpeedStep Technology
- Enhanced Halt State (C1E)
- EIST
- Intel Turbo Boost – disable
Also try to lower the FAN speeds to the bare minimum.
Windows Power Saving Settings
Windows also allow us to optimize the power consumption of our home lab server. Open the Power plan setting in the controler panel (Open start and type Power Plan). Open the advanced settings and select Power Saver to start with.
- Hard disk – Turn off disk after 10 min
- Internet Explorer > Javascript timer > Maximum Power Savings
- USB Settings > Selective suspend > Enabled
- PCI Express > Link State > Maximum Power Savings
- Processor Power Management > Set minimum state to 1%
We also want to minimize the CPU usage, so make sure that you disable all services that you don’t need, and remove any programs from the auto-start. If you are using Win 10 or 11 as OS, then run a debloater script to remove all unnecassary software.
Wrapping Up
Having your own home server is a great way to learn new and improve your IT skills. They are also great to test new features in a save environment or can be used to run software like home assistant. With the components listed in this article you can easily build a low power home server for a reasonable price.
I hope this article helped you with building your homelab server. If you have any questions or tips on building a home server, then just drop a comment below.


Do you have an alternative to the Coolmaster MASTERBOX Q500L as it seems to out of production or out of stock? Also are these builds compatible with Ubuntu server?
Ubuntu will run fine on it. Maybe the Q300L, but it only has one 3.5inch hdd slot (and 2 2.5inch).
Hi, I built this server with the 12th gen i3 processor and the computer turns on but shows no display. Do I need to add a graphics card to this server build? I used the ram you recommended and the motherboard.
Thanks
A videocard is not needed for this build.
Can you please advise if you had to install a video card in a server, which one would you choose? The thing is, I am currently building a terminal server based on the AMD Ryzen 5600X processor, but it, unfortunately, lacks integrated graphics. The Ryzen models that come with a graphics chip have significantly less L3 cache.
I would get look at the B550M-HDV for example.
Thanks for you guide! It’s been really helpful. Would you recommend separating devices by having a Home server + NAS (2 devices) or having them both in 1 device?
My use case is just running a few VMs, Docker containers and backing up all my important photos and videos (why I’m considering separating them). Thanks!
I have combined it, because it’s only a backup of my photos. But their is a risk ofcourse. If you brick your Hyper-V server (or what you are running as hypervisior) then you risk loosing your backup as well.
For the low powered NAS server, the Coolmaster MASTERBOX Q500L case only looks to have 1 slot for HDDs. Is that correct? Any recommendations for one that has 4 slots to match the 4 SATA ports on the MB?
you can mount either 2x 3.5″ hdds or 4x 2.5″ hdds
If, for example, you need ESXi in your home lab, what network card would you recommend for your setup?
Broadcom 5719 or an Intel i350 are good options.
I will recommend changing the case for the NAS server build, so it’ll fit more than 2* 3.5 HDDs. Other than that, Thanks! Really, open your eyes to the possibilities!
Keep in mind that 3.5″ disks use more power, that’s why I have chosen the 2.5″ disks and this case
Hi,
good information. But if I’m a Mac OS user, how do I configure my home server and what software to use if I want to host my page or have store photos or video. ?
This couldn’t have come at a more perfect time! I’ve been considering something like a Dell PowerEdge T-series because I just don’t have the room to have a rack server, but I also felt like a full-fledged server may be a bit much for VM’s and an aspiring SysAdmin. I’ll definitely check these things out! Thank you Ruud.