Azure Files is basically a hosted file server in the Azure Cloud. It allows you to create a file share, just like a normal file server, that you can access from anywhere in the world. The Azure File Share uses that standard SMB and NFS protocol, so you can use it on Windows, Linux, and macOS.
Even though most organizations use SharePoint, there are still applications and use cases that require a normal file share. If you don’t want or can’t use an on-premise file server, then Azure Files is a perfect solution.
In this article
In this article, we are going to look at what is Azure Files, how to create an Azure File Share, and of course how to mount it on your clients.
What is Azure Files
Azure Files is a cloud-based file system that you can use just like an on-premise file server. The advantage of Azure Files over SharePoint for example, is that you can create file shares and use this in specific business applications, or just mount them in your explorer.
Another option is to use the file share for your own (web) applications. You can connect to the Azure File Share using REST API. This way the application can easily read and write files from the Share, while developers or users can mount the file share as well.
Redundancy
The advantage of using a cloud storage solution is besides scalability of course redundancy. Your Azure File Share is created in an Azure Storage account. Depending on your requirements, you can replicate the data between geographical regions or only in your primary region.
No matter which option you choose, your data is always replicated three times in your primary region. For local replication, you have two methods to choose from:
- LRS (Locally redundant storage) – This copies your data synchronously three times in a single physical location (in the same data center). This is the least expensive option.
- ZRS (Zone redundant storage) – This method copies the data synchronously between 3 Azure availability zones in your region.
LRS only protects your data against drive or server failures. If, for example, a fire breaks out in the data center, then your data isn’t protected. This method is fine when you don’t store critical data, or when you have a third-party backup solution for your data.
ZRS spreads your data across 3 data centers in your primary region. This gives of course a better form of protection. Keep in mind, however, if you need to keep your data inside your country due to governance requirements, then check if the paired locations are also in your country.
If you want to be fully safe when it comes to storing your data, then you should use Geo-redundant storage in combination with LRS. This way 3 copies of your data are stored locally, and 3 copies are stored inside another region.
Pricing
To determine if Azure Files is a viable solution for your organization, you will have to take a good look at the pricing, which is built up out of a couple of components. First, you will have to decide which Usage Tier you want to use. You can choose between the following 4 tiers:
| Usage Tiers | Description | Storage costs |
|---|---|---|
| Cool | Used for online archiving or with Azure File Sync | $0.015 per used GiB |
| Hot | Optimized for general purpose | $0.0255 per used GiB |
| Transaction optimized | Great fit for applications that require file storage or for backend storage. | $0.06 per used GiB |
| Premium | For I/O-intensive workloads, with high throughput and low latency | $0.16 per provisioned GiB |
Storage costs are only one component that makes up the price for Azure Files. Another big part is the transaction costs. This is a price that you pay for every Write, List, Read, etc operation. Now calculating this part is pretty hard, because how many file reads will you have in a month?
A fact is that the higher the tier, the less you pay per transaction. Reading and writing a lot of files to a cool storage every day is of course more expensive than when you are using a Transaction Optimized storage. You can find all the details regarding the pricing here in the Azure Files Pricing details.
How to create an Azure File Share
To create a new Azure File Share you can use the Azure Portal or PowerShell. In both cases, we first need to create an Azure Storage Account. In the storage account, you can manage things like billing, storage location, redundancy, data protection, and more.
A storage account can contain an unlimited amount of file shares and other storage resources, so you will only have to set it up once. Make sure that you have an Azure Subscription before you begin
I will first explain the steps using the Azure Portal, and then show you how you can create and manage Azure Files with PowerShell.

Creating an Azure File Share
Time needed: 10 minutes
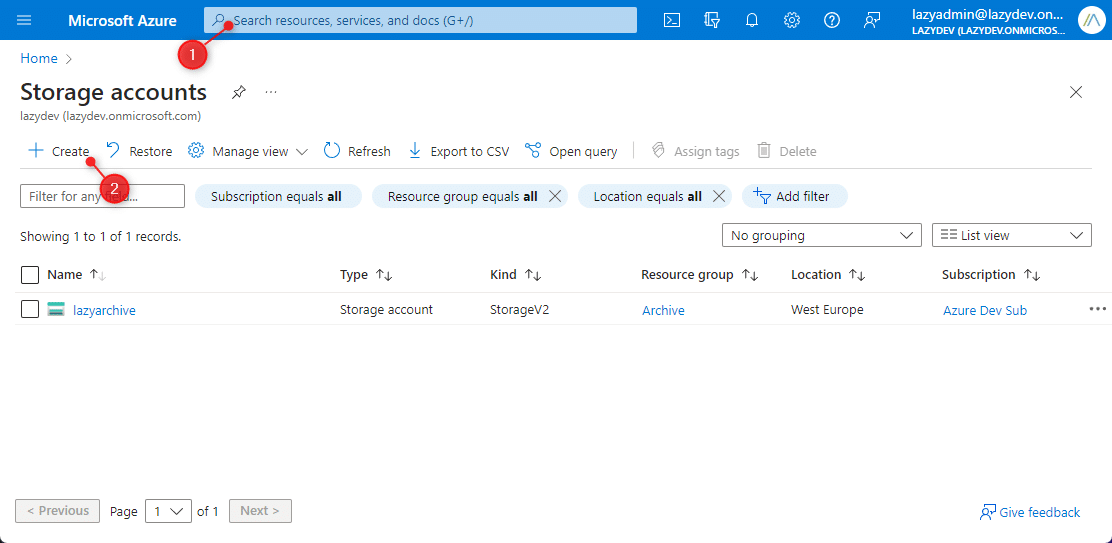
- Open Storage Accounts
In the Azure Portal, open (or search for) Storage Accounts
- Create a new Storage Account
Click on + Create to create a new storage account

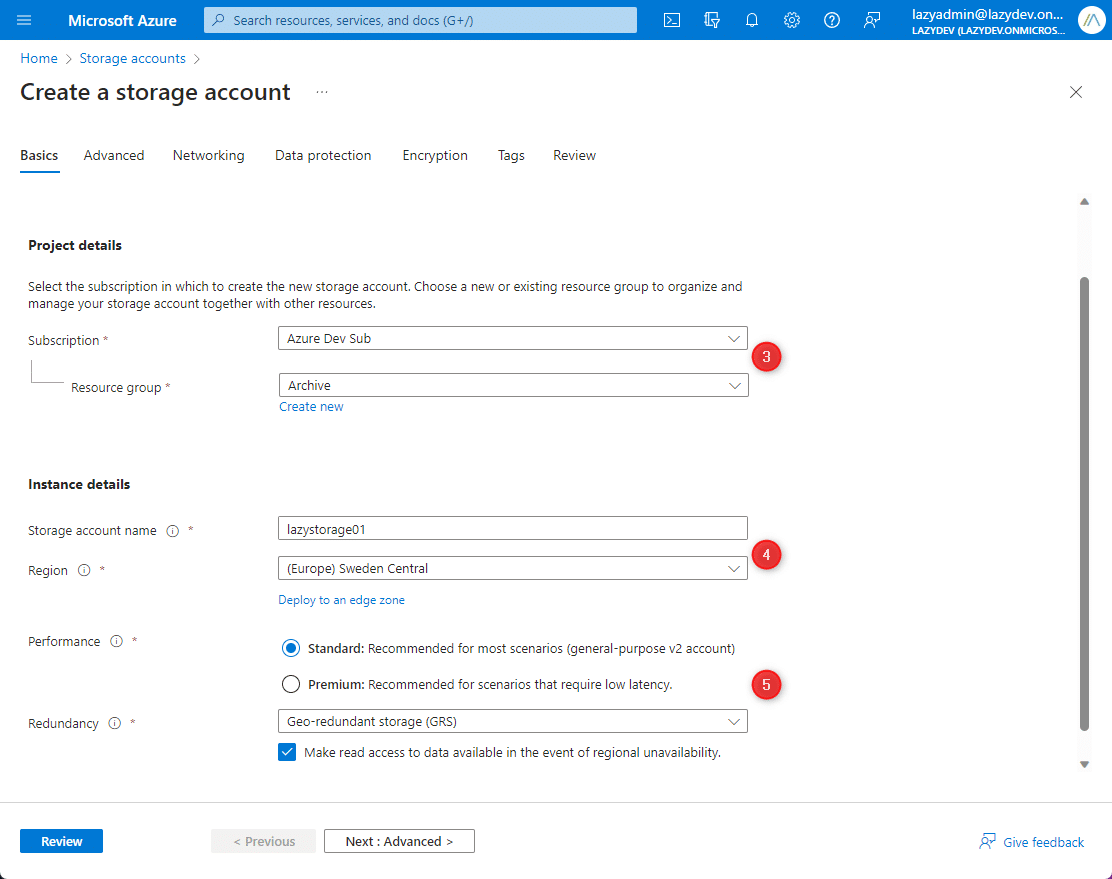
- Select your Azure subscription
The first step is to select your Azure Subscription under the Project Details. Also, select or create a resource group
- Storage Account Name and Region
The storage account name has to be unique and can only contain lowercase and numbers.
Select the Region where you want to store your data. Choose a location close to you for the lowest latency, keeping your governance requirements in mind.
- Choose Performance and Redundancy
The Standard performance option is good enough for most purposes. Only when you need a really low latency, you can choose Premium
Select the redundancy that you would like to use for the storage. Keep in mind that LRS is less expensive, but doesn’t protect your data against for example a fire in the datacenter. - Review settings and Create a storage account
Review the settings, and take a look at the data protection and network settings as well. You might want to change the retain period for soft delete or limit the access to the storage account to specific IP Addresses only.
When done click on Review, scroll down through the settings, and click on Create.
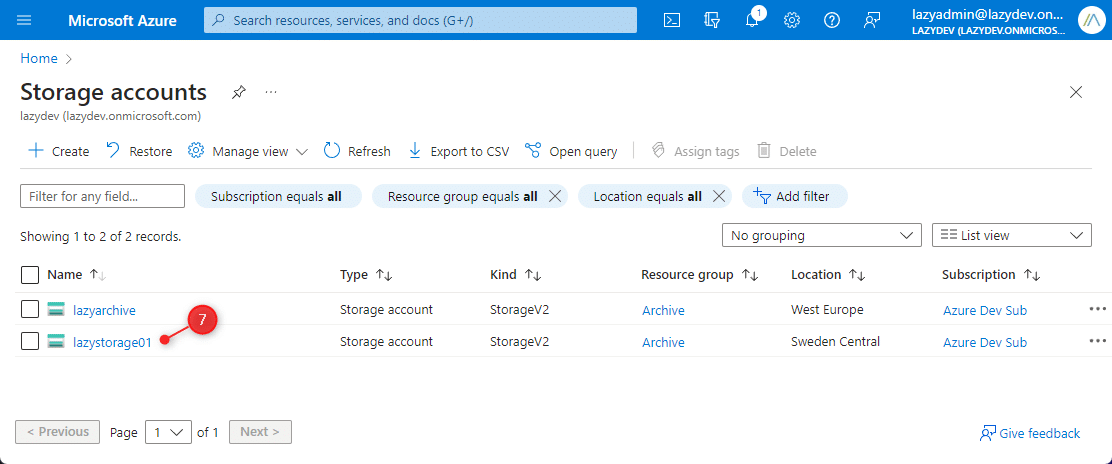
It takes a couple of seconds for the Storage account to complete. - Open your new Storage account
Go back to the dashboard, re-open the Storage Accounts, and select the newly created storage account

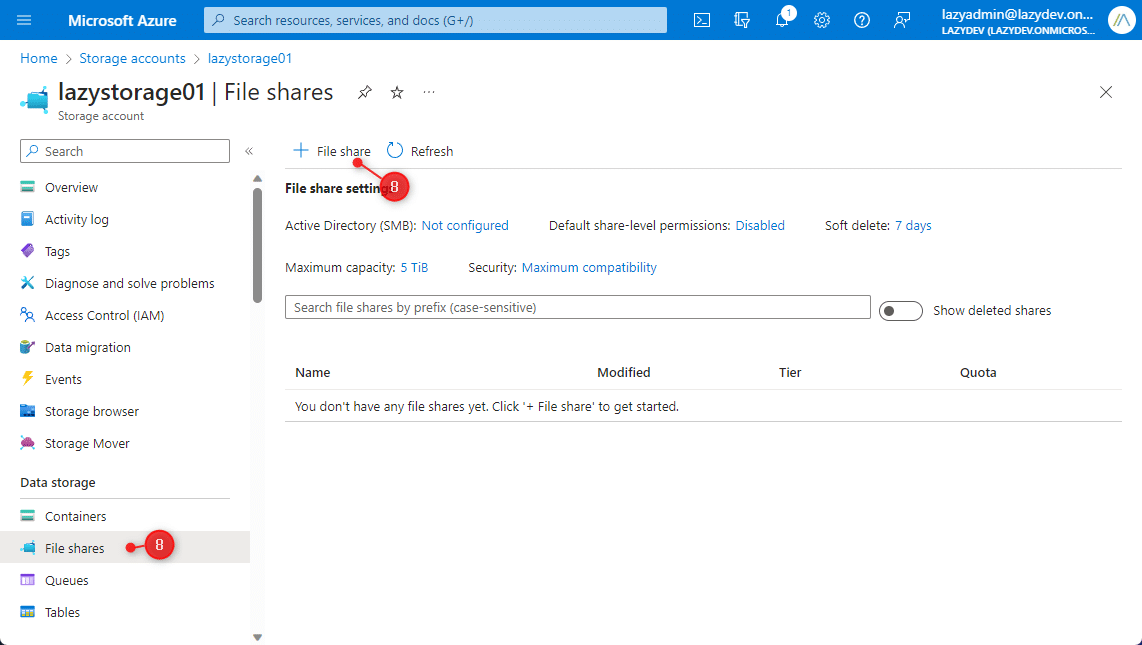
- Create a new File Share
Open the File Shares page in the storage account and click on + File Share

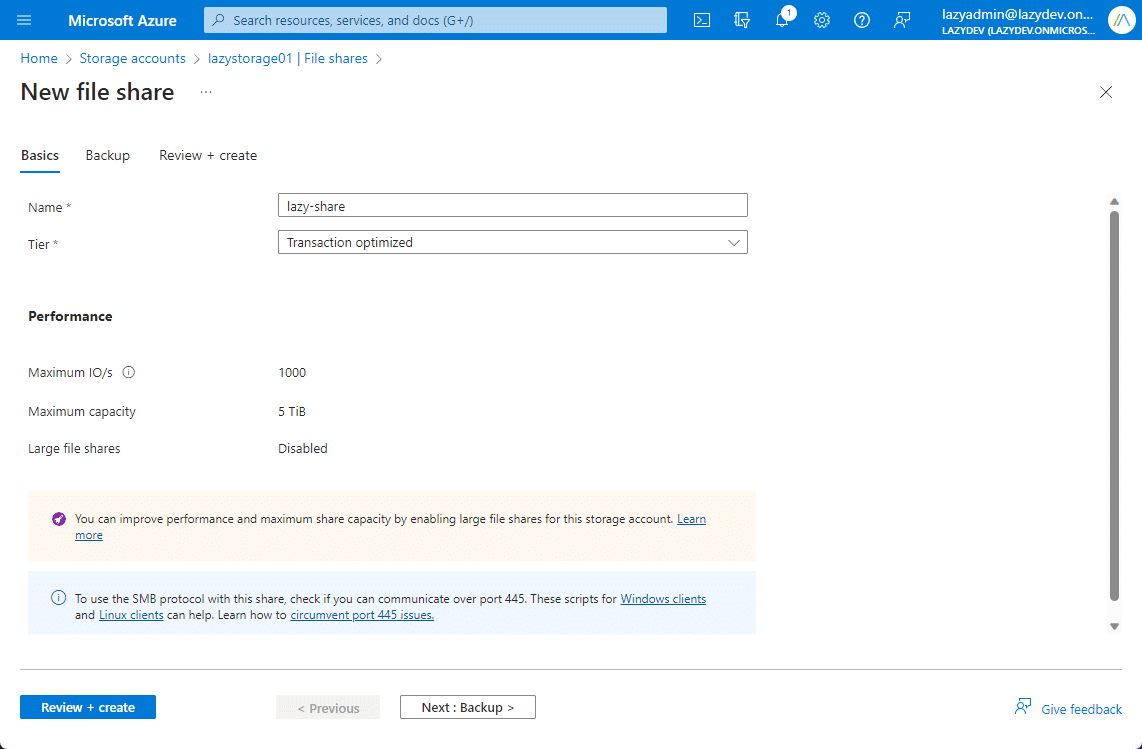
- Give your File Share a name
You will need to give your file share a unique name. It can only contain lowercase, numbers, and hyphens.
For the Tier, select Transaction-optimized. This Tier has the lowest write transaction cost (besides Premium). So it’s a good option to start with. Once you transfer all your files to the Azur File share, you can always lower the tier to Hot or even Cold
- Review and Create
Backup is enabled by default, I recommend leaving this on, but note that it will add additional cost to your Azure Storage account.
Review the settings and click on Create.
Adding Active Directory Service
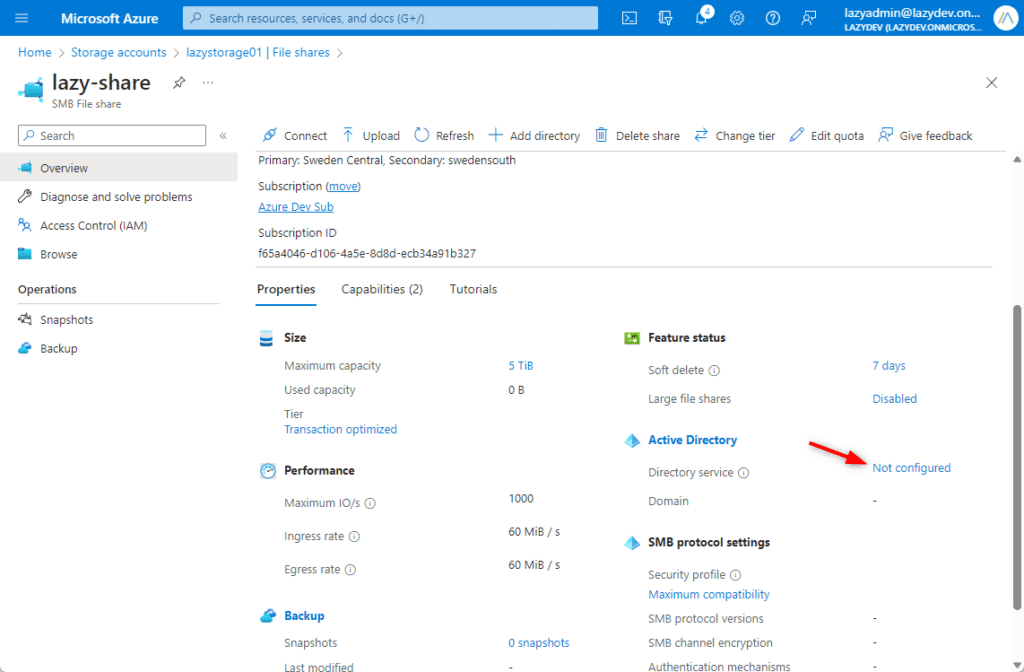
The Azure File share can now be used. You can mount the share using the Connect option in the Overview page of the share to mount the Azure File share on your computer for example with the storage account key. But to give other users access to the share, we will need to configure the directory service.
We have three options when it comes to configuring the Active Directory connection:
- Active Directory
- Azure Active Directory Domain Services
- Azure AD Kerberos (Preferred option when you have a hybrid AD environment)
To configure the connection, click on Not Configured under Active Directory in the Azure File share dashboard:
I have a hybrid environment here, so I chose the Azure AD Kerberos source for the connection. To configure it we will need to enter the domain name and domain GUID. You can find the GUID by running the following PowerShell cmdlet on the domain controller:
Get-ADDomain
The Domain GUID is the ObjectGUID in the results.
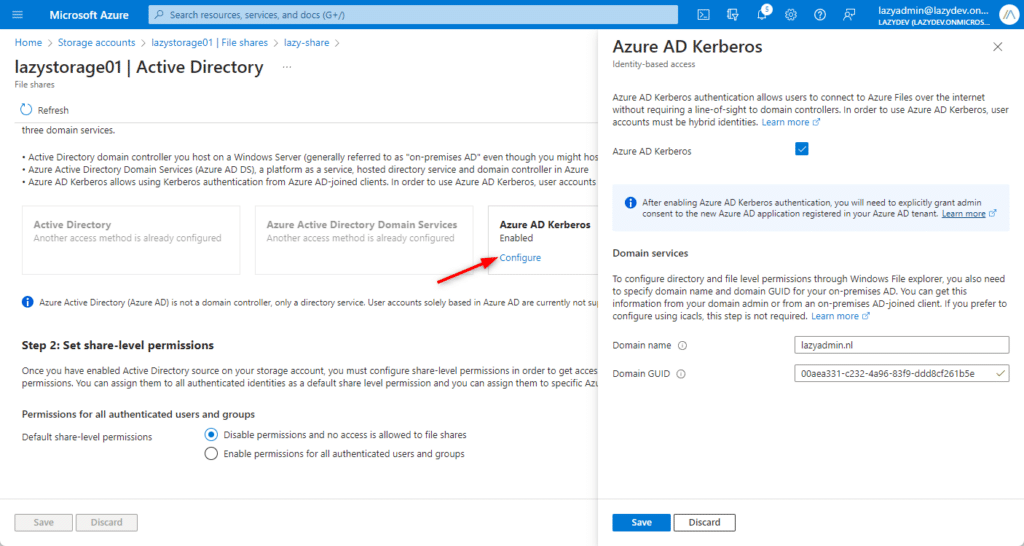
You can also configure the default share-level permissions. By default, the users won’t have access, but you can also change the to give all authenticated users access by default.
After you have enabled the Azure AD Kerberos connection, you will need to grant admin consent to the new Azure AD Application that is automatically created in your Azure AD tenant:
Note
Microsoft Azure AD becomes Microsoft Entra ID, read more about it in this article.
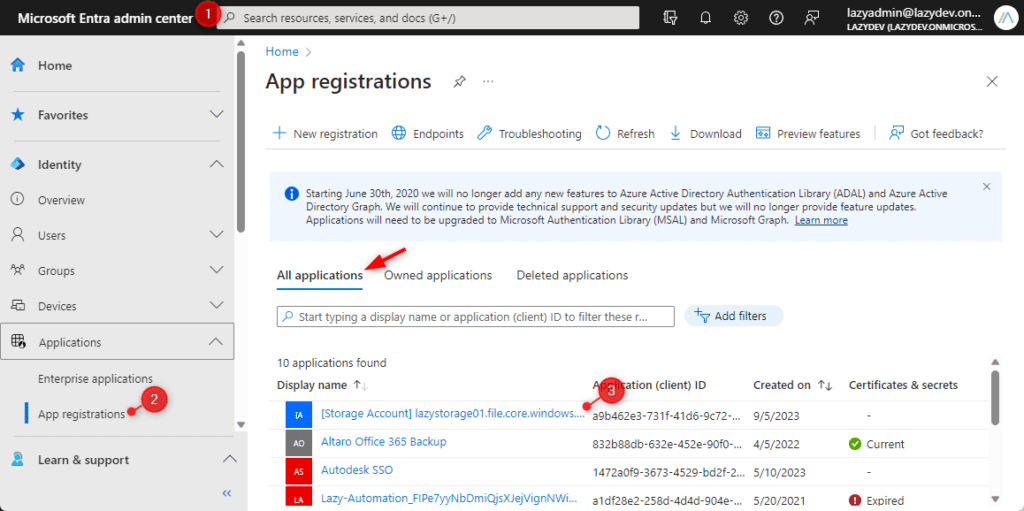
- Open the Azure Active Directory (or Microsoft Entra ID)
- Go to the Azure Active Directory > App registrations (Identity > Applications > App registrations in Microsoft Entra ID)
- Choose All applications and select [Storage Account] <your-storage-account-name>
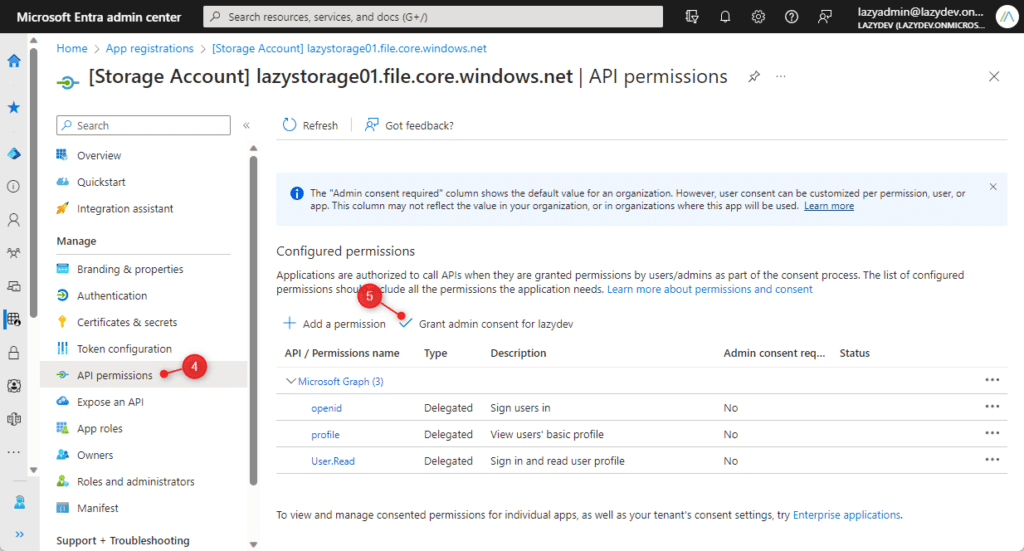
- Open the API Permissions (on the left side)
- Click on Grant admin consent for <domain-name> and click Yes to confirm it
Creating the Azure File Share with PowerShell
We can of course use PowerShell to create Azure File Shares. To do this you will need to make sure that you have Azure PowerShell module Az version 7.0.0 or later installed on your device. To install it you can use the following PowerShell command:
Install-Module -Name Az -Repository PSGallery -Force

# Connect to Azure AD with
Login-AzAccount -TenantId <TenantId>
Just like with the Azure Portal, we first need to create an Azure Storage Account. We will also need an Azure Resource Group in which we can deploy the new Storage account:
$resourceGroupName = "lazyResourceGroup"
$region = "westeurope"
$storageAccountName = "lazystorageacc03"

# Create new Azure Resource Group
New-AzResourceGroup -Name $resourceGroupName -Location $region | Out-Null

$accDetails = @{
    ResourceGroupName   = $resourceGroupName
    Name                = $storageAccountName
    Location            = $region
    Kind                = StorageV2
    SkuName             = Standard_LRS
  }

# Create Storage Account
$storageAcct = New-AzStorageAccount @$accDetails
With the storage account created, we can now create the Azure File Share. Keep in mind that the share name needs to be in lowercase, and can contain only numbers and hyphens.
$shareName = "lazy-share"

New-AzRmStorageShare -StorageAccount $storageAcct -Name $shareName -EnabledProtocol SMB | Out-Null
Mounting the Azure File Share
With the Azure File Share ready we can mount it on a client computer. To do this, the client computer will need to support at least SMB 3.x. If your Windows 10 or 11 machines are fully up-to-date, then this won’t be a problem. You can find an overview here of all the supported build numbers.
Also, you will need to make sure that port 445 is open. You can simply test this with the help of the PowerShell cmdlet Test-NetConnection:
Test-NetConnection -ComputerName lazystoragename.file.core.windows.net -Port 445
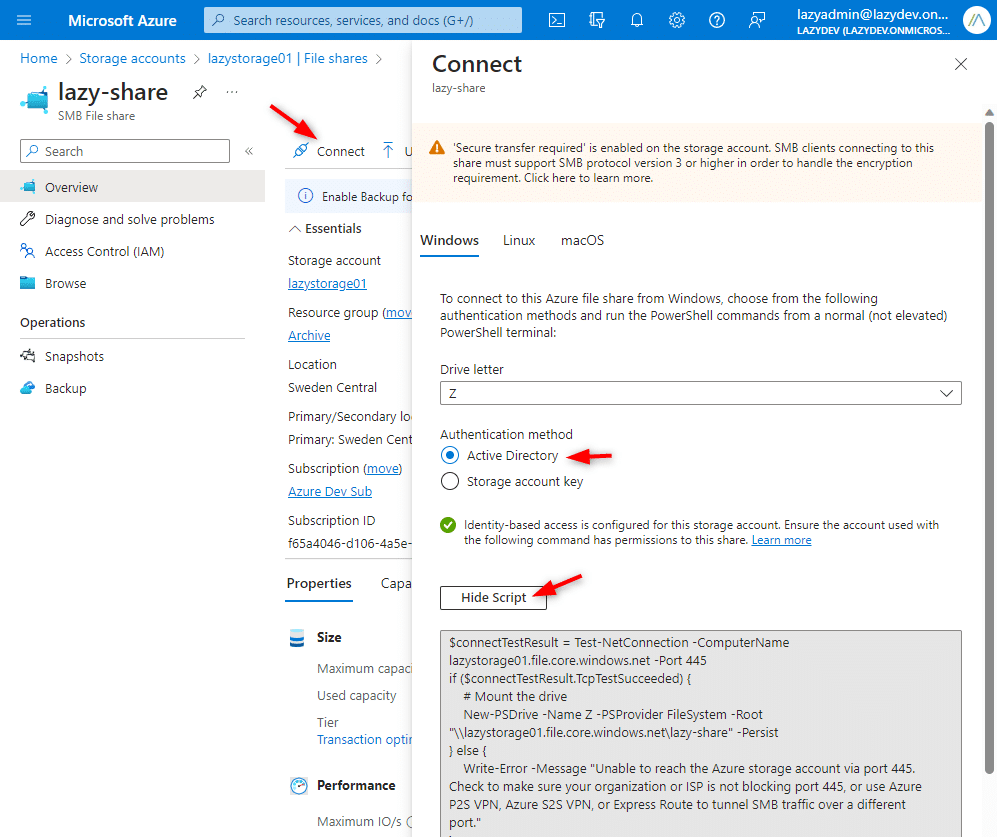
To mount the Azure File Share we can use a small PowerShell script. You can download/copy the script for your file share in Azure Portal:
- Open the Azure Portal
- Go to your storage account and open the Files Shares
- Open the File Share that you created
- Click on Connect
- Set the Drive letter, choose the authentication method Active Directory
- Click on Show Script and copy and run the script on the client
Note
You can also use the Storage account key for authentication, but this is the administrator key for the storage account. This gives you all administrator permissions to all files and folders within the share you’re accessing.
Tip
If you get the error “The specified network resource or device is no longer available” then you probably forgot the Admin Consent, or didn’t configure the permissions (Access Control) correctly on the Storage Account and/or File Share
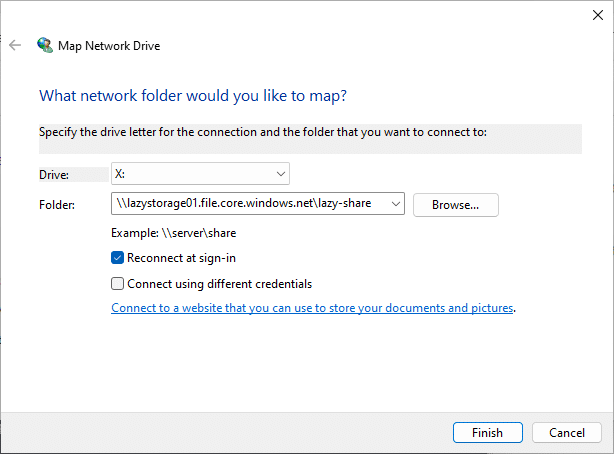
Another option is to use the normal Map Network Drive method in the Explorer. Use the full UNC path as the folder path:
Connecting or mounting the Azure File Share doesn’t always go smoothly. During my tests, it didn’t work the first time as well. Microsoft has a great Diagnostics script available on Github that you can run to quickly find any issues that might prevent you from accessing the share. You can find the script here.
Wrapping Up
Azure Files is a great solution if you need a file share of a specific business application alone, or when you already are using ADV (Azure Virtual Desktop). It isn’t a real replacement for a file server. The performance will also be slower than an on-premise file server.
Also from a permissions view you will have fewer options compared to NTFS permissions, so that is also something to keep in mind.
I hope you found this article helpful, if you have any questions, drop a comment below.