#sponsored
I have written earlier about why you should backup your Microsoft 365 data with a third-party backup provider. During the review, I tested a couple of solutions, among those, was Altaro Office 365 Backup.
Today we are going to take a better look at Altaro, and how easy it’s to configure, manage it, and of course restore files.
Note
I have revied Altaro Office 365 backup in dec 2020. In the meantime new features have been added to Altaro. Also Altaro was acquired by Hornetsecurity, a company that specialises in email protection.
If you are still in doubt if you even need to backup your Microsoft 365 tenant, then I really suggest you read this article first. It will describe in a detailed way why using a third-party backup solution is really recommended for Microsoft 365.
Altaro Office 365 Backup
Altaro is well known for its great VM backup solutions for Hyper-V and VMware. In 2018 they add their cloud-based Office 365 backup solution to it. Just like their other products, it’s really easy to set up and manage as you will see in this review.
The Altaro Office 365 Backup Solution is a cloud-to-cloud Saas Backup solution, which means that it’s completely cloud-based. The advantage of a cloud-to-cloud backup solution is that you don’t need to worry about bandwidth requirements, storage capacity, or protecting your own backup server.
What can Altaro Office 365 backup?
Microsoft 365 is an ever-growing platform. Every year new apps are added, so it’s good to know what Altaro can backup. The backbone of Microsoft 365 is SharePoint and Exchange (even OneDrive are just personal SharePoint sites actually). For example apps like List are basically a SharePoint list with another look and feel.
Not everything can be backed up with a third-party backup solution, Planner, for example, is stored in Microsoft Azure services, where only the comments are stored in the groups Exchange online mailbox.
Altaro is capable of backing up the backbone of Office 365, your SharePoint sites, OneDrive, and mailboxes. With this you have the most important data covered.
Backup location and Retention
You can’t create custom backup schedules in Altaro, but there is no real need for it either. Altaro will take up to four backups per day of your data which is more than enough. The backups are made in the background, so your users won’t even notice it.
The backups themselves are kept indefinitely until you stop your subscription and are stored in the Netherlands in Microsoft Azure using AEC 256-bit encryption.
Setting up Altaro Office 365 Backup
So let’s take a closer look at how to set up and configure Altaro. As mentioned, it’s completely cloud-based, so we don’t need to install anything. To get started we simply register for the 30-day trial. After you have verified your email address we can start with the configuration.
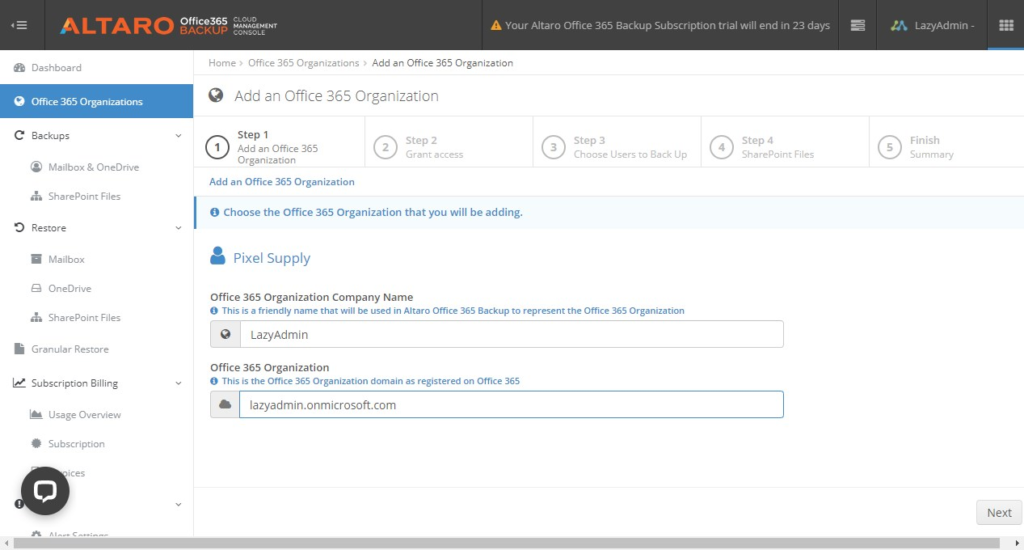
The first thing we need to do after we have logged in to the cloud management console is to add our Office 365 organization (tenant). Simply fill in your tenant name and onmicrosoft.com domain name.
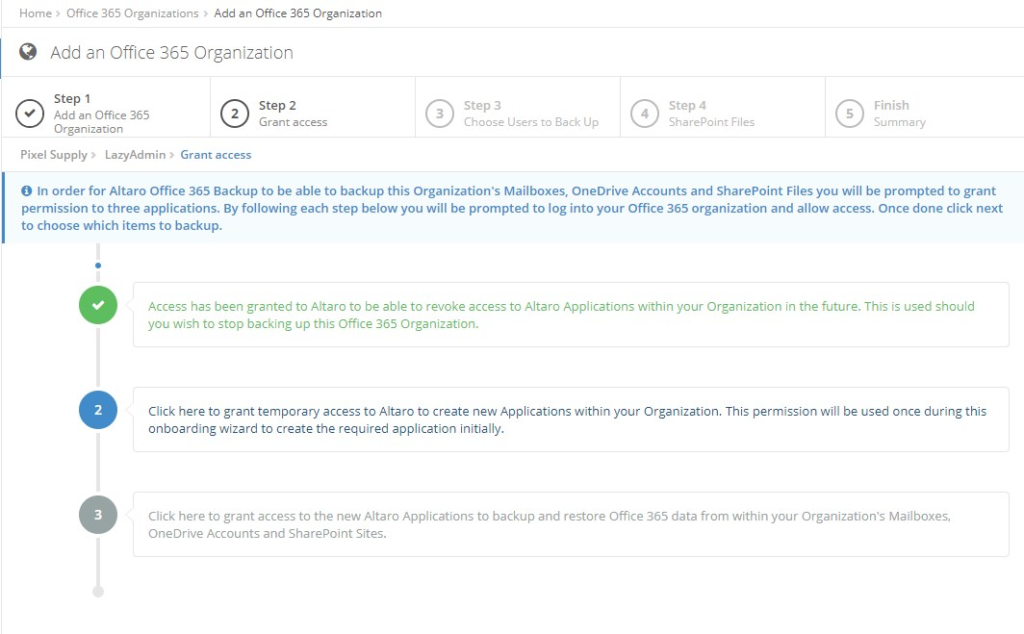
Altaro will need to have access to your OneDrive and SharePoint files and to your Mailboxes. We will need to grant access to each one of them.
Simply click on each step to grant access. A new tab will open where you can log in to your Office 365 tenant and grant the permission.
The next step is to select what we want to backup. The license is based on the number of users. On most occasions, you want to backup all your users, but if you have kiosk user accounts or other general accounts, then you probably won’t need to back up those.
You can then simply select specific users to backup, which will reduce the number of licenses you need. You will have to select each individual user, unfortunately, there is no option to select groups.

We can also select the SharePoint sites you want to backup, but Altaro comes with unlimited storage and the SharePoint sites don’t count towards the number of licenses you need. So simply select all SharePoint sites which have content you want to backup.
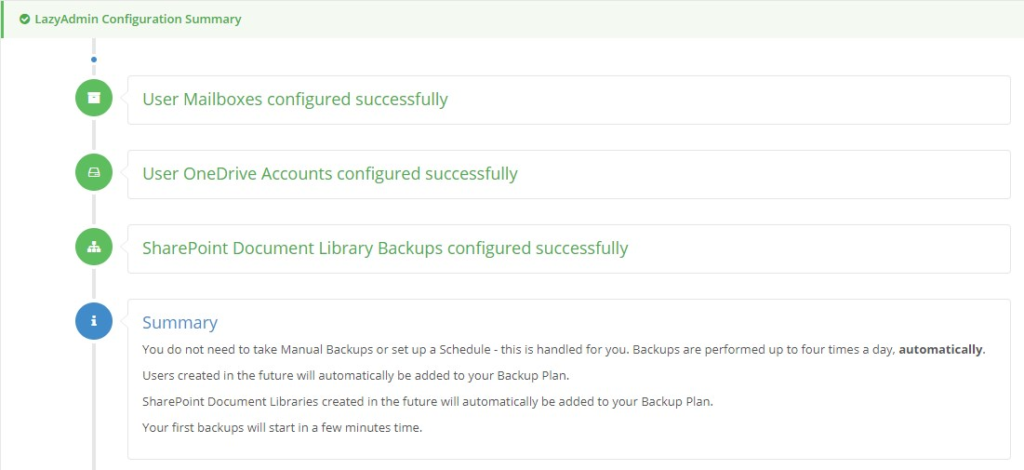
After you have finished the configuration, Altaro will start with creating the first backup within minutes. After that, it will automatically backup your data up to four times a day.
Managing your backups
In the dashboard, you will get a quick overview of your backup status and activity. You can see how many backups are in progress and the current health status of your backups per organization.
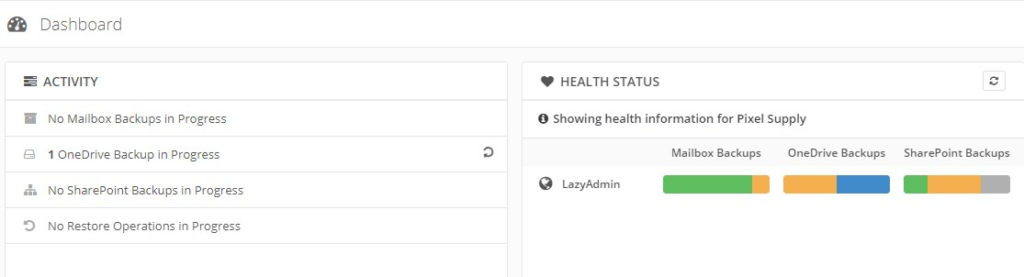
The warnings (partial backups) that you see in the screenshots are from empty SharePoint sites or mailboxes.
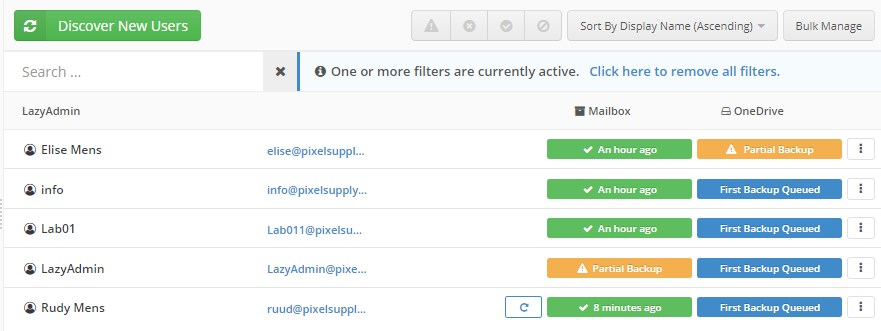
If we click on the mailbox, OneDrive, or SharePoint backups we can see the status of each individual item. When it was last backed up and any warning that there maybe are. If you click on a warning you will get more details about the warning.
A nice feature is that you can immediately open a chat with support, which is 24/7 available, from within the warning message.
Setting up alerts
You don’t want to check the dashboard every day to see if there are any issues with your backup. So it’s always a good idea to set up alerts for this. By default, alerts are turned off, but they can be turned on under Alerts > Alert Settings.
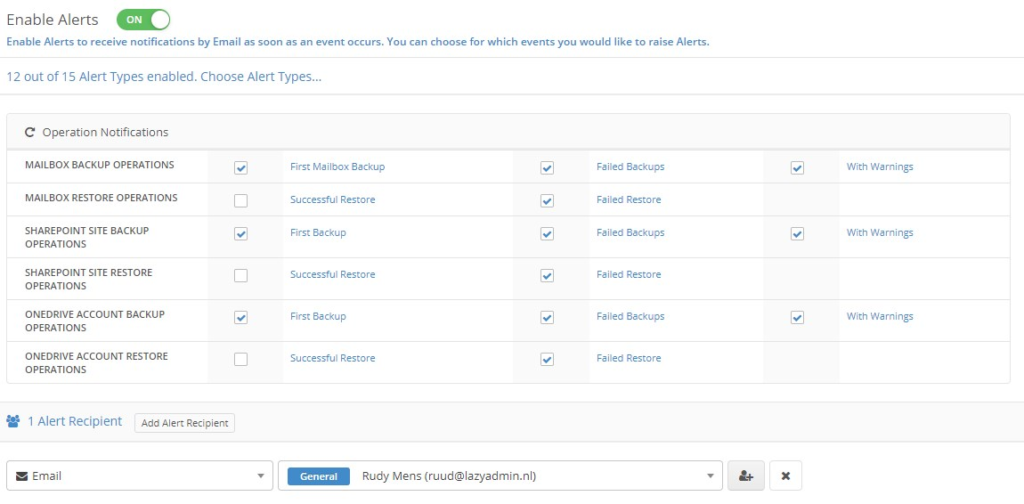
Of course, you want to turn on an alert for a failed backup or a warning. But a notification for the First backup is also really useful. This way you are sure that your new users are also backed up after you have added them to your Office 365 tenant.
Restoring Files and Mailboxes
The most important feature of a backup solution, restoring items. Altaro offers different options when it comes to restoring items. We can do a full restore of a mailbox, or SharePoint site, download the data in a zip-file or a granular restore.
Restoring SharePoint and OneDrive Items
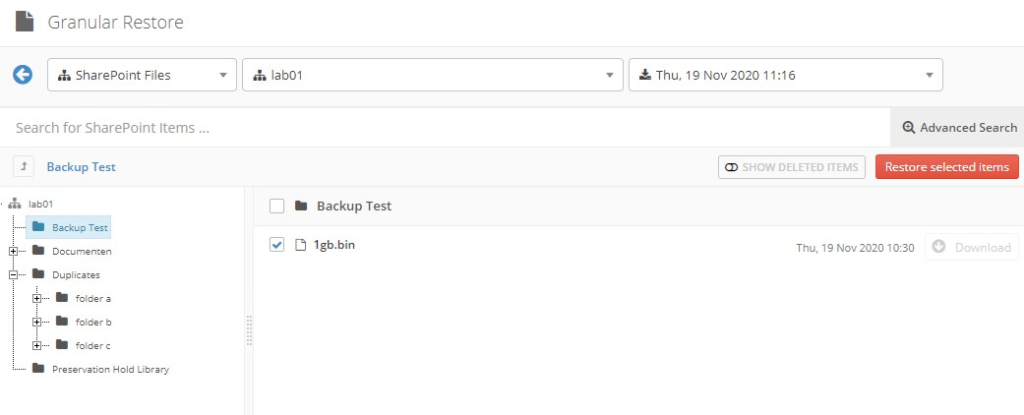
To restore files or folders we can use the Granular Restore feature in Altaro. In the restore window, we can first select the SharePoint site and backup date from which we want to restore.
You can then either navigate through the folder tree on the left side, or use the (advanced) search option to find the files or folder that you need to restore.
You can preview files before you restore them. Simply click on the download button behind the file to download and open the file. This way you can easily check if you have the correct version before you actually restore it.
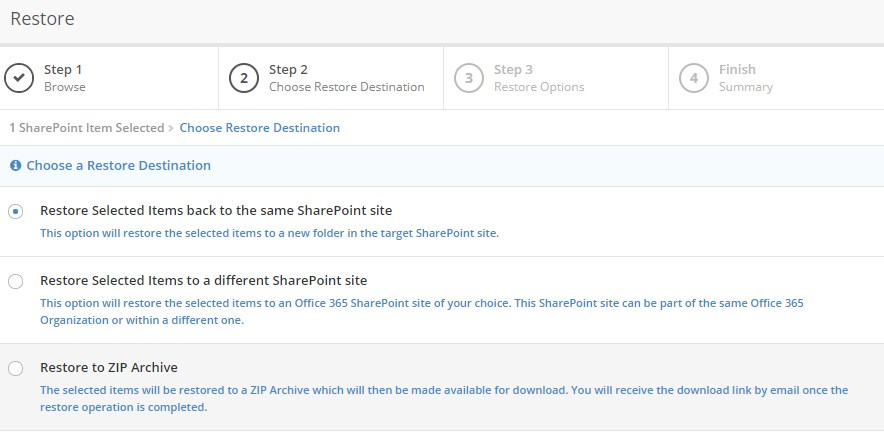
Once you have selected the items that you want to restore, you can click on Restore Selected items. You will have to option the restore the item to the original SharePoint, a different SharePoint site or create a ZIP Archive that you can download.
If you restore it to the same SharePoint site, the file or folder won’t be restored to the original location, but in a separate document library, AltaroRestored-<date> which you can find if you open the Site contents in SharePoint.
Once you have started the restore job you can follow the progress on the dashboard. You will also receive an email when job is finished.
I have done a couple of restore tests, with 1Gbit binary files and also a test with more than 5000 items. The large files were restored within a minute. The job with more than 5000 items took a bit longer, almost 2 hours. But again, jobs run in the background, so that you can continue with your work. You will receive an email when the restore job is finished.
Restoring mails
Restoring email items goes pretty much the same way. You will have an extra option to restore the items to a PST file besides restoring to the same Mailbox, different mailbox, and downloading a ZIP archive with the items.
The advanced search in the Granular Restore allows you to search on sender, recipient, subject name, and of course a date range.
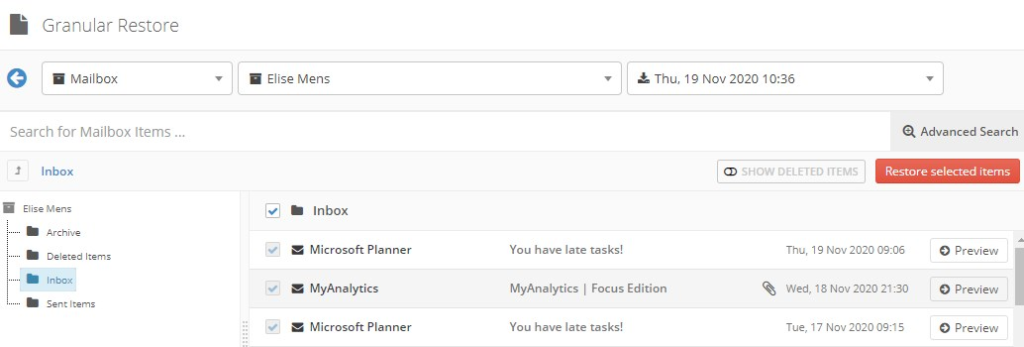
Just like with files you can also preview the emails before you restore them. Good to know is that you can restore mailbox items to their original location or to a separate folder in the mailbox itself.
Altaro Office 365 Backup Pricing
Altaro Backup for Office 365 comes in two subscription types, mailbox only and Mailbox, OneDrive, and SharePoint backup. Both subscriptions have unlimited data stores and an indefinite retention period.
Altaro requires a minimum of 10 licenses, and it goes up in steps of 10. So if you have 14 users, you will need to buy 20 licenses. The price starts at around $3,90 per user month with a one-year subscription. To more users you have, the lower the price per user will be.
Conclusion
The setup and configuration of Altaro Office 365 backup are really simple and straightforward. It only took 5 minutes to walk through the configuration and to get started with the first backup. The interface self of the cloud management console is clear and simple to use.
What a personally miss is a bit more insight or reporting of the backup jobs. I find it always useful to see how much data or items are backed up, especially in the beginning with new backup jobs or backup tools. Altaro will send you a warning when files are skipped, and you could also check the files through the Granual Restore Option.
Altaro can’t fully back up Teams, only the Teams SharePoint sites, and files that are shared in a channel or chat. For the most, this won’t be a big deal, but I can imagine that if your organization is using Teams a lot, with the calendar, mailbox, etc, it would be nice to have those backed up as well.
Overall is Altaro Office 365 Backup a great product. The intuitive cloud management console makes it super easy to deploy and manage your backups.