When you want to use your own domain name in Office 365 you will need to create an SPF record. SPF, together with DKIM and DMARC helps to prevent spoofing of your mail domain.
SPF is the first line of defense in this and is required by Microsoft when you want to use a custom domain instead of the onmicrosoft.com domain. You will need to create an SPF record for each domain or subdomain that you want to send mail from.
In this article, I am going to explain how to create an Office 365 SPF record.
SPF Record
An SPF record is used to identify which mail servers (or systems) are allowed to send mail on your behalf. So before we can create the SPF record we first need to know which systems are sending mail on behalf of your domain, besides Office 365.
Think of your scanners that send email to external contacts, (web)applications, newsletters systems, etc.
You will first need to identify these systems because if you don’t include them in the SPF record, mail sent from those systems will be listed as spam.
SPF Record Structure
The SPF Record is structured in such a way that you can easily add or remove mail systems to or from the record.
The 6 commonly used elements in an SPF record are:
| Element | Description | Example |
|---|---|---|
| v=spf1 | Every SPF record starts with this | |
| a | Match all domain name records (A and AAAA) | a |
| MX | Match all listed MX records. So only the listed mail servers are allowed to send mail | mx |
| include: | A domain name that is allowed to send mail on behalf of your domain | include:spf.protection.outlook.com |
| ip4: or ip6: | Ip address that is allowed sending mail on behalf of your domain | ip4:21.22.23.24 or complete range: ip4:20.30.40.0/19 |
| Enforcement rule | Indicates what to do with mail that fails | -all |
You can add as many include: or ip4: elements to your SPF record as you need. The enforcement rule indicates what the receiving mail system should do with mail sent from a server that isn’t listed in the SPF record.
Normally you use the -all element which indicates a hard fail. Other options are:
~all– Soft fail. Used when you are not sure that you have listed all mail systems?all– Ignore. Only used for testing.
SPF Record Example
I will give you a couple of examples of SPF records, so you have an idea of how they look when you combine different applications.
Example
Sending only mail from Office 365
v=spf1 include:spf.protection.outlook.com -all
Example 2
- Sending mail for on-premise systems – public IP Address 213.14.15.20
- Office 365
- Sending mail from MailChimp (newsletters service)
- hard fail
v=spf1 ip4:213.14.15.20 include:spf.protection.outlook.com include:servers.mcsv.net -all
Create Office 365 SPF Record
When you have created a new Office 365 tenant and your subscription includes Exchange Online or Teams, then you will need to add a couple of DNS records. Included in those records is the Office 365 SPF Record.
We are going to start with looking up the DNS records that Microsoft 365 is expecting and then add the correct SPF record to our DNS hosting provider:
- Open the Microsoft 365 Admin Center
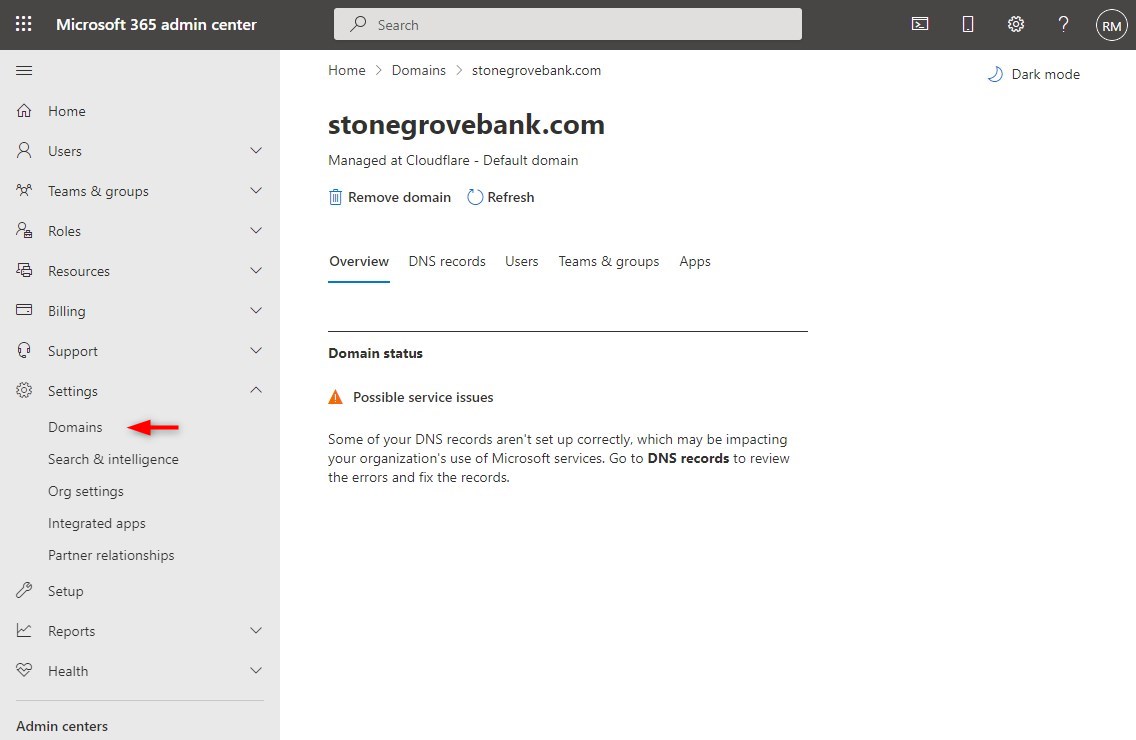
First, we are going to check the expected SPF record in the Microsoft 365 Admin center. Login at admin.microsoft.com - Navigate to your domain
– Expand Settings and select Domains
– Select your custom Domain (not the <companyname>.onmicrosoft.com domain
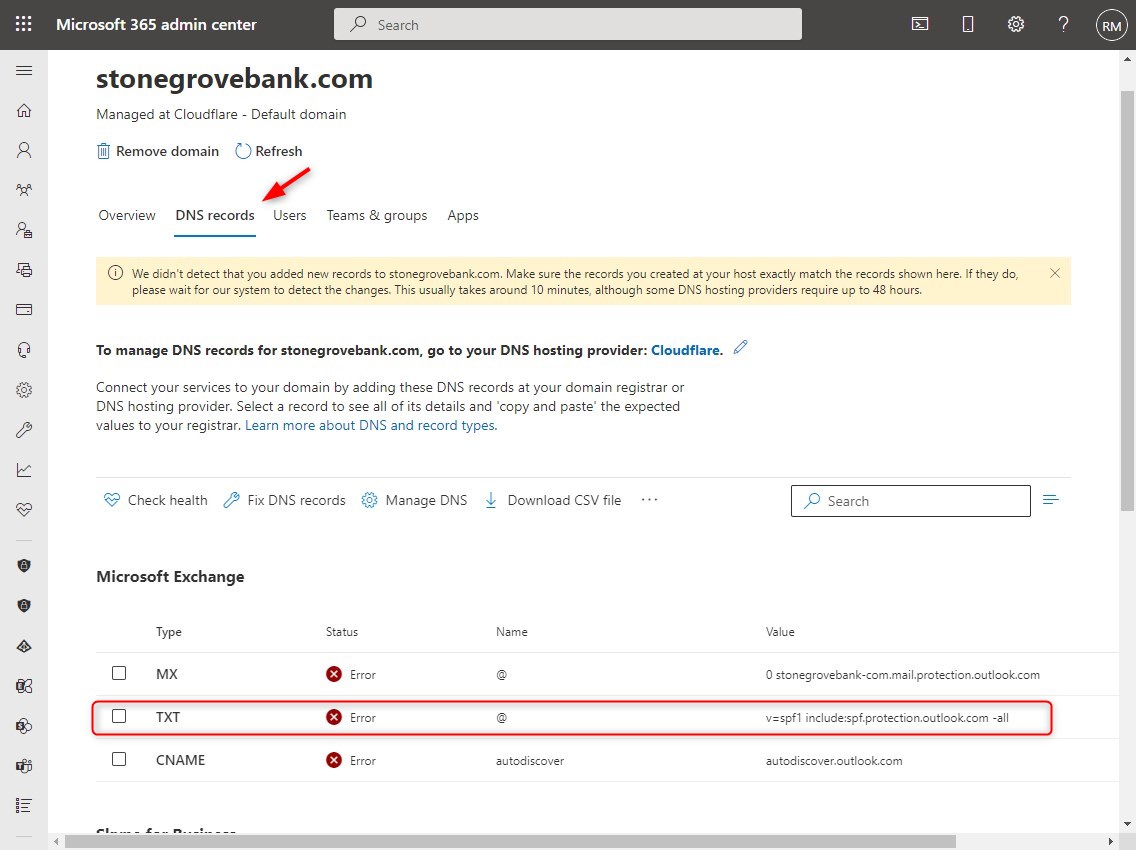
- Lookup the SPF Record
Click on the DNS Records tab.
If you have bought a license that includes Exchange Online then the required Office 365 SPF record will be shown here
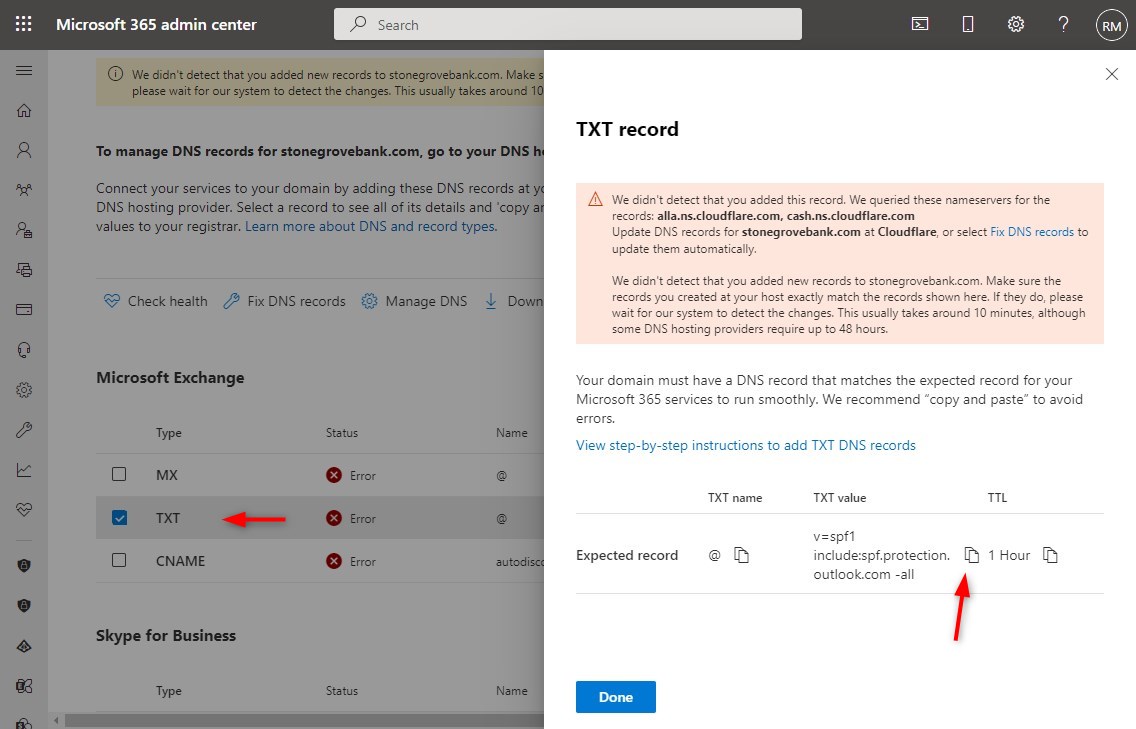
- Copy the SPF value
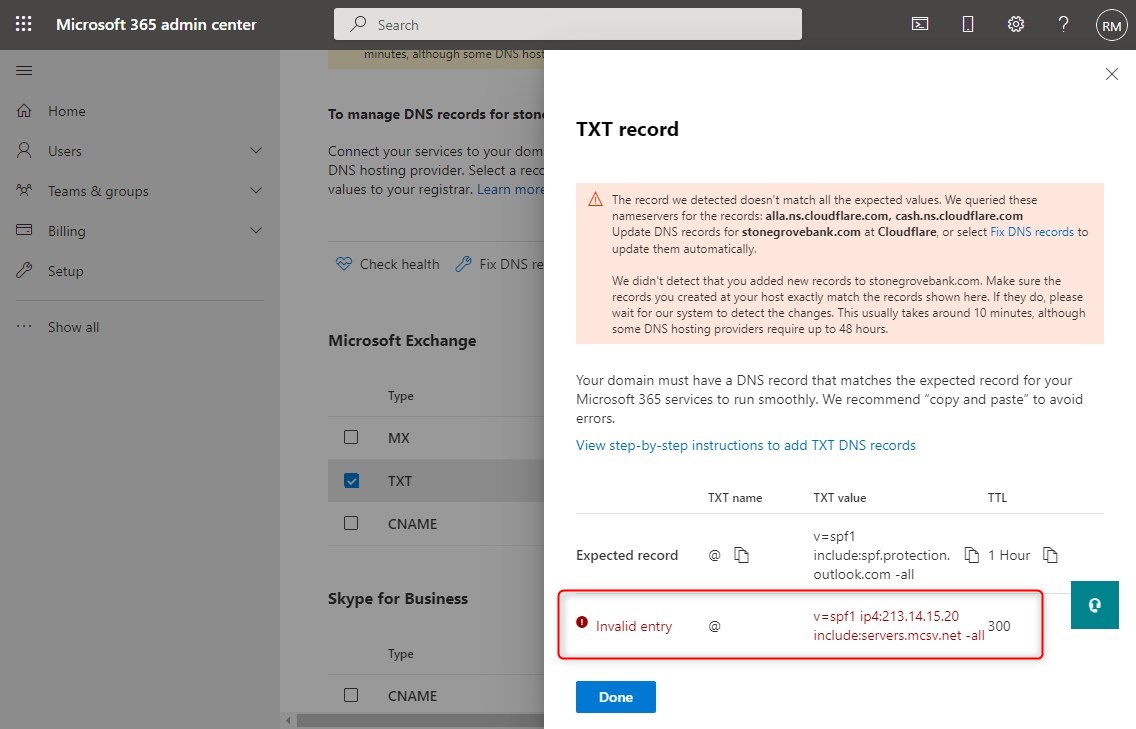
Click on the TXT (SPF) record to open it.
This allows you to copy the TXT value and also check if your domain already has an SPF record (it will be listed as Invalid Entry). Continue at Step 7 if you already have an SPF record
- Go to your DNS Hosting Provider
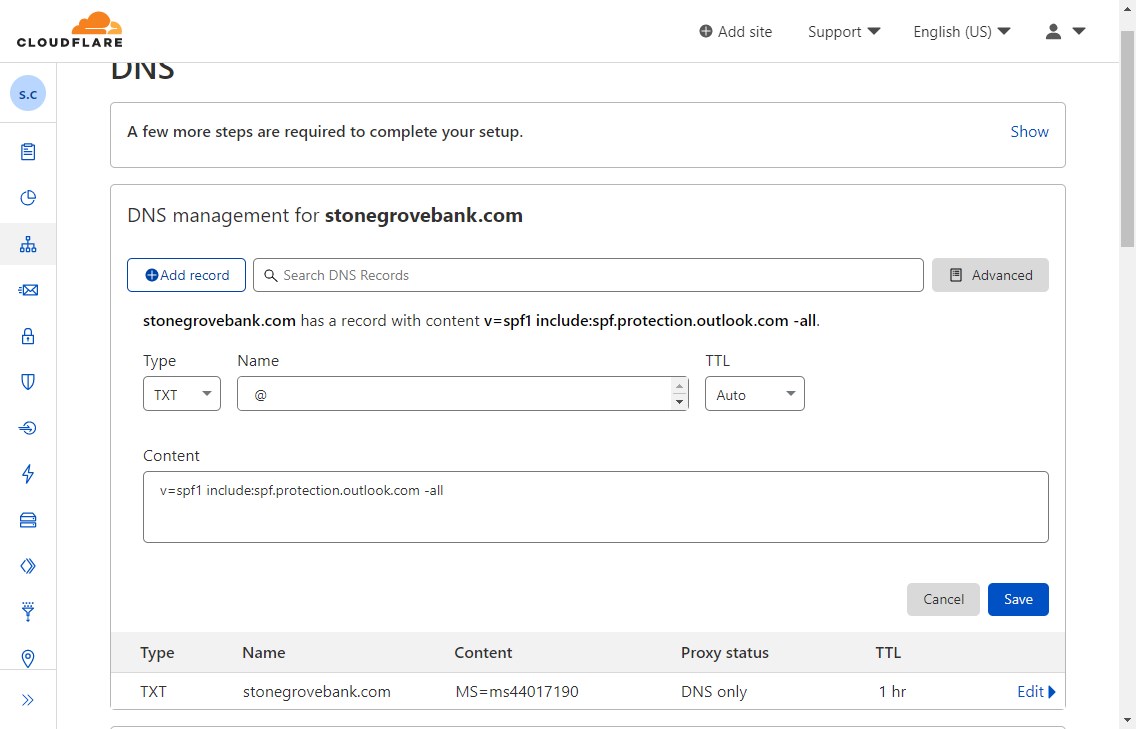
I am using Cloudflare, if you don’t know how to change or add DNS records, then contact your hosting provider. - Create SPF record
– Add a new Record
– Select Type: TXT
– Name/Host: @
– Content/Value: v=spf1 include:spf.protection.outlook.com -all (or copy paste it from Microsoft 365 ( step 4 ))
– Click Save
Continue at Step 8
- Update SPF Record
If you already have an SPF record, then you will need to edit it. As you can see in the screenshot below, Microsoft has already detected an existing SPF record, marking it invalid.
We can safely add include:spf.protection.outlook.com to our SPF record.
In your DNS Hosting Provider, look up the SPF record, and click edit.
– Addinclude:spf.protection.outlook.combefore the -all element
So in this case it would be:v=spf1 ip4:213.14.15.20 include:servers.mcsv.net include:spf.protection.outlook.com -all
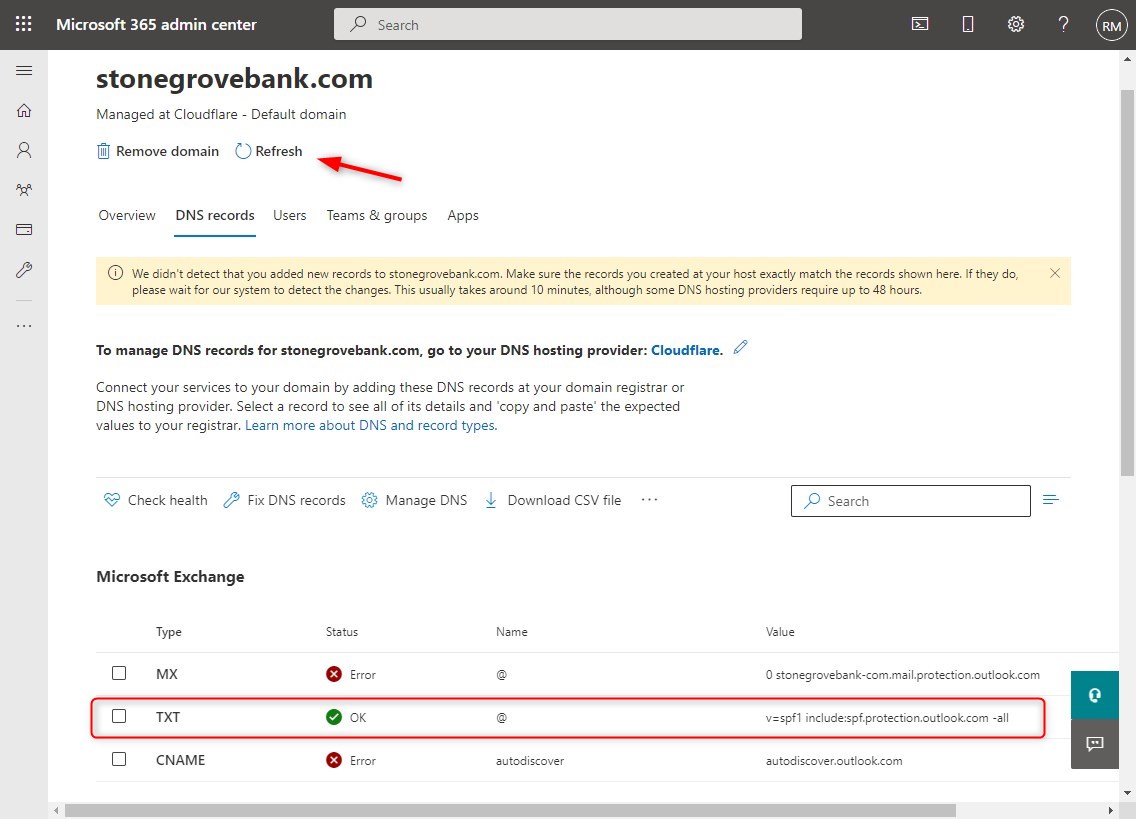
- Refresh the DNS page
It can take a couple of minutes up to 24 hours before the change is applied. Refresh the DNS records page in Microsoft 365 Admin Center to verify the settings.
The status of the TXT record will be listed as Ok when you have configured it correctly.
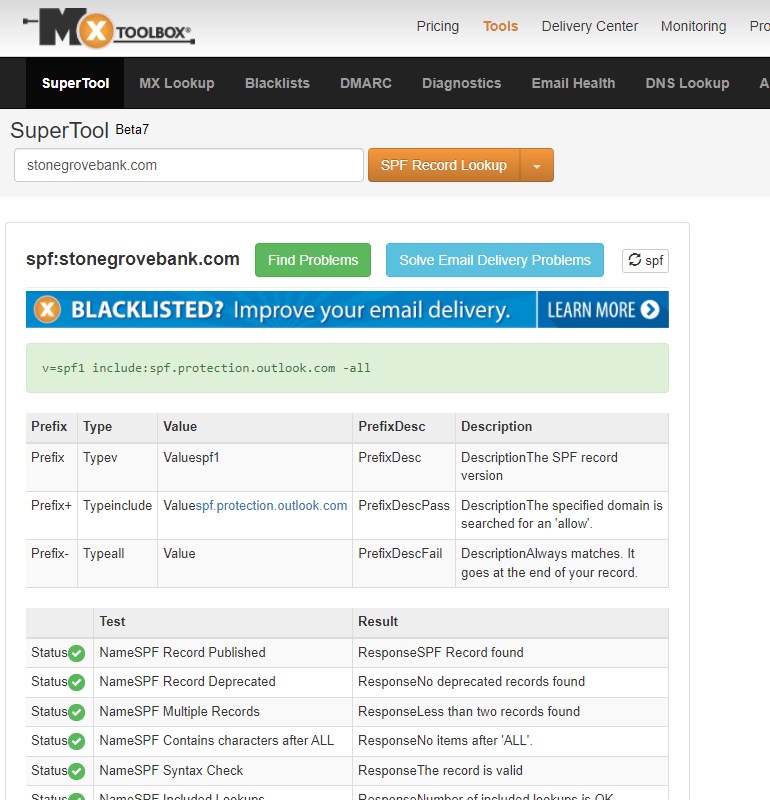
Verify SPF Record
The Microsoft 365 Admin Center only verifies if include:spf.protection.outlook.com is included in the SPF record. But it doesn’t verify or list the complete record.
A great toolbox to verify DNS-related records is MXToolbox. This tool checks your complete SPF record is valid.
Wrapping Up
To be able to send mail from Office 365 with your own domain name you will need to have SPF configured. Make sure that you include all mail systems in your SPF record, otherwise, mail sent from these systems will be listed as spam messages.
It’s a good idea to configure DKIM after you have configured SPF. DKIM is the second step in protecting your mail domain against spoofing and phishing attempts.
If you have any questions, just drop a comment below.


I’m seeing email from office365 that comes from 40.95.96.76 that isn’t in the spf.protection.outlook.com record … is there a more complete record we should be using?
Not that I know. The IP address is indeed outside the configure scope
Must i include the RFC Adresses for local Clients
like ipv4:192.168.0.0/16
ipv4:172.16.0.0/12
ipv4:10.0.0.0/8
or depends that on the behaviour of my email-relay/server ?
Local address are not needed, only the public IP address of your office(s)
Dear Ruud,
Very helpful, but perhaps there is a simplified guidance for folks like me who just want to make sure gmail users will receive their teams meeting invitations made through groups in Outlook using a microsoft business account and own domain.
Great article.
Keep in mind, that SPF has a maximum of 10 DNS lookups.
If you go over that limit with your include, a-records an more, mxtoolbox will show up an error!