Signatures are basically your digital business card. They contain all your contact information, to let your recipient knows how or where to reach you. These days we will need to add a signature in Outlook, Outlook Mobile app, and maybe even Outlook Online if you are using Microsoft 365.
To manage signatures company wide you can use a third-party signature tool, but for small companies or for personal use, you can perfectly add the signature manually.
In this article, I will explain how you can add a signature in Outlook. Both the online, Microsoft 365, and normal versions of Outlook. Also, I will give you some tips on creating an Outlook Signature.
How to Add a Signature in Outlook
To add a signature in Outlook we will first need to create one. Signatures can be simple, with only text, but they can also contain company logos and text colors. Adding logos to your signature really help with identifying your emails, so make sure that you always add them when possible.
Time needed: 1 minute
- Create a New Email in Outlook
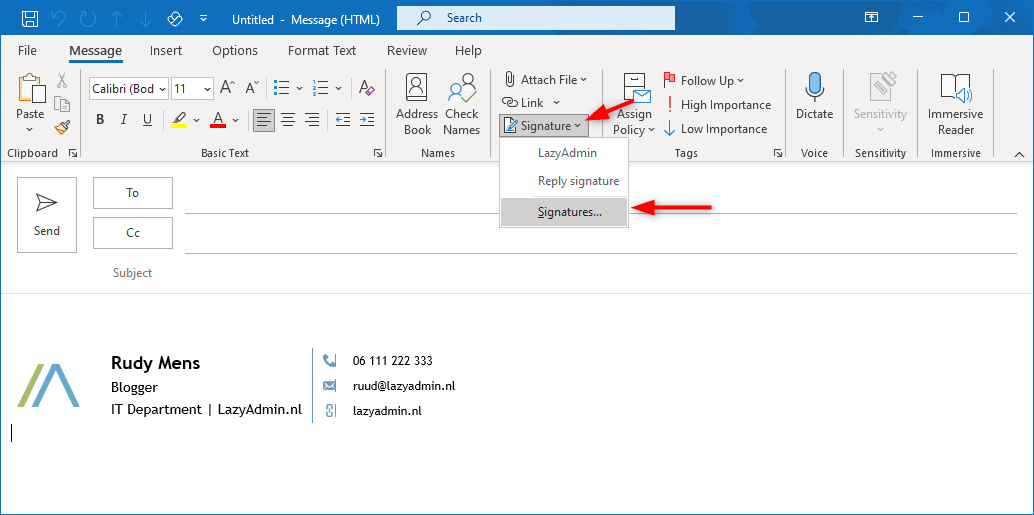
- Open Signatures
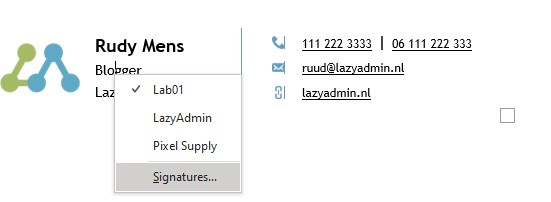
Click on Signatures in the toolbar and select Signatures… from the dropdown menu

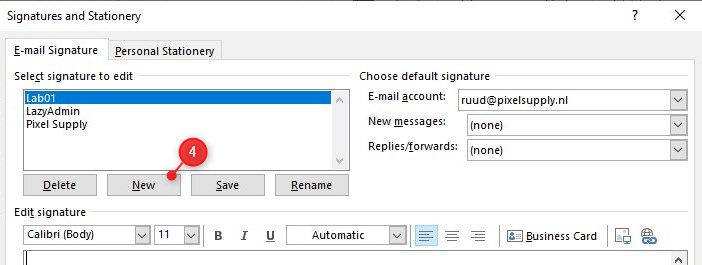
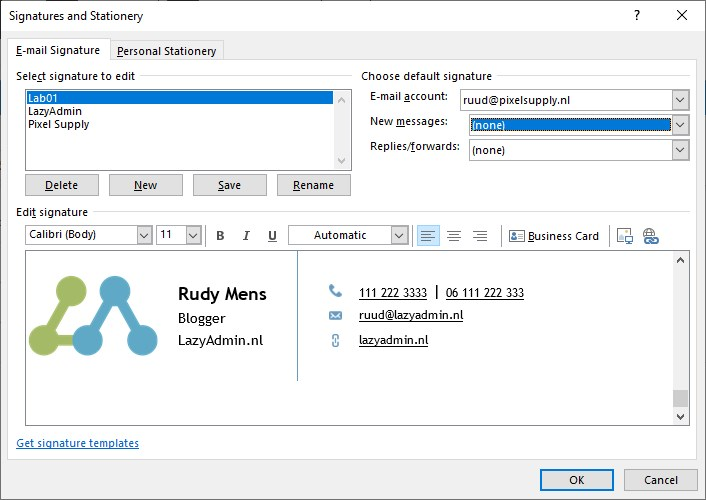
- Click on New to add a new signature
Give your signature a name. Make sure you use a recognizable name so you can easily select the correct signature in your emails later. You can create a separate signature for your reply emails for example.

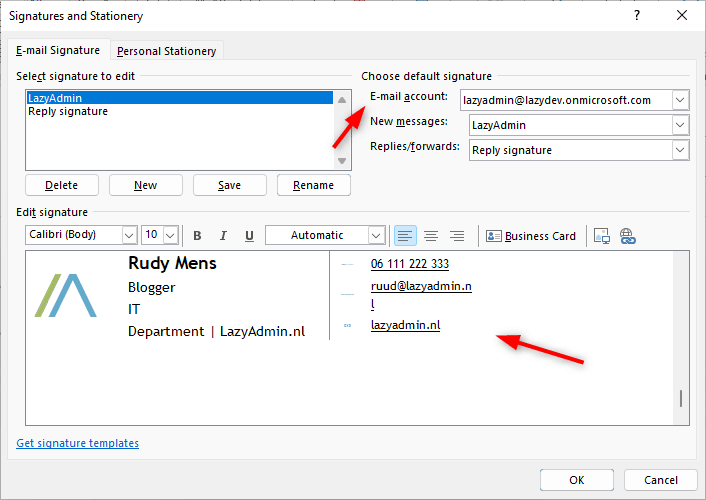
- Create or Paste your Signature in the Edit Signature text area.
If you have multiple email accounts, you will need to select the account that you want to use for the signature.
Create or paste your signature in the text area. (Want to use an HTML signature, then read this article)
You can set different signatures for new messages and replies.
- When you are done, click Ok
In the Outlook Desktop App, you can use multiple email signatures within the same account. You can set a default signature for your emails, but also easily switch it to another one if necessary.
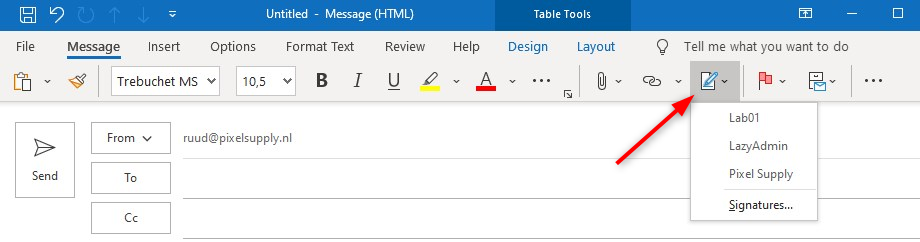
If you are using the minimal toolbar in Outlook then you can find the Signatures here:
Your new Outlook signature should now be available in your New Email Messages. If you have set a default signature, then you should see the new signature in the body of your new messages Otherwise select it from the Signatures drop-down menu.
Insert the Signature in Outlook
If you haven’t set a default signature in Outlook then you will need to add the signature manually.
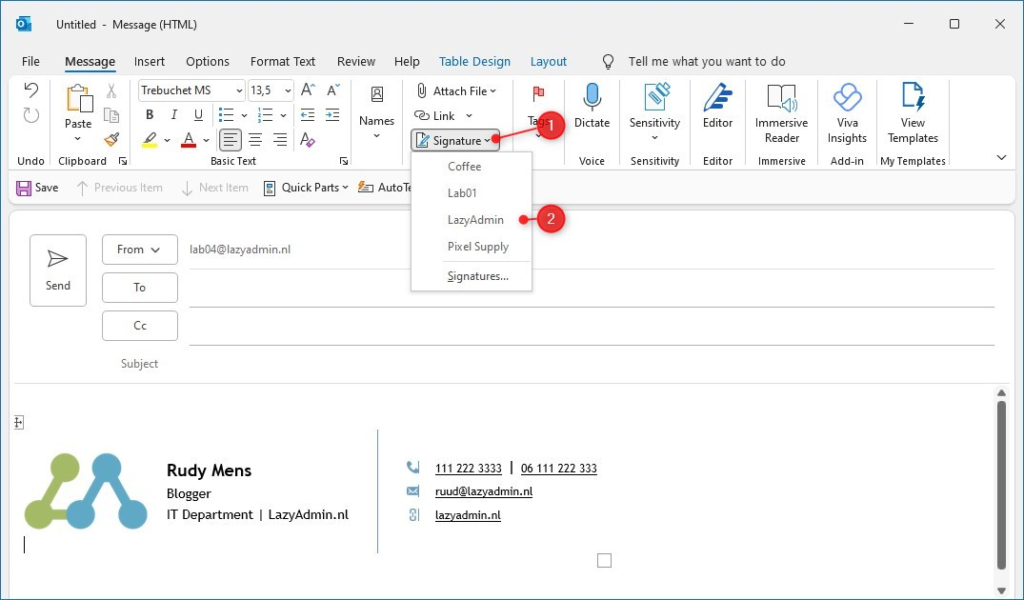
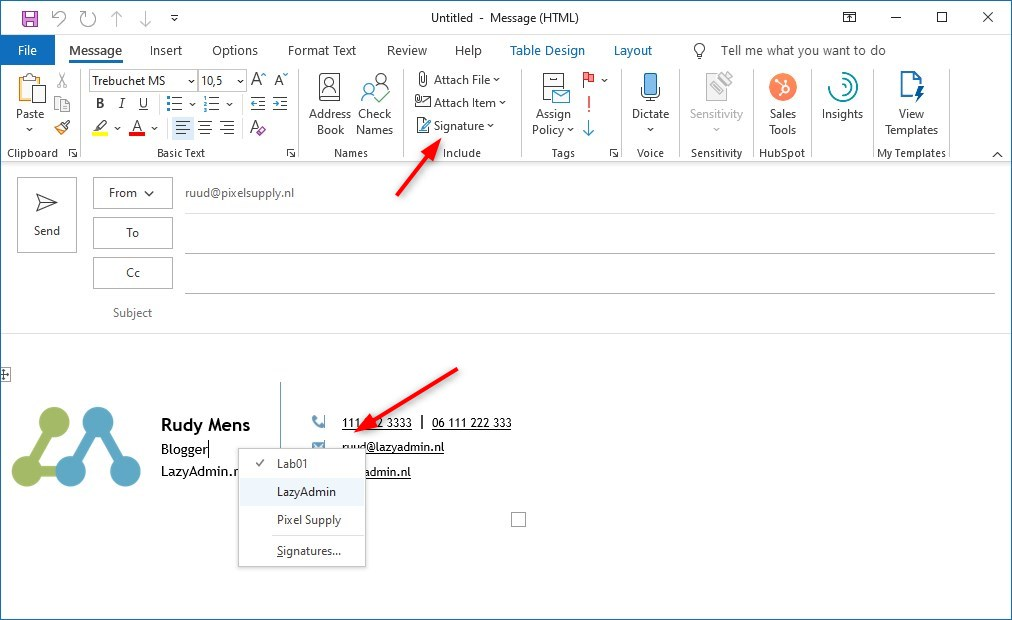
- Open a new email and click on Signature in the toolbar.
- Your signatures will appear in the dropdown menu. Select your signature to apply it to your email message.
How to Add Signature in Outlook 365
Signatures are still not synced between Outlook and Outlook Online. This means, that if you are using both versions of Outlook, you will need to add the signature to Outlook 365 as well.
To add a signature to your emails in Outlook 365 (Outlook Online) you will have to open Outlook in your web browser: outlook.office.com
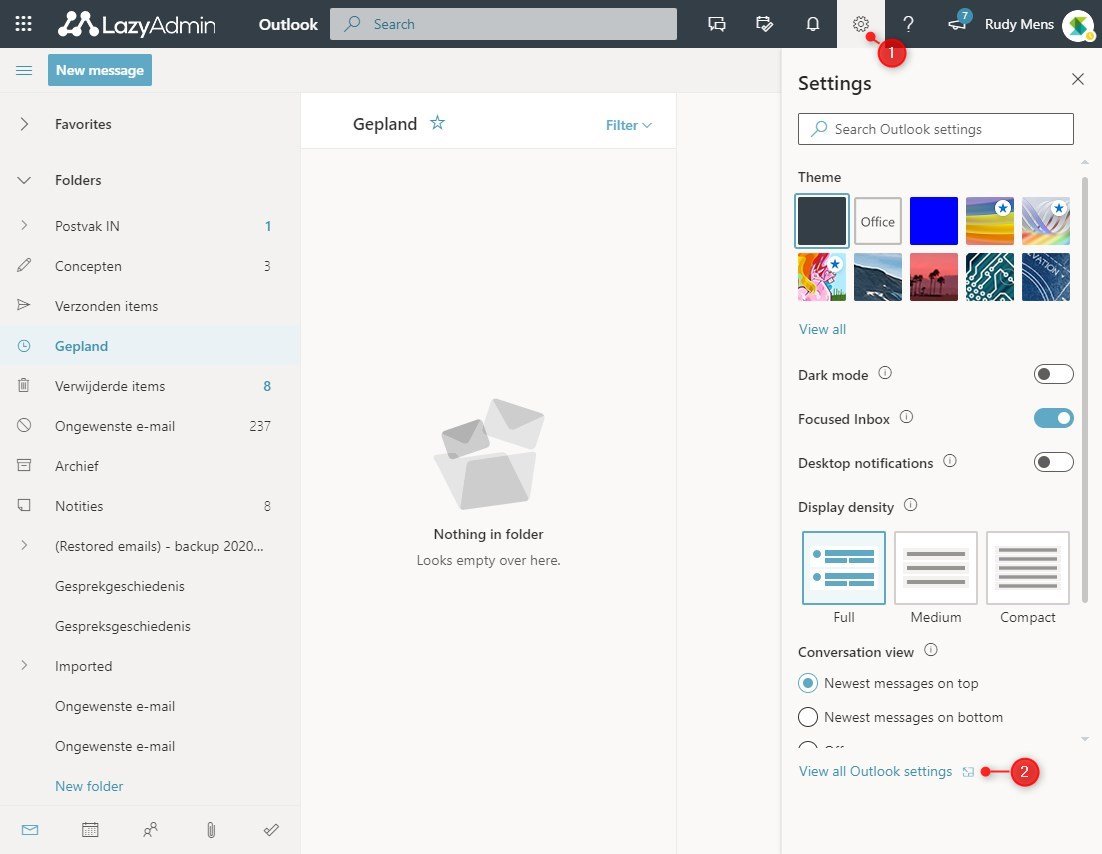
- Select the gear icon on the right side of the top bar.
- Add the bottom of the settings pane, select View all Outlook settings

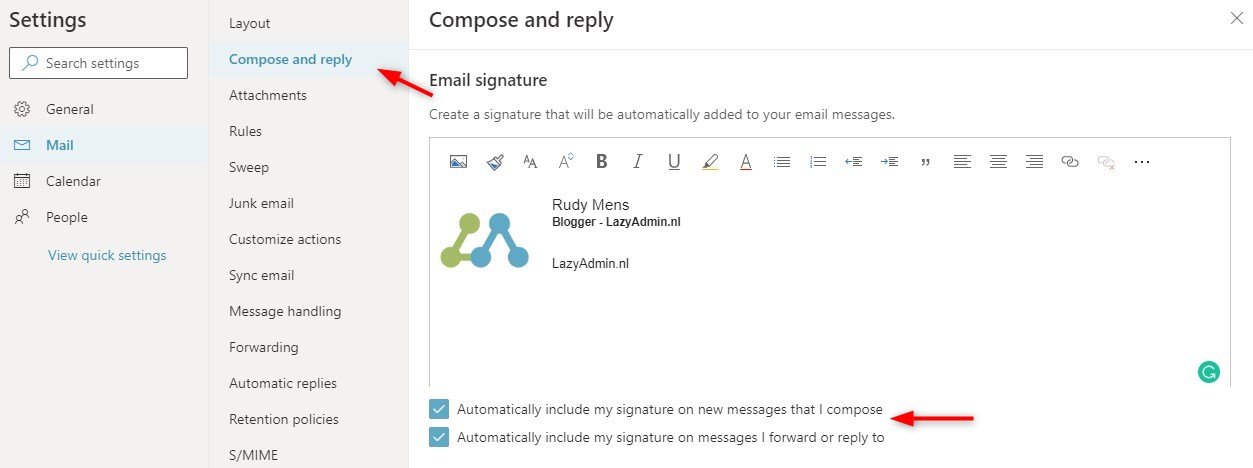
- Select Compose and reply
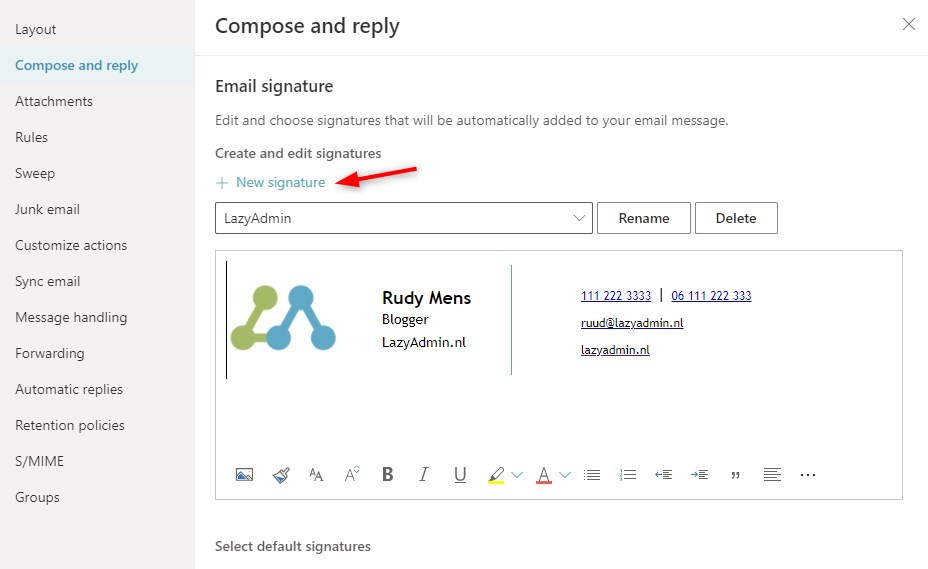
You will now see the Email signature settings. You can create or paste your signature in the text area.
- Automatically include the Signature in Outlook 365
If you want to include your signature automatically in your emails, then make sure you select the two checkboxes below the text area. - Save your Settings
When you are done, click Save at the bottom and simply close the settings screen. Your signature should now be active in your Outlook Online.
You can now also add multiple signatures in Outlook 365 (Outlook Online). To add an extra signature, simply click on + New Signature in the Compose and reply screen:
How to use the Signature in Outlook 365
You can also manually add the signature to a message. You will first need to create the signature as described above, but leave the two checkboxes below the text area unchecked.
After you have created the signature, you can simply add it to a message as follows:
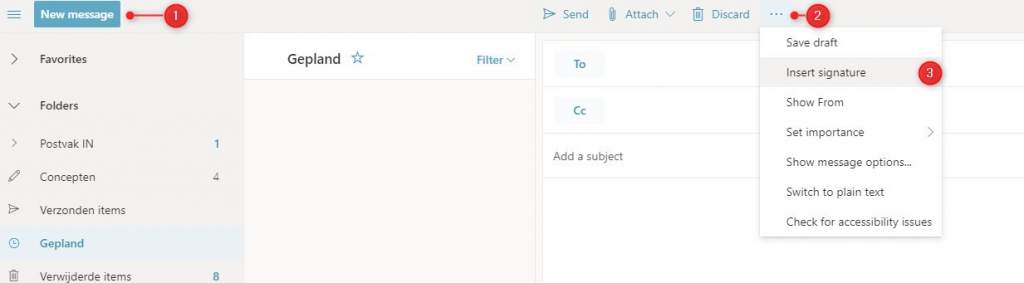
- Open a New Message in Outlook Online
- Select the More options icon
- Choose Insert Signature
Set a signature in the Outlook Mobile App
You are probably using Outlook on your mobile phone as well. By default, the app will add a line below your email message “Get Outlook for Android” (or iOS) on an Apple device. You probably want to change this line to a more useful signature.
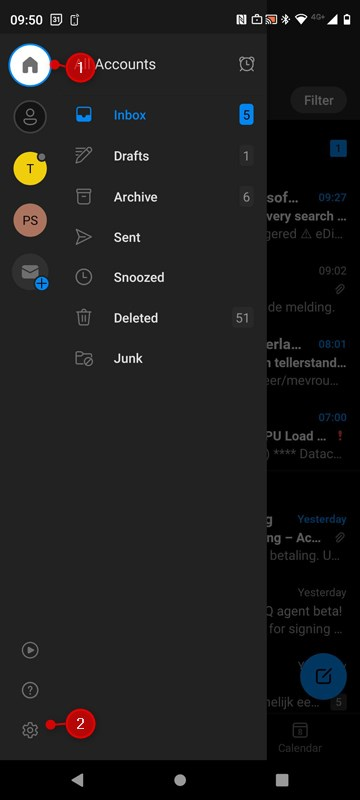
- Open the Outlook App and click on the Home icon in the top left corner
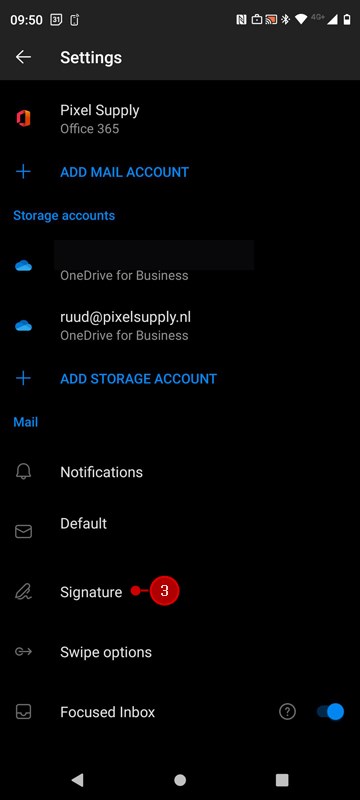
- Open Settings
- Scroll a bit down and open Signature
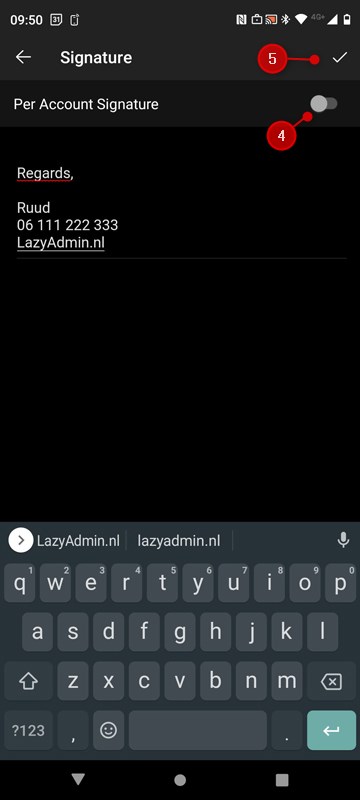
- If you have multiple accounts, then you can create one signature for all or individual signatures per account
- You can now create your signature. Click on the check mark when done
Keep in mind that you can’t use images in the Android app. On iOS it’s possible to add an image to your signature.
Change Email Signature
In Outlook you can create multiple signatures, but of course, only set one as your default signature. When you want to change your email signature in Outlook you have two options:
- Right-Click on the signature in the email body and select another signature.
- Click Signature in the toolbar and choose another signature from the dropdown menu.
If you want to set another signature as your default signature, then click on Signatures… and change the default signature for new and reply messages as described earlier.
Edit Signature in Outlook
Sometimes you need to edit your signature in Outlook, to change your telephone number for example. The steps to edit the signature are pretty much the same as creating a new signature:
- Right-click on your current Signature
- Select Signatures…
- You can now make the changes to your signature when done simply click Ok
Export Outlook Signature
If you are getting a new computer or when you want to share your Outlook Signature as a template with your co-worker, you might want to export the Outlook signature.
Outlook doesn’t offer a built-in function to export the signature. But to copy the signature to another computer we only need to copy three files and a folder:
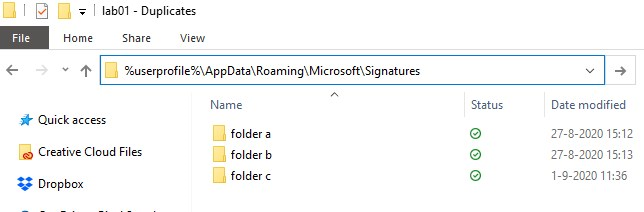
The Outlook Signature Location is:
- %userprofile%\AppData\Roaming\Microsoft\Signatures
- Open your Explorer
- Paste the path in the address bar as displayed below and press Enter
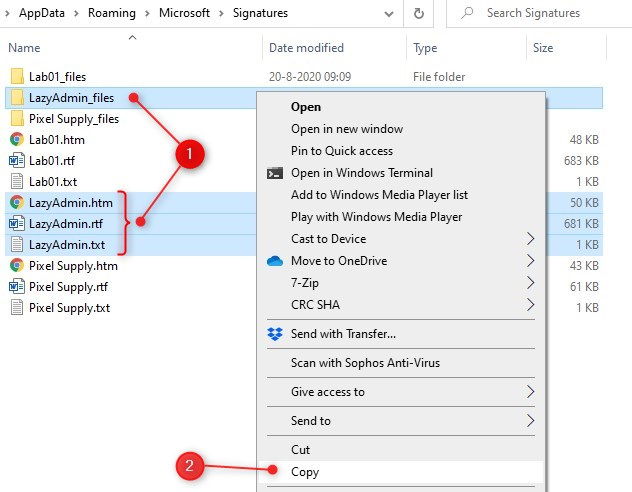
- Copy the signature that you want to export
- Select the folder and the three files that start with the signature name
- Right-click and choose Copy (or press Ctrl + C )
- On the other computer, open the explorer and navigate to
%userprofile%\AppData\Roaming\Microsoft\ - Create the folder Signatures if it doesn’t exist, otherwise, open the folder
- Paste ( Ctrl + V ) the signature files in the Signature folder.
Wrapping Up
Signatures are your digital business card, make sure that they look good and contain all the information that your clients need to contact you. If you want to know more about creating signatures, then make sure you read this article.
If you have any questions, then just drop a comment below.